Skinny Italian Wedding Soup

photo (11)

Could it be!? After a brutal summer of 90+ temps daily, we are finally experiencing our first bits of fall here on the NC coast, woo-hoo! Yesterday was cool and rainy, just the kind of day that calls for a good bowl of soup. I am a huge soup fan and although the hot summer didn’t have me bringing out my soup pot very often, now that fall has arrived I will be on a mission to try out a new soup each week. This week I decided to come up with my own version of Italian Wedding Soup, which I’ve never really been a fan of because mystery meatballs out of a Progresso can kind of creep me out (lol) and the canned version is really the only version I’ve known of this soup until I spotted a Pinterest recipe for it that sparked my interest. While the recipe I found looked delicious I wanted to create my own lightened up version using lean turkey instead of sausage to form the little meatballs, both because J and I try our hardest to maintain a clean diet during the week and because now that baby P is pretty much eating what we eat I try to be more mindful of the sodium content and level of process to our foods. Another reason I love my new original recipe (and soups in general, for that matter) is that it is a great way to sneak in some leafy greens and veggies and lets be honest, who doesn’t love the clean-up (or lack-there-of) that comes along with a one pot meal!? Give this a try on your next rainy day or freeze up some mini-meatballs for a quick-fix meal down the road, either way – happy soup weather to you! 🙂

INGREDIENTS:

  • 1 lb. lean ground turkey
  • 1/3 cup bread crumbs
  • 2 cloves garlic, minced
  • 1 Tbsp. fresh Italian parsley, chopped
  • 1/4 cup parmeasan cheese
  • 1 large egg, beaten
  • 4 oz. frozen chopped spinach, prepared
  • 1/2 tsp. fennel seeds (optional, this will just give it a more “sausage-like” taste without using the sausage)
  • 1/8-1/4 tsp. red pepper flakes
  • salt and pepper to taste
  • 2 Tbsp. olive oil
  • 2 carrots, diced
  • 1 medium onion, diced
  • 8 cups chicken stock + 1 cup water
  • 1 cup dried orzo pasta
  • 1 can (15 oz.) cannellini or great white northern beans
  • 1 large bunch kale (or other dark leafy green, swiss chard would be great in this too!), stems removed and chopped (about 4 cups)

INSTRUCTIONS:

Step 1: Start by making your meatballs. Combine first 10 ingredients (turkey-salt and pepper) and mix by hand until just combined (don’t over mix!). Roll into small 1-inch meatballs (makes about 50!) and place on a tray or sheet pan and refrigerate until ready for use. SHORTCUT ALERT: You can prep these tiny meatballs ahead of time and freeze individually on a baking sheet lined with wax paper then transfer to a zip-lock bag once they are frozen and store for whenever you’d like to make this (or any!) soup!

Step 2: In a LARGE (emphasis on large because you will need it to fit 50 mini meatballs without overflowing, lol) dutch oven or pot, heat olive oil and add diced carrots and onion, season with salt and pepper and saute until just soft. Add the chicken stock and water to the pot and bring to a boil.

Step 3: Once soup is boiling add your mini meatballs one at a time, allow liquid to return to a boil the reduce to a simmer. Allow to simmer for about 5 minutes then add your orzo pasta to the pot. Cook until pasta is done (about 5-10 more minutes) and meatballs are cooked through, then check for seasoning and add your beans and chopped kale to the pot, cook for about 5 additional minutes until the kale has wilted. Serve with extra parmesan cheese and enjoy!

IMG_0192

I’ve finally been playing around with my new DSLR camera! Super excited to get more practice on yummy recipes 🙂

Baby Rocking Chair Re-Do – My first re-upholstery project!

image (78)

One of my biggest (and smallest, lol) inspirations for so many of my DIY projects has been none other than my own baby P! Whether it be items for is nursery or coming up with ways to work all of his adorable photos into our decor (check out my DIY Rustic Picture Display!) I am thoroughly amazed by the creativity that this little guy has prompted in me. One of my latest projects was upcycling an old rocking chair that I found at a used furniture store (at the same time I picked up my old shutters that turned into my DIY shutter shelf!) for $8, actually funny story: it was actually $15 but jokingly as I was checking out I said “how about $8.00?” and the guy said “Ya know what, sure. That’s what my wife gets for making me work today instead of fishing!”, haha. Honestly, although the chair is good quality wood, in the state it was in at the time of purchase it wasn’t worth more than $8.00, haha, the seat was covered in a raggy, dirty old cowboy print cloth and smelled like old people (don’t even pretend you don’t know the smell I’m talking about, lol) but despite all of these factors I saw potential!

As soon as I got the chair home I got super motivated and removed the upholstered part of the chair as well as all of the staples that were holding it in place. I even went as far as to borrow a staple gun from a friend for the re-upholstery part of the project, but that was as far as I got before getting swept up in another project and forgetting all about the little rocker. Flash forward to last week, I had used the same paint that I was intending to use on the chair for my DIY Owl Themed Coat Rack/Hooked Sign and knew that this would be a good opportunity to get cracking on the chair.  For the fabric I chose a beautiful grey/brown chevron print decor fabric that I happened to find in the remnants bin at my local fabric store for only $7.00, making the grand total of this project just about $20.00! Now I know that a random $8 cowboy-themed rocking chair probably isn’t an option at your local thrift shop BUT lucky for you this project can be duplicated with any kid-sized chair (or an size for that matter) that you happen to find, even if it doesn’t already come with a piece to reupholster (I was able to salvage the original seat from my piece) you can absolutely fashion your own using a small piece of plywood and simply attach it to the existing seat! You will not believe how easy this project is, especially for how amazing the result. If re-upholstery seems daunting to you don’t let it deter you, I was extremely skeptical about this project as it was my first time working with upholstery but now that I know how easy it is I can’t wait to try my hand at it again! Happy stapling, watch those fingies 😉

image (74)

SUPPLIES: 

*For this project I used chalk paint (find out how I mix my own here), feel free to refer to my re-finishing wooden furniture with gel stain or latex paint posts for alternative painting methods. If you want to add a cushion to a chair that did not have one to begin with simply follow my steps below but use a piece of plywood (something cheap but sturdy), you can even have your local home improvement store cut it for you for free!

  • Kid-sized rocking chair
  • Chalk Paint – I mixed my own (refer to this tutorial to find out how I made it using a sample sized latex paint), the color is “Opera Glasses” by Valspar which is now one of my favorite paint colors as I’m always looking for a good “greige” which is oh-so popular right now.
  • Minwax Finishing Paste Wax in “Special Dark”
  • Sanding blocks or sand paper
  • Black foam paint brush
  • Manual staple gun (if you’re super hardcore and have a power stapler you can use that as well, I’m too clumsy to be around things that shoot out metal, lol)
  • Foam or fiber cushion – I used this one that I purchased at my local fabric store (with a coupon, yay!) but it is also available online via Amazon and most other retailers of fabric.
  • Fabric of your choice – the amount you will need depends on the size of your seat (you won’t need much though, I used about 1/4 of a yard!)
  • Heavy Duty All-Purpose adhesive – anything that says it will bond to most all surfaces, you can’t go wrong with E-6000 or any of those “E” adhesives or Gorilla glue)
  • Scissors

INSTRUCTIONS:

Step 1: I began by ripping all of the original fabric and batting from the chair to reveal the frame. I kept the board that made up the seat as it was in good condition and I wanted to reuse it. I then removed all staples that remained in the wood using needle-nosed pliers.

Dirty and torn, but still promising!

Dirty and torn, but still promising!

image (79)

image (77)

Step 2: I sanded down the chair by hand using a sanding block (150-grit), while I do have an electric sander I feel some projects move quicker when they’re done by hand, especially ones with a lot of nooks and crannies like this chair. Once I had finished sanding I wiped the chair down with a damp cloth to remove any remaining dust particles.

image (63)

chair post-sanding

image (62)

Step 3: Using a black foam brush (I prefer these to regular paint brushes because they don’t leave streaks) I evenly painted the top half of the chair with an even coat of my chalk paint, I then waited about 2 hours before returning to my chair, flipping it upside down and applying the first coat to the bottom. I continued in this fashion for two more coats (three total). I found this was the easiest way to paint the chair on all sides and on the bottom of rocking part.

image (64) image (65)

Step 4: Once my final coat had dried I waxed the chair by applying a thin coat of paste wax using an old rag, waiting the appropriate amount of time (15 minutes I think?) then buffing it out using another rag. At that point the re-painting part of the project was complete – yay!

image (69)

After the chair was waxed. I like that the wax gives it an antiqued look. You can also get a natural or clear wax for protection and sheen without color!

image (70)

Step 5:  I began my reupholstering part of the project by cutting a piece of fabric that was about 4-5 inches wider than the piece of wood that would make up my seat. NOTE: If you are using a thinner fabric that you think may be prone to ripping use a sander to dull down the corners of your wood or cut the tips of your corners off so that they are flat, this won’t make a difference in the look of the chair but will prevent the corners from protruding through the fabric over time. After cutting my fabric, I cut my foam piece to be just big enough to reach over the edges of my board.

image (67) image (68)

Baby P playing peek-a-boo with the fabric, lol!

Baby P playing peek-a-boo with the fabric, lol!

Step 6: Once all of my components were ready I laid my fabric face down, my foam piece atop it in the center and then my wooden seat atop the foam. This step is best done using two people but if you’re all by your lonesome just use your knees to secure the board in place while you tighten and staple – but be careful! Pull one edge of the fabric taught over the edge of the wood and make sure that the foam will wrap nicely around the edge of the wood, if you are happy with the way it looks staple along the edge of the wood, about 2- 3 inches in, I used about six staples per side for good measure! NOTE: The corners will be a little trickier so do your edges first and then your corners last because you may need to manipulate and fold them a bit to get them right.

Step 7: After I made my cushion I trimmed any excess fabric from the bottom that was sticking out too much. Then I was ready to bond my seat to the base of the chair. I did so by applying a generous amount of adhesive to the bottom of the cushion (not too close to the edges, you do not want it oozing out!) and to the base of the chair where the cushion was to be attached, then pressed down firmly to secure it. You may want to place a book or something else flat and heavy on top the seat to hold it in place as it dries (this would be a great job for a kid in time-out! Just kidding, haha). Voila! Finished and beautiful and ready for baby P’s adorable squishy butt to sit on it 🙂

image (71)

Finished product!

NOTE: An optional Step 8 would be to add decorative upholstery nails or trim along the edge where your seat meets your chair. My hubby was opposed to this idea so I left the chair as is (and it looks just adorable without them so it is not necessary to do this by any means). However, this is a great way to add a little extra flare or elegance to your chair and to hide the area where the seat meets the chair.

image (80)

The most rewarding part of this project was seeing how much baby P loved the rocker, which completely took me by surprise because I was sure he wouldn’t want anything to do with it because it’s just a chair, however he loves rocking it and sitting in it and when he sees it he gets so excited, points and says “this! this!”. What a warm feeling to have my crafts appreciated by even the tiniest of people 🙂

image (82) image (87) image (88)


Rustic Burlap “Autumn” Pennant Banner

photo (8)

So as I’ve mentioned, last year I made a commitment to myself to keep up with my holiday and seasonal decor. As a kid my Mom always put a lot of time (that she didn’t have) and effort into decorating my childhood home for the holidays and I’d like to do the same for baby P and any other future children I may have. Since in my opinion it’s a tad early for Halloween decor (it still feels like summer!) I thought I’d get my decorating started with a few easy fall themed pieces that compliment our regular home decor. This pennant banner is super easy to create and is both fun and elegant and most importantly – cheap! Mine cost about $3.00 to create. Happy fall, now go make a cute pennant banner to celebrate 🙂

pennantbur

This project was inspired by my DIY Rustic Pennant Banners that I use for party decor, follow this link to see how you can jazz up your next event!

My fall version!

My fall version!

SUPPLIES:

  • Burlap – the amount you need depends on what you would like your banner to say and how many letters it will contain, but you will likely need less than 1/4 of yard which will cost you about $1.00-$2.00.
  • Twine
  • Brown acrylic paint
  • Small paint brush
  • Large stencils – I used my reusable stencils that I used to create my DIY Rustic Burlap Pennant Banners, they are available at Staples.
  • scrap fabric (optional)
  • Scissors
  • Scrap paper

INSTRUCTIONS:

Step 1: Begin by creating a pattern out of scrap paper (I just used a piece of computer paper out of my recycling bin) in whatever shape you would like your pennants to be. I chose a square shape with an inverted triangle at the bottom which measured about 7″ wide by 10″ long.

I made sure that my letter fit atop the pattern.

I made sure that my letter fit atop the pattern.

Step 2: Once you have your pattern, use it as a guide and use a marker to trace as many as you need onto the back of your burlap then cut them out.

photo 2 (4)photo 3 (4)

Step 3: After all of your pieces have been cut. Use your stencils and acrylic paint to apply your letters to the tops of the burlap using your small paint brush. Use a generous amount of paint. Set aside to dry.

Step 4: Once your letters have dried use your scissors to poke a small hole in either end of each of the tops of the pennants through which you will thread a piece of twine. At this point if you wish you can dab some mod podge on the ends of your pennants to keep them from fraying but since mine was going to be up high out of tiny finger reach (lol) I didn’t bother.

Step 5 (optional): If you want to add little fabric tassels to the ends to jazz it up use the same method I used in creating my Scrap Fabric Banner but instead with a few pieces knotted together.

IMG_0168 IMG_0167

DIY Mason Jar Bathroom Organizer

photo 3 (3)

Since moving on base in June we have slowly been adjusting to living in significantly less square footage. We have been making the best of it by doing lots of organizing and rearranging to make our furniture and style fit this little cookie-cutter home. One room that I am having a very hard time getting used to is our new bathroom which is basically the size of the powder room in our old house, lol (to see our old master bathroom and how we transformed it on a budget check out this post). The lack of space is killing me, the vanity won’t even provide enough space to fit our toothbrushes and toothpaste and there are no drawers, just a small cabinet below the vanity that is already crammed with bathroom paraphernalia and extremely disorganized. So, in the spirit of organization and making the best of our tiny bathroom, I decided to try my hand at a Pinterest project that I had been eyeing for quite some time – a mason jar bathroom organizer. Since I already had mason jars all I was going to need to do was get a piece of wood (which I ended up getting out of my neighbor’s trash, score! lol) and some metal hose claps (I’ll explain below), for just a few dollars (literally a few, I think my total project cost was just under $4.00) I was able to create a beautiful and functional little addition to our not-so-master bathroom. This is SUCH a simple project and can be fashioned using scrap wood and any size jars since the little hose clamps come in several different sizes. Need more than three jars? No problem! Just a use a longer piece of wood and additional jars. There’s nothing I love more than a project that is simple with many options for variation so that I can duplicate it in other areas of the home (I plan to make a cute little addition to our laundry room soon so be on the lookout for that!) so I’m super excited to share this with you as a tried and true Pinterest trial!

image (35)

SUPPLIES:

image (28) image (29) image (8)

NOTE: if you are happy with the look of your wood as is you need not go through the trouble of painting and distressing it, this just happened to be the look I was going for. This supply list and step-by-step instructions apply to my specific variation of this project.

  • 1 piece of scrap wood – mine was cut from a 12′ board we scored from a neighbor’s trash. I cut mine to be 16″ long, it was the perfect fit for the space and the three jars.
  • grey chalk paint – I used left over paint from my hand-painted sign and shutter shelf, check out this post here to see how I made my own chalk paint using sample sized latex paints, this one is “Stone Mason Grey” by Valspar.
  • white latex paint
  • Minwax Paste Wax in “Special Dark”
  • 2 keyhole fasteners
  • black foam brush
  • regular 2″ paint brush (for dry-brushing the wood)
  • sanding blocks, sand paper or electric sander
  • 3 mason jars (I used standard 16 oz. jars)
  • 3 stainless steel metal hose clamps (available where the HVAC supplies are at your local home improvement store, if you can’t find them just show an employee a picture of the craft, they’ll know exactly what you’re talking about)
  • 6 standard picture hanging hooks and the nails that come with them (see picture below, these are available at the dollar store, supermarket and countless other places, make sure they look like the ones that I have pictured or they will not work!) NOTE: if you have a good quality power drill and strong drill bit you can skip the picture hooks and drill a hole directly into the backs of the hose clamps and use a 1/2 inch screw to attach the hose clamps to the wood. I will tell you that takes some SERIOUS elbow grease and a very strong drill, when our drill bit wouldn’t even make a dent in the steel my hubby improvised the hook idea so I could finish my project that night – ain’t he sweet 😉
  • Needle-nosed pliers (you only need these if you are planning on using the hook method)

INSTRUCTIONS:

Step 1: I began by prettying up my trash wood. Please refer to my post on creating my DIY Rustic Picture Display for a detailed description on how I go about painting and distressing most of my wood pieces. In short, what I did was apply a coat of chalk paint to my wood (or two, I can’t remember, lol) using a black foam brush, then once it had dried I used my regular paint brush to dry-brush the surface and once that had dried I used my electric sander to distress the edges and surface with 150-grit paper (this can also be done using a sanding block or regular sand paper). Finally I used a rag to apply a coat of paste wax and then buffed it once it had dried.

image (8)

wood – before

painted wood

painted wood

image (26) image (27)

wood - finished

wood – finished

Step 2: Once my wood was ready I attached my keyhole fasteners to the backs of my wood piece, one in each corner. Don’t leave this until the end as it will be very hard to do once the jars and hardware are attached.

Step 3: I then marked where I wanted my mason jars to be placed on the board. NOTE: if you have a fancy drill and plan on drilling holes in the backs of the hose clamps and screwing them into the wood this is the point at which you would do that (then simply fasten the clamps around the necks of the mason jars), if you are planning on using my less conventional “hook” method read on! We (I say we because this is where J’s crafty brain stepped in, ha) then fashioned make shift little holders for the mason jars out the picture clips. I took my picture hangers and using pliers unfolded the top part of the hook so it sticks out (kind of like the bottom does to begin with) then flattened both ends over the back of the metal hose clips, two per (making sure to unscrew the hose clips first). The key was to ensure that when I folded over the the tops of the hooks (the part with the hole was always facing UP) the two holes at the top became pressed together to form one nail hole (this is how I nailed them to the wood).

we tried a nail first, didn't work out so well, lol.

we tried a nail first, didn’t work out so well, lol.

The picture hooks I used. See how if you flatten the tops the two holes will come together to for a tab with a hole in it?

The picture hooks I used. See how if you flatten the tops the two holes will come together to for a tab with a hole in it?

Hose clamp after attaching the "hooks", two little tabs stick up with holes through which the nails can hammered.

Hose clamp after attaching the “hooks”, two little tabs stick up with holes through which the nails can hammered.

Step 4: Once all of my hooks were fastened to the hose clamps I used the nails that came with my picture hanging hooks to nail the hooks into the board (using the little tabs at the top that were created by flattening out the hooks). After my three hose clamps were attached to the board I re-screwed the clamps around the necks of the jars. All done!

photo 1 (4)image (37)

Although the “hook” method may seem a little wonky these jars have stayed put and since they hold our toothbrushes and toothpaste we are handling them multiple times a day. That being said, this is a GREAT project for a renter, not only does it free up space in smaller bathrooms but you only require two small screws in the wall to hold it up. Additionally this project can be made using items readily found at your local home improvement stores (which will cut the wood to size for you), Walmart and dollar stores, which is great for people who may not necessarily have many tools on hand (you can buy a hammer and pliers at the dollar store, I checked, haha). 

Our Favorite Meatloaf Recipe

photo (7)

When it comes to comfort food I’m a huge fan. Lucky for my waistline my hubby doesn’t share my love for comfort food so we don’t really indulge in it too often, however, the one thing I do require that we eat on occasion in order to satisfy my comfort food fix is meatloaf. I love a good meatloaf, partly because I love anything that you can put ketchup on (lol) but also because it’s kind of an all-in-one type meal (since I include lots of veggies in mine). That being said I have tried out a lot of recipes for “the loaf” (as my hubby refers to it, ha) trying to find one that would magically convert J to a meatloaf lover like me. While I am still yet to have him go ga-ga over a plate of meatloaf this recipe below is the one that I’ve had the most success with. I am a huge fan of this recipe because I was successfully able to use beef with a lower fat content and still achieve a nice moist meatloaf! Additionally I include lots of veggies and top it a special glaze (that is also great on chicken!) that yields a yummy caramelized crust. I am also happy to report that this recipe was baby P approved 🙂

Baby P enjoying some meatloaf for lunch! Did I mention it makes great leftovers? :)

Baby P enjoying some meatloaf for lunch! Did I mention it makes great leftovers? 🙂


INGREDIENTS

FOR MEATLOAF:

  • 1.5 lbs. lean ground beef (I used 93% lean)
  • 1/2 lb. ground pork
  • 1 zucchini, diced
  • 1 red bell pepper, diced
  • 1 yellow pepper, diced
  • 1/2 yellow or white onion, diced
  • 5 cloves garlic
  • 1/4 cup parsley
  • 2 large eggs
  • 1 cup panko bread crumbs
  • 1/2 cup Parmesan cheese
  • 1/2 tbsp. dried thyme
  • 1/2 cup ketchup
  • olive oil
  • salt and pepper, to taste

FOR GLAZE:

  • 3/4 cup ketchup
  • 1 tbsp. oregano
  • juice of half of a lemon
  • 3 Tbsp. honey
  • 3 tbsp. olive oil
  • salt and pepper, to taste

DIRECTIONS

Step 1: Begin by dicing your veggies, then heat about 2 tbsp. of olive oil in a pan and add onion, garlic, peppers, zucchini, thyme and a bit of salt and pepper. Cook until just soft, stirring constantly. Set aside to cool.

Step 2: In  a bowl combine beef, pork, parsley, eggs, panko, parmesan cheese, ketchup, salt, pepper and cooked veggies. Mix by hand until just combined, don’t over mix.

Step 3: To make glaze combine all ingredients and mix together, set aside.

Preheat oven to 425 degrees. On a sheet pan covered with parchment paper form meatloaf into a log (mine was about 10″ long), baste with some of the glaze and bake for about 1 hour, basting again halfway through cook time. Once meatloaf has finished cooking, allow to rest for 5 minutes before slicing. Enjoy!

photo 2 (2)

I serve mine with mashed potatoes, yumm!!!


Adapted from Food Network

Pottery Barn Hack – DIY Faux Succulent Wreath

image (5)

So I have a confession to make, despite the awesomeness that is this wreath, until I made it I hadn’t gotten swept up in the whole succulent craze. This is probably because anything that becomes popular automatically becomes unnecessarily expensive, even fake plants, lol. Come to think of it, back in the day I knew succulents as “rubber plants” and my parents would lure us to the Home Depot with the promise of being able to buy a little rubber plant or cactus if we cooperated (don’t worry, since then I’ve learned to extort better items from my parents in exchange for favors, lol), haha. Anyway, back to the wreath. J’s sweet Aunt M asked if I would be able to make her a wreath and sent me a picture of a Pottery Barn faux succulent wreath (pictured below) and went on to explain that since the wreath would not be under the shelter of a porch or storm door it would need to be made of materials that would withstand the elements and this one seemed to be fitting. I was super intrigued as I hadn’t attempted a faux flower or moss wreath before and couldn’t wait to get started. Well, in typical Natasha fashion I got caught up in approximately one million other projects (worst niece ever! lol) but the other night I was determined to get both this succulent wreath and my own September wreath  done and did so in just a about two hours (which makes it all the more embarrassing that it took so long for me to start, ha)! The wreath turned out beautifully and is made even more attractive by the fact that the cost came in at around $50.00 while the PB version was $99.00! I was almost sad that I wouldn’t get to keep it for myself, lol, but I am happy to know that it will have a good home being enjoyed by J’s Godparents 🙂 I also think that it is worth mentioning that this is one of the most simple wreaths I have made although it looks the most complicated, all it requires is a wreath frame, some Spanish moss and artificial succulents so please don’t let the illusion of complexity be off-putting to you!

image (6)

Pottery Barn inspiration! No offense to PB but so not worth $100!

SUPPLIES:

  • 18″ grape vine wreath frame
  • 14 artificial succulents (there are SO many out there, I just picked mine based on the PB version to achieve a similar look)
  • Spanish Moss
  • Glue Gun/Hot Glue
  • Wired Burlap Ribbon or Ready-Made Bow
  • 1 Pipe Cleaner

INSTRUCTIONS:

Step 1: I began by laying out my my wreath components: the faux succulents, the moss and the bow. I messed around with the arrangement and grouping of the succulents and moss to see what looked best. I made sure that wherever I wanted to place the succulents their stems could be wedged between the vines and that they would lay flat as possible against the wreath frame.

Step 2: Once I was happy with the layout of my wreath I used hot glue to attach each succulent one by one by covering the stem and bottom of the succulent with a generous amount of glue and wedging it back between the vines and pressing down firmly. For each moss section I would cover the area atop the wreath frame on which the moss was to be attached with a generous amount of hot glue and gently press the moss on. NOTE: When handling the moss and separating your packaging try to tear it apart as little as possible aside from separating it into sections. To get it to cover the area you need gently stretch it.

Step 3: I worked in the above manner until all of my moss and succulents were attached, the long stringy succulents I secured by applying a little glue to the top of the moss or frame where the long strands would lay and attached them that way. Finally I attached my bow using an olive green pipe cleaner, that way if Aunt M chooses she can switch out the bow at her will!

image (2) image (3) image (4)

Obviously there are tons of variations on this wreath, there are so many varieties of faux succulents and they can be arranged in any manner. If you don’t want the trouble of having to use moss you can purchase a wreath that has been pre-covered in moss (although this may run you a bit more price-wise). I will report back to let you know how this wreath withstood the PA fall and winter, however, my DIY Felt Flower Wreath made using the same frame held up nicely without shelter so hopefully this one is equally as resilient!

image (7)

Football Themed Wreath – NY Giants

photo (4)

The past two nights have been all about wreaths! One of which was my “September” wreath which I decided to make football themed to both support our favorite team and because I felt weird putting out a fall themed wreath when it’s still too hot to go outside most days, lol. The other was a faux succulent wreath I made for our dear Aunt Maryann who patiently waited for it while my scatter-brained self took forever to get around to making it (and even longer to send it out, shame on me!) but I finally got them both done – yay! In this post I will be sharing my September football wreath which happened to be my first attempt at a mesh wreath. While we have been transplanted to the south we’re still NY fans to boot so since we don’t have cable at casa de Schulze (we pinch our pennies, remember? lol) this wreath will be our method of team support for the season. Aside from the fact that this wreath turned out HUGE (which I decided was fitting because “Giants” lol) I was very happy with the results and even happier with how easy it was to create! My only gripe with this wreath is that mesh is more expensive in comparison to burlap, however, I do like that mesh gives you the option for super bright fun colors which are great for holidays like Halloween and Christmas which is what will keep me coming back to this method. If you’re yet to jump on the deco mesh bandwagon give this method a shot, it’s just as easy as creating a burlap wreath and super fun!

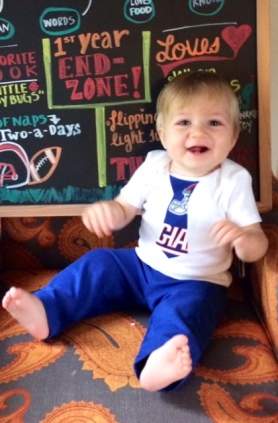
Squishy baby wearing his Giants tie onsie! :)

Squishy baby wearing his Giants tie onsie! 🙂


SUPPLIES:

photo 1 (2)

  • Wire Wreath Frame – I used a 24″ frame because my craft store was out of 18″ frames but I would definitely suggest going with the 18″ or even a 12″ frame unless your door is exceptionally massive. The mesh adds a LOT of volume to the wreath so a small frame goes a long way!
  • Blue and Red 5″ X 45′ Rolls of Wired Deco Mesh – I used two of each, but if you were to use a smaller wreath frame you would definitely only need one of each.
  • Red and Blue Pipe Cleaners
  • NY Giants Scrap Fabric – left over from my DIY Little Man Tie Onsies
  • Mini Giants Football
  • 2 Mini Giants Helmets
  • Blue 1/4″ ribbon
  • Scrap Burlap Fabric – left over from my DIY Rustic Burlap Pennant Banners
  • Stick-On Fabric Letters
  • Glue Gun & Hot Glue

WHAT I DID:

Step 1: I began by cutting the pipe cleaners into thirds to shorten them, then twisting the shorter pieces around the wreath frame wherever I was planning to bunch up the mesh. Then I used basically the same method I used to create my 4th of July Burlap Wreath, by weaving the mesh in and out of the wire frame (in an over-under-over-under manner) using the pipe cleaners to secure the mesh to keep it “poufed” up. NOTE: Another method would be to use a styrofoam wreath frame (as I did to create my Chevron Wreath) and create loops out of the mesh by stapling them directly to the styrofoam frame to achieve the same look.

photo 2 photo 3

Step 2: After I had finished creating the mesh portion of the wreath I attached my embellishments. I cut a small hole in the back of the mini football and threaded a pipe cleaner through the whole and attached it to the wire frame. I did the same with the mini footballs which already had holes in the sides that were perfect for threading the pipe cleaners through.

Step 3: I then moved on to my mini “Go Giants” pennant banner which I created by cutting mini triangles out of my scrap burlap and then smaller triangles out of my scrap Giants fabric to fit atop the burlap triangles which I attached using hot glue. After I had created all of my little triangles I went ahead and attached my fabric letters which were actually stick-on but I used a bit of hot glue on the backs of the letters as well to ensure that they really stuck since my wreath was going to have to brave the elements. After adding the letters I created the pennant banners by gluing the triangles to my blue 1/4″ ribbon, one reading “go” and the other “giants”. I secured it to the wreath by tying each opposing end to the wire frame.

Step 4: My final step was not planned but after finishing my wreath the episode of SVU I was watching still had a few minutes left (lol) so I took that time to play around with the idea of adding the Giants logo and helmet to the mesh. I cut the logos and helmets out of my fabric and used hot glue to secure the fabric to the top of the mesh and another piece of scrap fabric to hold it in place on back (inside of the mesh) since the hot glue would not fully secure the logo/helmet to the mesh without a backing.

photo 4

please disregard my disgusting doormat! hehe This is the GIANT wreath in all it’s glory, you can see it from space! ha

TA-DA that was it! Now that I’ve attempted this method I will most likely be making another deco mesh wreath for my Halloween/October wreath (except I will use the appropriate wreath frame this time, haha).


Documenting Baby P’s First Year – Month 11

photo 21

Baby P is 11 months old! How did that happen?! I can’t believe I will have a one year old in less than a month, it’s so bitter sweet because while I am loving how he has become such a fun little boy I still miss him being a squishy baby. This past month alone he has become even more of a little person, he is even starting to form his first little words, in addition to “Mama” and “Dada” he now says “this” and “that” (words that are usually accompanied by a little finger pointing frantically at the object of interest, lol), he is even beginning to be able to mimic words we say, although he doesn’t know what he is saying, haha. He still loves the outdoors, animals (dogs especially!) and nature in general, we genuinely feel bad when we bring him back indoors after playing outside because he looks so sad, ha! We are also enjoying his love of food as he much prefers to share what J and I are eating than his own food (which is fine by me, less time spent making separate meals for him, lol). Here he is with his football themed chalkboard (since it’s still 90 degrees here almost everyday I thought doing a fall themed board would be a little premature, ha!), sporting one of my DIY tie onsies in support of his favorite team – the NY Giants, duh! If you love these chalkboard updates as much as I do check out his other boards for birth-six months, seven months, eight months, nine months and ten months as well as all of my pregnancy chalkboards. Next chalkboard update will be for baby P’s one year marks, somebody pinch me! 🙂

photo 11

I should have redone the lettering but it was midnight and I was tired 😛

photo 31

Happy little frog!

photo 2 (1)

I wanted to get the football in the picture but he was more interested in throwing it, lol.

photo 1

He was super excited!

Meal Planning – Week of Aug. 31st

Eeeek! So as I predicted I am way behind on posting our weekly meal plans as the last two weeks have been kind of crazy! Unfortunately when choosing to cook or craft it’s either feast or famine at the Schulze home – I’m either crafting up a storm and relying on our favorite no-fuss meals to get us through the week or I put my crafts on hold and take the time to try out new recipes. If you’ve been following my last few posts you’ll see that the past two weeks have undoubtedly been crafting weeks. I did however, get the opportunity to participate in two meal trains for new mamas last week so I plan to make a post on meal trains soon! This week the pace has slowed down a bit and although I’ve still got lots of projects in the works, I did take some time to try out a few new recipes so I’m happy to share this week’s meals with you!

SUNDAY // Ordered In  – Since Monday was a holiday I was eager to keep my crafting buzz going and not be bothered with cooking on Sunday evening, so Chinese deliver it was! 🙂

MONDAY // Tacos – Just plain old tacos! I make my taco meat by browning the meat with canned green chilies, onions and homemade taco seasoning (paprika, chili powder, garlic powder, onion powder, pepper, salt and cumin).

TUESDAY // Grilled Chicken Wraps – I love turning salads into wraps. It’s a great way to work a carb into the meal and make the salad more of a whole meal. One of my favorite salads is one that I make using grilled chicken, spring mix salad, craisins, Gorgonzola cheese crumbles, bacon bits and pecans with a raspberry vinaigrette. For this night’s dinner I simply turned this salad into a wrap.

WEDNESDAY // Pasta e Fagiole Soup – I am SO happy I found and tried this recipe! It is so simple to make and absolutely delicious! Even though it has been ten thousand degrees outside this week I still couldn’t resist whipping up this soup for dinner and boy am I glad I did 🙂 I subbed turkey sausage for regular Italian sausage. NOTE: If you want to make it super healthy just brown up some ground turkey sausage then add some salt, pepper, red pepper flakes and fennel – this way you omit the fat of the sausage (even turkey sausage is pretty fatty) but still achieve those sausage flavors.

THURSDAY // Slow Cooker Beef & Broccoli – This is one of my favorites. It’s super simple and great to cook up when you’re craving take out. It only requires a few ingredients and can be prepped the night before.

FRIDAY // Miso Glazed Salmon – Help! I’ve created a monster! lol. Ever since I made this recipe for my hubby a few weeks ago, he requests it anytime I suggest we have fish! However,  I hardly mind – t’s hard to argue with a recipe that is so healthful and delicious!

SATURDAY // Inside-Out Jalapeno Popper Burgers – Finally a new original recipe! As I mentioned I have been seriously slacking when it comes to my creativity in the kitchen but I like to think that this recipe helped me to redeem myself a bit. It is super delicious and the perfect lightened-up gourmet style burger just in time for football season. If you’re like me and are always torn on whether or not you should order an appetizer and a meal, now you can have both! 🙂

To see more of my favorite recipes check out my “Tried and True Recipes” board on Pinterest!

Inside-Out Jalapeno Popper Burgers

jalabur

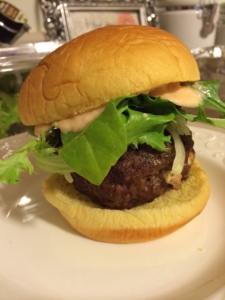
So you’re probably reading this post and thinking “wait, she cooks?”, lol. On account of my crafting spree the past few weeks I haven’t tried out many new recipes but luckily I have an arsenal of easy favorites that I can rely on during the weeks that I lack creativity in the kitchen. Last night I came up with this amazing new burger recipe that I am so excited to share with you! I like to think of this recipe as rolling two bar favorites, a burger and a jalapeno popper, into one delicious bite. In the interest of full disclosure I will tell you that the motivation for this burger was actually to get rid of some lingering cheese, sour cream and scallions in the fridge (throwing out food drives me nuts!) which reminded me of typical dip ingredients and then somehow my mind wound up at jalapeno popper, lol. No idea how that happened but I’m glad it did because I love a good burger and I’m so happy to add this one to my list of favorites (I’ll have to write a burger collective post soon!). I wouldn’t classify any recipe containing cream cheese and sour cream as “skinny” (lol) but for what it’s worth I did lighten it up by using reduced fat ingredients and lean beef feel free to adapt it to your liking whether that be dialing back the amount of cheese or using full fat ingredients! With football season officially upon us I hope you can feature these at your next game day get together, served up with lots of cold ones 🙂

Even though baby P wasn't awake for burger deliciousness he still thought our weekend was fab! :)

Even though baby P wasn’t awake for burger deliciousness he still thought our weekend was fab! 🙂


INSIDE-OUT JALAPENO POPPER BURGERS

INGREDIENTS (makes 8 regular burgers)

  • 2 lbs. lean ground beef
  • 4 oz. reduced fat cream cheese
  • 1/4 cup light sour cream
  •  1 medium jalapeno, diced (I removed the ribs and seeds to reduce the heat a bit, but prepare to your liking)
  • 1/3 cup crumbled bacon or bacon bits
  • 1 cup mild shredded cheddar cheese (pepper jack or mozzarella cheese would also work)
  • 1 scallion, sliced
  • 1/2 tsp. garlic powder
  • salt and pepper, to taste
  • olive oil

INSTRUCTIONS

Step 1: Combine cream cheese, sour cream, diced jalapeno, bacon, cheese, scallions, garlic powder, salt and pepper, stir to combine.

jalabur2

Step 2: Separate your ground beef into eight equal portions. Working one at a time, separate each section of beef and form two equal patties. Take about 1-2 Tbsp. of the cream cheese mixture and place it in the center of one of your patties, then take the other patty and place it on top of the filling using your fingers to pinch the edges of the two patties together around the filling and reform the burger. Continue until you have eight equal sized burgers.

jalabur1

Step 3: Brush your burgers on both sides with a bit of olive oil and sprinkle with a generous amount of salt and pepper. Grill on conventional grill or grill pan to your liking! These would be delicious served with homemade onion strings but if you’re lazy like I am just throw your onions on the grill while your burgers are cooking 🙂

jalabur5

ignore my weird choice of lettuce, yet another fridge item I was trying to burn lol

jalabur6

For two other great burger recipes check out my recipe for Kitty’s Mediterannean Turkey Burgers and Greek Sliders!