
Ever since I made my first DIY wreath this past Easter I was hooked and decided that I was going to try my best to create a different wreath for each month. Not only do I love switching up my front door but it gives me a fun project to look forward to at the end of each month (as if I don’t have enough projects going the rest of every month, haha). Since we are coming into football season and the holidays and I’ve got a full list of festive wreaths that I’m planning on creating come fall, I wanted to give one last crafty hoorah to summer with a fun floral wreath for August. I was inspired by a similar wreath I found on Pinterest and especially loved that with very few (and very inexpensive) supplies I could quickly and easily create a fun wreath to send the summer season out with a crafty bang! Before I get to the tutorial allow me to place some emphasis on how amazing fast this craft was – it only took me about 15 minutes to create the flowers and about 5 to attach them to the wreath (so about half an SVU episode worth of time, lol), which is good because according to my new-wreath-on-the-first-of-the-month plan I was already two weeks late in getting it up on display – better late than never! lol
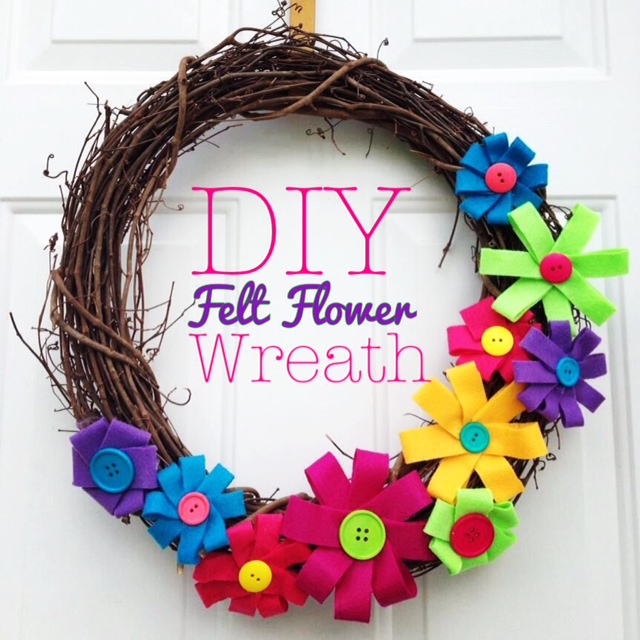
DIY FELT FLOWER WREATH
*There are so many variations on this wreath, if your outdoor decor works on a particular color scheme you can easily adapt this wreath to fit it 🙂
WHAT I USED:
- 6 pieces of felt – I purchased a crafting variety pack of felt from Walmart for $1.99 (it came with about 20 pieces!). If you’re looking for specific colors your local fabric store should carry a ton at about 50-99 cents a piece.
- 10 medium-large buttons – a variety pack I also purchased from Walmart for $5.99 but if you have buttons laying around any will do!
- 12 inch grape vine wreath – I purchased mine at a local home decor store for $3.99
- Scissors
- Glue gun & hot glue sticks
- ruler
WHAT I DID:
Step 1: I began by measuring and cutting your felt. This part is subjective, as your wreath may be a different width than mine and allow for larger or smaller flowers, but mine worked best with 10 flowers (3 large, 3 medium, 4 small). For my large flowers I cut strips of equal width and length (again, this is up to you), my large, medium and small length measurements were somewhere around 5, 3 and 2 inches, respectively. Then for the amount of flowers that you plan to make, cut a round circle of felt (about 2 inches in diameter) for each.

Step 2: Next I assembled all of my flowers by taking each piece of felt and folding it over to create a loop (these will be the “petals” of your flowers), then securing each with a dot of hot glue. Then gluing each petal onto the felt circle working in an overlapping/fan fashion. Once all of the petals were secured, I glued a button to the center of each flower.

Sorry for the gross finger pic, I’m a nail biter lol

Step 3: Once I had established the correct design, I glued each flower on one by one, using a generous amount of hot glue.

That’s all folks! It has been out in the elements for about a week now and is still holding up great even with a few rainy days and no storm door. Keep this in your pocket for next spring OR you can even adapt the colors to fit a fall scheme for the coming months!

Pingback: Pottery Barn Hack – DIY Faux Succulent Wreath | simplyschulze