

So since it’s too hot outside to work on any of my DIY projects in the garage, I’ll take this time to share one of my recent DIY decor projects – no-sew curtain panels! Now, if you are a sewing expert or enthusiast avert your eyes because this project will probably make you cringe and break out in hives, lol, but if you’re like me and sewing isn’t particularly (or at all) your thing, then this may definitely be of interest to you!
I’m a big fan of this project and this wasn’t my first time attempting it, in fact, at our old house after my first successful attempt on our no-sew bedroom curtains prompted the creation of two other curtain projects (I will post about these soon as well!). When designing our bedroom (a grey and yellow theme with black accents), I couldn’t for the life of me find any curtains that I liked (those I did fancy either didn’t work with my color scheme or were way out of my price range). Now let me just say that my original plan was to finally learn to use the ol’ sewing machine and actually sew the curtains. However, after finding an affordable decorating fabric option in a print that I liked, and a little Pinterest research and found (and became obsessed with) a non-sewer’s dream – iron-on hem! Iron-on hem has become my substitute for sewing in almost all of my projects that would otherwise require a needle and thread (check out my no-sew bow-ties!). Granted in some situations there is no way to duplicate a stitch, but I am always willing to try :).
These particular curtains were born out of my love for Pottery Barn’s “Kendra Trellis Drape” which came in at $99 per panel … seriously?! Since I didn’t (and probably won’t ever) have that kind of coin lying around to spend on curtains but nonetheless desperately needed a window covering in a fun print to distract from these hospital-white base housing walls, I came back to my trusty DIY curtain project once more. For these particular curtains I chose a grey and white trellis pattern (similar to the one on the overpriced PB curtains), to compliment our grey and orange furniture (see below for details and pricing). It took me about 20 minutes per panel to create these pocket curtain panels, so I would just work on them at night while my hubby and I caught up on our shows, this way I could be certain that any tiny fingers would keep out of the way :). Now that the curtains are hung I am thrilled with the outcome, and while I know I could have very easily gotten some cheap Walmart or Target brand panels for a comparable price I like that I was able to pick from literally thousands of fabric patterns to find exactly what worked for me … and of course that I was able to make a project out of them :). As I do, when you see an interior decorating or design piece in a store that is either outside of your budget or just not quite what you’re looking for always try to get creative and think of a way you can DIY it, chances are you’ll pleasantly surprise yourself!
DIY NO-SEW CURTAIN PANELS
WHAT I USED:
- Decorator Fabric – purchased from Fabric.com, I used Premier Prints “Fynn” Slub in Ash Grey (no longer available, but there are plenty of the “Fynn” trellis print options available in a variety of other colors). The amount you will need will depend on how many panels you are making and the height of your walls, I simply measure the length in inches and convert it to yards. There are all sorts of complicated methods for taking into account bunching at the top, fabric print repeat etc. Personally this just confused me, I was fine with the width of the fabric so I just paid attention to the necessary length.

It will get delivered in a giant box like this, your UPS man will not be pleased lol
- Iron-On Hem – available at any major fabric retailer (or super Walmart). I purchased the “Stitch Witchery” brand in heavy-weight, 1″ wide. Again, the amount you need will depend on how many panels you are making and the length of your panels.

- Iron
- Hand Towel
- Measuring Tape
WHAT I DID:
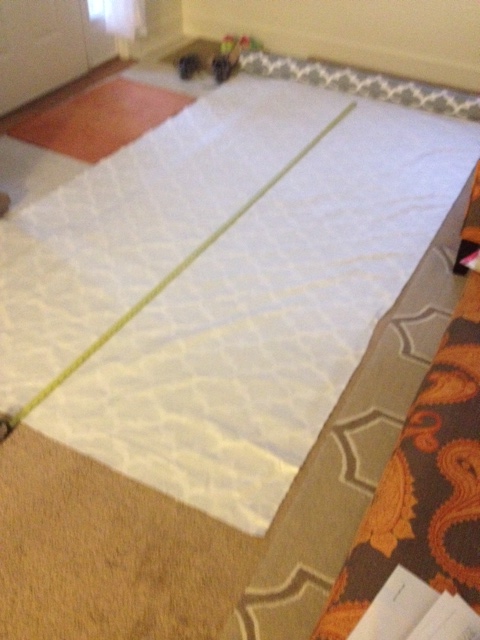
Step 1: Anytime you order a large quantity of decorator fabric it will usually come rolled on a giant cardboard cylinder (kind of like a giant toilet paper roll, lol). So I began by rolling out my fabric and measuring out the necessary length, which for me was 91″ with three additional inches added to accommodate a one inch hem at the bottom and a two inch fold-over at the top to create a pocket for the curtain rod (the size of your pocket will depend on the girth of your curtain rod, make sure you measure accordingly), for a total of 94″ per panel. After measuring my 94″ length I cut five 94″ pieces, as I was going to be making five panels.
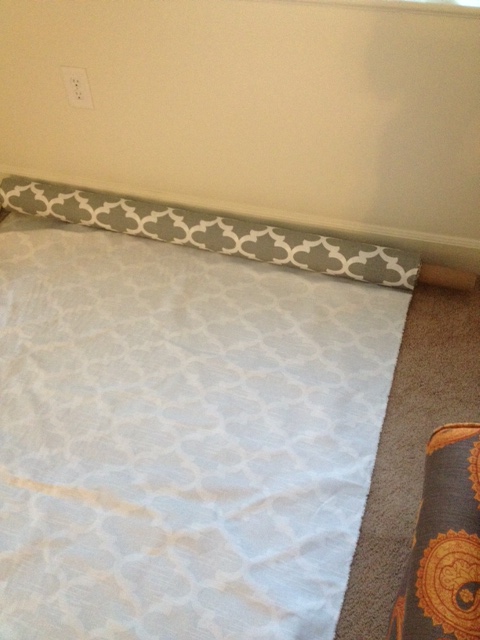
Step 2: Starting with my first panel, I began by laying the piece of fabric upside down on a towel. I was too lazy to dig the ironing board out of the garage so I just did this project on the floor, using the towel to protect my carpet. Now, when doing a pocket curtain it is very important that you hem the sides FIRST I made the mistake of reversing this project on one of my panels in our old house and while you couldn’t really tell, I always knew it was wrong and it bothered me to no end.
Step 3: Heat your iron. Starting with one of your sides, lay a long piece of iron-on hem (I find it is easier to work in sections so you can ensure a straight hem) parallel to your fabric edge about an inch in. NOTE: Follow the directions on the iron-on hem package for the actual ironing process, as the method can differ by brand. Mine required that you dampen a towel (where the hand towel comes in), fold the fabric over the iron-on medium then place the wet towel over the hem and iron over that, apparently the steam will activate the “bonding” process. I have, however, used brands that just require you iron directly on the fabric so be sure to read the directions.

Step 4: After you have completed one side, move onto the other side. Once your sides are complete you are ready to hem the bottom and the top, the order you do this in doesn’t matter. For the bottom simply repeat what you did on the sides, simply fold over about an inch worth of fabric and fuse.
Step 5: For the top of the panel, fold over enough fabric to create your pocket. Be sure your pocket is big enough to fit your curtain rod, I was using a pretty skinny rod so folding over just about two inches of fabric was fine for me. Then simply continue with the same process you used to fuse the bottom and sides, the only difference is you will have created a pocket at the top.
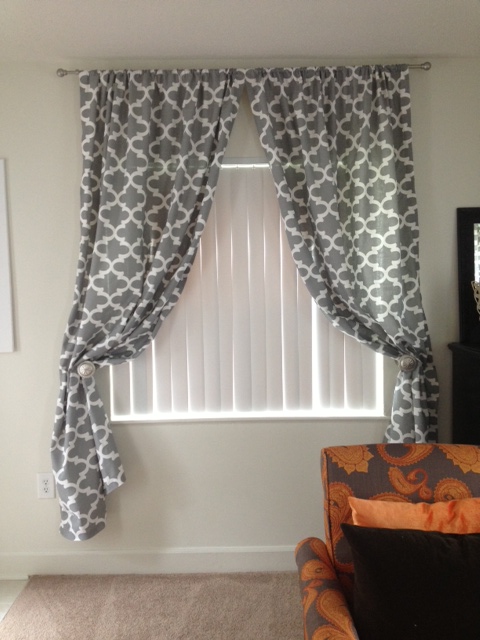
Voila! You are done! Now, they may not all be 100% even but I’m telling you nobody (probably not even you) will notice, I have gotten so many compliments on my curtains and even though they aren’t perfect they work perfect for me. 🙂

A FEW TIPS:
- Try to stick to heavier decorator fabric. I know it may be tempting to use the $2.00/yard cotton options but unless you are using them solely for decor, you’re going to want a heavier fabric to achieve any level of functionality, as you are not lining them.
- Try to measure as accurately as possible. Once you cut the fabric you cannot return it. I somehow wound up with about three extra yards but plan to use it on other DIY projects.
- When working on the sides and bottom make your hem as small as the strip of iron-on hem will allow, as you do not want to create an unwanted pocket.
- If you find that your second folds (top and bottom) are having a hard time bonding at the corners just use a little dot of hot glue and that will do the trick.
SOURCES:
- Fabric // Fabric.com Premier Prints “Fynn” Slub in Ash Grey (no longer available, but there are plenty of the “Fynn” trellis print options available in a variety of other colors such as this “Cool Grey“). It cost me $7.18/yard so in purchasing a total of 15 yards the total cost was about $108.00 (so for what one curtain panel would have cost me at PB I got FIVE!). Don’t forget to Google those free shipping coupons!
- Curtain Rods // “Kenny Ball Deco Curtain Rod” in champagne silver, available here via Amazon for $12.00/piece. They are kind of cheap looking up close but they look just fine up on our walls, nice and simple!
- Curtain Tie-Backs // “Urbanest Colette Decor Drapery Tie Back” in Pewter. Available here via Amazon for $6.99/piece. I knew I wanted the “knob” looking tie-backs and was obsessed with one design that I found at Anthropologie but knew that at $32.99 per knob those ones just weren’t going to happen for me, lol. Although these ones are not actually metal they don’t look cheap at all even though they were the cheapest ones I found price-wise!

Pingback: DIY No-Sew Side-Light Window Panels | simplyschulze
Pingback: Quick No-Sew Sink Skirt | simplyschulze
Pingback: Laundry Room & Command Center Transformation | simplyschulze