Grilled Thai Tacos with Peanut Sauce

thai7

So the weather has been getting progressively nicer, creeping into the high seventies and finally into the eighties today! Southern summer is in full swing (must have blinked and missed spring, lol). Needless to say with the exception of rainy days (and even on some of those too lol), I plan to prepare most of our meals on the grill. As I’ve said before I like to switch up our protein intake during the week (chicken and beef get boring), so I always keep frozen shrimp on hand. Since the nearest Thai restaurant is about 35 mins away (not to mention, the nearest payday is about a week away lol) I decided to satisfy my craving for some Thai with a little homemade Asian fusion in the form of Thai tacos! After a busy day of baby-birthday-partying and errands, us Schulzes reconvened at home to throw together a quick marinate for our shrimp before heading to the park so J could see baby P swinging on the swings like a big boy for the first time (awwwww!). Upon arriving back home we shuffled P off to bed (6 pm sharp lol am I a lucky mom or what!?) then J and I fired up the grill and whipped up a quick peanut sauce for these DELICIOUS Thai tacos, which were ready in 15 mins flat! These were another winner, and like so many of my other recipes, made with mostly pantry ingredients. If you like Thai/Asian inspired food, definitely throw these on the menu, they are quick and easy, can be made with any form of protein and like my hubby says “anything with peanut sauce is good!”.

First things first, how cute is baby P on the swings!?

thai4thai5thai6

Okay, now that you’ve had your squishy baby fill, here’s the recipe 🙂

GRILLED THAI TACOS WITH PEANUT SAUCE

TIPS 

  • Use a store bought peanut sauce if you are in a rush.
  • Switch it up: use the sweet chili marinade as the sauce and the peanut sauce as the marinade.
  • The recipe for the peanut sauce makes quite a few servings, freeze the other helpings in smaller portions and thaw in the fridge the night before making this recipe the next time (because there will be MANY next times 🙂 ) or use with other Thai dishes (satay anyone? yummmm).

For Thai Tacos:

INGREDIENTS

  • 1 lb. frozen shrimp (feel free to use fresh shrimp or any other protein for that matter)
  • 2 Tbsp. Chili Garlic Sauce (available in oriental section of most grocery stores, feel free to use any chili paste or sauce or if you prefer a non-spicy dish use red curry paste instead)
  • 1/4 cup honey
  • Juice of 2 limes
  • 2 Tbsp. Sesame Oil
  • 2 cups shredded napa or other cabbage
  • 1/2 cup green onions, sliced (for garnish, optional)
  • 6-8 flour tortillas
  • 1/2 cup peanut sauce (store bought or see recipe below)

DIRECTIONS

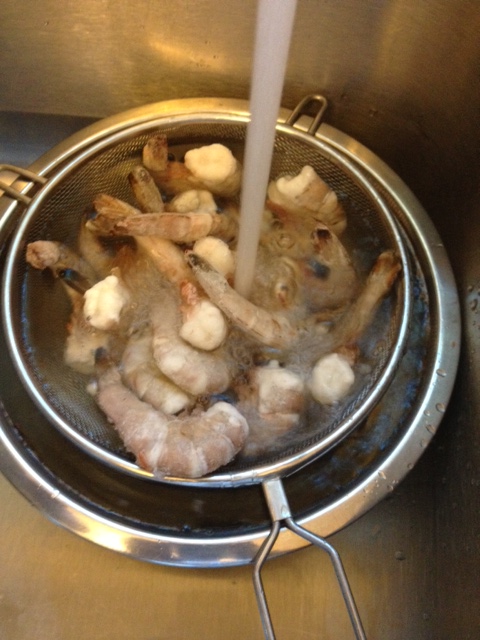
  1. Defrost your shrimp by placing in a bowl of cold water for about 5 minutes, then remove shells and tails (if not already cleaned). If you are using another protein disregard this step.
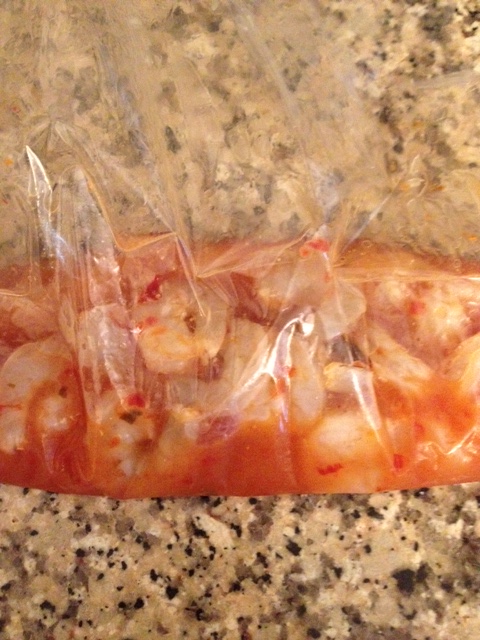
  2. Meanwhile, combine chili sauce, honey, lime juice and sesame oil in a freezer bag.thai
  3. Add shrimp or other protein to bag and allow to marinate 30 mins or overnight (for shrimp or fish marinate only about 30 mins).
  4. Preheat grill or grill pan.
  5. Skewer your shrimp and grill for about 4 mins on each side or until pink.thai1thai2
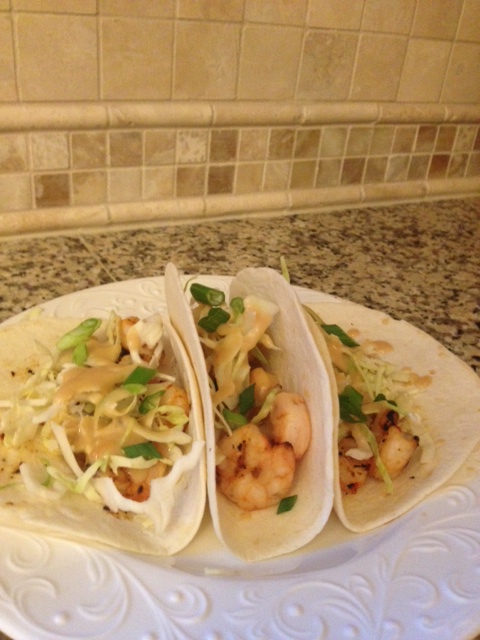
  6. Heat your tortillas on the grill or for a few seconds in the microwave, then assemble your tacos by placing a few grilled shrimp topped with cabbage and a drizzle of peanut sauce with green onions for garnish. Enjoy!thai3

For Peanut Sauce:

INGREDIENTS

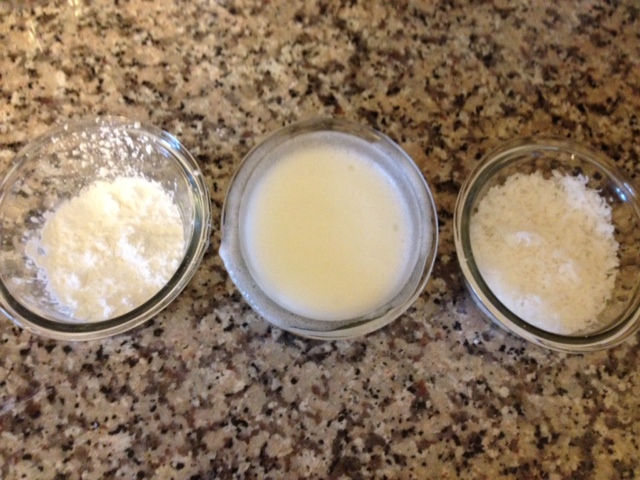
  • 1/2 cup peanut butter
  • 1/2 cup coconut milk (about 1/2 can)
  • 1/4 cup water
  • 1/4 cup sugar
  • 3 Tbsp. Rice Wine Vinegar (or white vinegar)
  • 2 tsp. chili sauce or siracha sauce
  • 1/2 tsp. onion powder
  • 1/2 tsp. garlic powder

DIRECTIONS

  1. Combine all ingredients in a saucepan and whisk to combine.
  2. Bring to a boil then reduce to simmer.
  3. Allow to simmer for about 10 mins until slightly reduced and thickened.
  4. Serve with above recipe or any other thai dish! Note: this will make several servings, I divide them and freeze in small sandwich bags for later use.

Healthy Mini Summer Chicken Pot Pies

potpie

After coming off of a super fun long Easter weekend with my hubby and squishy baby, it was sad to lose J to another dreaded full week of work, lol. Luckily P and I were able to fill our time with lots of outdoorsy things since it was in the high 70s all week! We even got to host our own little belated Easter egg hunt and picnic in our backyard and it was a huge hit  with our baby and mommy friends. Since the weather was going to be questionable today, I figured it would be the perfect time to give the grill a break and try out my idea for a “summer” chicken pot pie recipe. I don’t dabble in paleo (no pasta or potatoes, is that a sick joke!? lol) but apparently cauliflower based everything is all the rage for those folks, so a few weeks ago I gave the cauliflower “alfredo” sauce a go and it was AMAZING (and freezes well which gave me the opportunity to use my left over sauce in tonight’s recipe!). When I triumphantly posted my cauliflower dish on Facebook, a friend of mine had suggested using the sauce as a base in a chicken pot pie – genius! Even without the heavy cream-based sauce I still felt that chicken pot pie was a little heavy a dish for the beautiful weather we have been having so I decided to lighten it up a tad more by using zucchini and summer squash in the veggie mix (plus squash and zucchini were next up for baby P to try food-wise so I was going to be buying them anyway). So tonight with J off early to hang with my sweet squishy (I know I’ve mentioned before how P does not like super involved recipes lol) I gave this recipe a go. Truthfully, I was a little worried that without the hearty sauce the finished product would be too watery and much less flavorful – I could not have been more wrong!!! This was a homerun to say the least, my hubby even said he liked it better than my regular pot pie recipe! I’m literally enjoying my second right now as I type because it was THAT good lol. These will without a doubt be going into our regular recipe rotation, they are hearty but not heavy and the leftovers even make perfect little lunches. If you’re looking for some almost-guilt-free summer comfort food, look no further (and let me know what ya think!).


HEALTHY MINI SUMMER CHICKEN POT PIES

*Recipe makes 6 mini pot pies, using 6 6oz ramekins. If you use 4 or 10oz ramekins your portions will vary.

Ingredients

  • 2 cups diced chicken (I used left over grilled chicken breasts)
  • 1 package frozen or refrigerated pie dough (mine came with 2)
  • 1 small onion, diced
  • 1 yellow summer squash, quartered lengthwise and diced
  • 1 zucchini, quartered lengthwise and diced
  • 1 red potato, diced
  • 2 carrots, diced
  • 1/2 cup frozen peas
  • 1/2 cup frozen corn
  • 2 Tbsp. olive oil
  • 1/2 tsp. salt
  •  1/2 tsp. black pepper
  • 1/2 tsp. dried thyme
  • 2 cups Cauliflower Sauce (I used 1 head of cauliflower instead of the 3 that the recipe calls for, other than that I followed the recipe to the letter. If you are preparing the sauce specifically for this recipe just use an extra cup of the boiling vegetable broth in lieu of the starchy pasta water that is called for)
  • 1 egg + 1 tbsp. water

DIRECTIONS

  1. If your pie dough requires defrosting remove from the freezer, preheat oven to 375 degrees.
  2. Begin by dicing all of your vegetables and chicken.                                                                                                                                                                                                                                                                                   IMG_5787IMG_5788
  3. Heat the oil in a  large pan and add the onions, squash, zucchini, potato, salt, pepper and thyme. Cook until veggies begin to soften (about 7-10 mins. The potatoes will still be hard, they will finish cooking in the oven).
  4. Once veggies begin to soften add frozen peas, corn and cauliflower sauce. Stir and allow mixture to heat through.
  5. Unroll your pie crusts and use one of your ramekins as a guide to cut around the edge of the ramekins and set aside.           IMG_5790    IMG_5792
  6. Add about a cup of the vegetable mixture to each of your ramekins (depending on the size of your ramekins this will vary). IMG_5791
  7. Lay each piece of pie dough over each ramekin then seal the edges using a fork (if your ramekin does not have a flat edge just disregard this step), then using a knife cut a few small slits in the top to vent each pie.IMG_5793IMG_5794
  8. Beat the egg and water and brush the tops of each mini pie, this will help them brown. IMG_5795
  9. Place the ramekins on a cookie sheet and bake for about 1 hour, until tops are golden and filling I bubbling. IMG_5797
  10. Remove from oven and allow to cool for 5-10 mins before serving, enjoy!!! IMG_5798


Easy Slow Cooker Lamb Roast

lamb0

Given that my father is from Greece, my love for Greek food and flavors come as no surprise. Lamb is a big part of Greek cuisine and every one in a while, usually on special occasions my father would make the most amazing lamb roast. Preparing the roast was always a very specific (and weird) process, which involved seasoning the lamb then wrapping it in wax paper, newspaper (yes, newspaper lol), tying it together with thread and putting it in a paper bag before finally roasting it in the oven for several hours. Strange as the cooking process was, it always came out amazing and I had always wanted to attempt it myself but it was too involved for my liking so I would resort to grilling up some little lamb lollipops instead, a much quicker and easier dish to prepare. This year with Easter upon us I figured it would be a great opportunity to keep the lamb roast tradition going and attempt to make one for J and myself. I decided I would make it in the slow cooker, because whatever magic occurs in the crockpot always ensures a tasty, tender roast which was key since I was going to cry if I messed up a piece of meat that cost almost $40.00, haha. I followed my Dad’s steps for seasoning the roast but stopped there, because I’m pretty sure that cooking your food in newspaper can’t be good for you, lol. It came out amazing!!! I served it up with my Lemon and Herb Roasted Potatoes and could not have been more thrilled with this delicious meal! Sadly our grocery budget won’t allow for us to make this often but I am super excited to make my next slow cooker lamb dish. So if  you love lamb and are looking for a simple (emphasis on simple – this has only 4 ingredients!!!) recipe that is absolutely delicious and will make you look like a superstar chef, this is it!!! Καλό Πάσχα (Happy Easter)! 

SLOW COOKER LAMB ROAST

Ingredients

lamb

Only 4 Ingredients!!!

  • 4-5 lb. lamb roast (bone in or boneless, whatever is cheaper)
  • 1 head of garlic (about 12 cloves)
  • 1 1/2 tsp. salt
  • 1 1/2 tsp. black pepper
  • 1/2 cup water

Directions

  1. Peel all of your garlic cloves (I just do so by smashing them with the broad side of the knife, it doesn’t matter if they get broken into smaller pieces).
  2. Combine salt and pepper in a small bowl.
  3. Using a small knife, cut small slits all over your lamb roast (top, bottom and sides), making sure there is one slit per clove of garlic.lamb2
  4. Take a pinch of the salt and pepper mixture and mash it into each of the slits you have made, then stuff a clove of garlic into each individual slit.lamb3lamb4
  5. Rub the remaining salt and pepper mixture all over the roast.
  6. If your roast is boneless, use a piece of kitchen twine to tie the roast together so it does not fall apart as it is roasting.                              lamb5
  7. Place the roast in your slow cooker, fatty side up.                                                                                                                                                               lamb6
  8. Cook on low for 8-9 hours or high for 4-5 hours.                                                                                                                                                                    lamb7lamb8
  9. Enjoy!!! 🙂


Kitty’s Mediterranean Turkey Burgers with Lemon Dill Sauce

turkeybur7

As I’ve mentioned before, I LOVE Mediterranean food. A few weeks ago while J was out of town, one of my favorite NC gals Kitty, was nice enough to come over and make dinner with me :). We both love to cook and blog, so I suggested we make something that we would be able to blog about later and she came up with the idea for Mediterranean turkey burgers which was perfect since it was beautiful out that day! I’m not usually a fan of turkey burgers but these came out AMAZING and I was so grateful to Kitty for introducing me to this recipe. Needless to say I was super excited to whip these up again, so last night when I was thinking about what to grill for dinner (it was going to be the only nice weather day on our long weekend, blah!), Kitty’s turkey burgers immediately came to mind! Not only are these burgers healthy but they are SUPER delicious and pack tons of flavor. Credit for this recipe of course goes to Kitty (hence the name of the recipe, lol), so be sure to follow her blog, Kitty’s Corner, she has lots of great recipe ideas and her blog is as awesome as she is! 🙂

KITTY’S MEDITERRANEAN TURKEY BURGERS

Ingredients

*this recipe makes 6 burgers, feel free to double or triple for more!

  • 1 lb. lean ground turkey
  • 1/2 cup bread crumbs
  • 1 egg
  • 1/2 of a red onion, diced
  • 1/3 cup chopped cilantro
  • 1 cup chick peas (about 3/4 of a can)
  • 1/2 cup corn (about 1/2 can)
  • 3 oz. crumbled feta cheese
  • 1 tsp. ground cumin
  • 1 tsp. garlic powder
  • 1/2 tsp. black pepper
  • 1/4 tsp. salt

Directions

  1. Heat grill or grill pan.
  2. Combine all ingredients in a large bowl and mix by hand to incorporate all ingredients.                                                                                     turkeybur1turkeybur2
  3. Form your burgers. This recipe makes 6 standard size burgers but could also make 12 slider sized burgers or 4 extra large burgers.turkeybur3
  4. Brush both sides of your burgers with olive oil and place on grill.                                                                                                                                turkeybur4
  5. Grill to required temp for poultry, mine took about 8 mins per side.

    I feel like I'm really getting a hang of this grilling thannggg, check out those sweet grill marks lol

    I feel like I’m really getting a hang of this grilling thannggg, check out those sweet grill marks lol

  6. Enjoy! I served mine up on a whole wheat bun with spinach, tomatoes and lemon dill sauce (recipe below). These are also a great low-carb lunch sans bun!turkeybur6


LEMON DILL SAUCE

Ingredients

  • 1/2 cup non-fat plain greek yogurt
  • 2 tbsp. fresh dill, chopped
  • 1 tbsp. lemon juice
  • 1/2 tsp. garlic powder

Directions

  1. Combine all ingredients in a small dish and mix to combine.
  2. Refrigerate for 10-15 mins before serving to allow flavors to develop.
  3. Enjoy! This sauce is great with an Greek inspired dish as it is a quick alternative to tzatziki sauce!


Baked Coconut Shrimp with Sweet and Spicy Orange Dipping Sauce

shrimp7

So yesterday was an early day for my hubby, yay! While I was super bummed because we were supposed to go to DC for the Easter holiday and ended up having to cancel at the last minute because of J’s stupid job (sorry, ungrateful brat moment lol), I was still excited to have a nice long weekend with my two favorite guys 🙂 I was also excited to try out a new recipe that was a bit more involved, which can be a little hard during the week because my sous chef (Baby P, lol) can get a little bit fussy come 5 o’clock, haha. Since J isn’t a fan of seafood but does like shrimp, I try to work it in where I can, especially because I always have frozen shrimp on hand so I can easily add a shrimp dish to the weekly menu. After passing the frozen food section and seeing coconut shrimp (at like 8g of fat per shrimp, no thank you lol), I made a mental note to troll the internet for baked shrimp recipes when I got home. I ended up adapting a recipe for the shrimp from one that I found on Pinterest and creating my own recipe for the dipping sauce. This one was SUCH a winner! My hubby LOVED them, as did I and we can’t wait to make them again!

BAKED COCONUT SHRIMP (Recipe Adapted from The Girl Who Ate Everything)

Ingredients

  • 1 lb. frozen shrimp, tail on (feel free to use fresh, but I always have frozen on hand)
  • 2 egg whites
  • 1-2 cups shredded sweetened coconut
  • 4 Tbsp. cornstarch

Directions

  1. Preheat oven to 400 degrees
  2. Place your frozen shrimp in a bowl of cold water with a bit of salt to thaw, it should only take a few minutes.            shrimp2
  3. If you purchased shell on shrimp, remove the shells leaving the tail in tact. *Note: go for the uncleaned shrimp to save some coin, they’re cheaper and don’t take long to clean at all!
  4. In a small bowl, whip egg whites using an electric mixer until stiff peaks form.
  5. Place the cornstarch and coconut in separate bowls.                                                                                                   shrimp4
  6. Line a baking sheet with parchment paper. Next take each of your shrimp, dip them in the cornstarch, then the egg whites and coconut and place on baking sheet.

    shrimp5

    sorry this isn’t the prettiest, I was too lazy to look for the bigger baking sheet 😛

  7. Bake for about 20 mins, turning half-way through the cooking time to brown on both sides. Depending on the size of your shrimp the cooking time may vary, if using medium shrimp time may be closer to 16 minutes.
  8. Serve with Sweet and Spicy Orange Dipping Sauce (recipe below) and enjoy!!! 🙂                                                                        shrimp6


SWEET AND SPICY ORANGE DIPPING SAUCE

Ingredients                                                                                                                                                                      shrimp1

  • 1/2 cup orange marmalade
  • 3 Tbsp. stone ground mustard
  • 1/2 tsp. red pepper flakes
  • 2 Tbsp. water

Directions

  1. Place all ingredients in a sauce pan and bring to a simmer, allow to simmer for 2 minutes.
  2. Remove from heat and allow to cool before serving.
  3. That’s it!!! Enjoy 🙂                                                                                                                                                                                                  shrimp3


Cheap ‘n’ Skinny “Porcupine” Meatballs

meaball

So amidst the last few days worth of sunny weather and super warm temps, we got a stormy crap day with a high of only 60-something (gasp! lol). Since I’d been wanting to try out my new meatball recipe I figured this was a good opportunity since it might be one of the last cooler days which are perfect for a good ‘ol spaghetti and meatball dinner. I came up with this recipe when I was thinking about how I could get rid of the rest of the brown rice I was going to have left over from a meal I had made earlier in the week. I figured that they would make a good substitute for the bread or breadcrumbs I usually use in my meatball recipe. All excited about having thought of the first ever meat and rice meatball, I hopped on the internet and found out, it already exists in the form of a “porcupine” which is apparently some sort of retro recipe staple which utilizes rice, meat and V8 or something like that. Regardless of my lack of originality I figured I would simply adapt my recipe for regular Italian meatballs to include brown rice and at the same time lighten them up into my own healthy little porcupine :).

CHEAP ‘N’ SKINNY PORCUPINE MEATBALLS

TIPS

  • Use ground turkey and add an 8 oz. box of frozen spinach, thawed.
  • Feel free to cut the recipe in half for 10-12 meatballs or double/triple if you would like to freeze them and reheat them with sauce in the crockpot! This is an excellent money saver since you can usually purchase a family size pack of ground beef at a discount.
  • 93% lean can be a little dry, so if you’d like a traditional meatball use a meat with higher fat content 🙂

INGREDIENTS

  • 2 lbs. 93% lean ground beef (feel free to use a combination of 80/20 and 93/7 if you like a more traditional meatball, turkey would also be great)
  • 1 cup cooked brown rice
  • 1 small onion, grated
  • 1/2 cup Italian parsley, chopped
  • 2 eggs
  • 4 cloves garlic, minced
  • 1/3 cup grated Parmesan cheese
  • 1/2 tsp. garlic powder
  • 2 tsp. dried basil
  • 1/4 tsp. each, salt & pepper

DIRECTIONS

  1. Make sure you have a squishy baby sous chef on hand, this is optional but how cute is baby P?! 🙂                                            meatball
  2. Preheat oven to 375 degrees.
  3. Combine all ingredients in a large bowl and mix by hand to combine.                                                                                                      meatball1meatball2
  4. Form 15-24 balls (depending on how large you’d like them) and arrange on a baking sheet or dish (I line mine with foil for easy clean up).meatball3
  5. Bake for about 30 mins or until browned on the top.                                                                                                                                      meatball4
  6. Serve up with your favorite sauce and enjoy! I served mine with whole wheat spaghetti and homemade tomato sauce, but since they have rice as a filler they would also be great as a meal without pasta but I love to pile on the carbs 🙂

meatball5

Documenting Baby P’s First Year

From the moment we met our precious Baby P, I couldn’t believe how much he was changing by the day! Luckily, I had already somewhat perfected my chalkboard documentation during my pregnancy and was excited to keep it going through P’s first year. I began by doing a weekly chalkboard for the first month and then one per month after that. Since P is now 6 months old I will share with you the boards I have done up to now and will continue to post the next 6 months worth of boards in individual posts. Hope you enjoy looking at these as much as I enjoy creating them!

1 2

3 4

56

7 81

82 83

84 85

86 87

88 89

90 91

Documenting My Pregnancy with Baby P

From the minute we found out we were expecting our tiny baby I knew I wanted to document the pregnancy in a creative way, other than with maternity photos. Even before I became pregnant I was in LOVE with the chalkboard pregnancy pics on one of my favorite blogs ever, Little Baby Garvin. While the creator of Little Baby Garvin is MUCH more beautiful and talented than I, she was my inspiration for my chalkboard pregnancy documentation. Go check out her blog, it is SUPER cute and she’s got a great Etsy shop with all of her chalkboard designs. In adapting my chalkboard idea from Little Baby Garvin, I took the easier route and used Chalk Pens instead of regular chalk as they are easier to draw with and I used a pre-made chalkboard that I purchased on Amazon (although with my next baby I may use one of my own DIY chalkboards :)). I love looking back and seeing my progress throughout the pregnancy and I EXTRA love that I continued doing these chalkboards to document Baby P’s first year of life (check out that post here) :). Hope you enjoy all the pics!

8 9

10 11

12 13

14 15

16 17

18 19

20 22

23 24

25 26

27 28

29 30

31 32

33 34

35 36

37 38

39 40

41 42

43 44

45 46

47 48

49 50

51 52

53 54

55 56

57 58

DIY Holiday Picture – Easter!

easter

Nothing makes me happier than my squishy baby P and since I feel like all the little thing has done since birth is grow, grow, grow, I try to take as many pictures of him as I can (and I am succeeding since my phone is currently at storage capacity lol). While I wish that I could get professional pictures taken of him for every holiday, my budget (and most people’s budgets) will not allow for this, so I have to improvise! Since I am big on sending cards for every holiday to friends and family, I love to stick a little picture of P in there to make it extra special (in this case EGGS-tra special lol). Now let me begin by saying, photography is not my forte unless you count being able to max out my phones storage space in under 3 months lol. I take all of my pictures using an iPhone camera and am yet to become proficient in Photoshop, so if this sounds like you, I am about to give you living proof that you can still whip up a cute little holiday photo for a few bucks in no time flat! When I first decided to do my own little baby-photo booth it was after I had seen a professional picture of a newborn on a cute little Valentine’s Day set and I’m no expert but from the looks of it, all it seemed to be was a baby on pillow, in front of a white background with some heart bunting, and I thought “hey, I can totally do this!”. I’ll share my Valentine’s Day and St. Patty’s Day pictures below as well. The best thing about this little DIY holiday picture is that it will probably cost you under $5.00 (or if it’s an Easter pic it will be FREE since you probably already have plastic eggs and a basket for the kiddos right?). So if you have a smart phone, a white sheet and access to a dollar store you’re good to go!

YOU WILL NEED:

  • Smartphone or other camera
  • White sheet or large piece of fabric (it doesn’t have to be white, but I feel like most of us have a white sheet lying around somewhere).
  • A room with a window.
  • Painter’s Tape (or any other kind of strong tape)
  • Props (get creative! I hit up my local Dollar Tree and pick up a few items that I think would work well, for Valentine’s Day I used the heart garland, St. Patty’s Day the little hat and for Easter the bunny ears, basket and eggs).
  • “Phonto” Free Picture editing App (if you want to add text to your picture)

HOW I DID IT: 

  1. Start by setting up your backdrop. Use a wall that is facing a window, this is a tip I got from a photography savvy friend, that way you’ll have lots of natural light for your photo. Take the sheet and tape it along the wall (I usually use painter’s tape so as not to damage the paint, but this time I didn’t have any on  hand so I just used shipping tape and the paint still survived haha) so that half of the sheet is against the wall and half is spread out along the floor below.
  2. Set up your props, then using your camera take a test picture to be sure that you like the way the photo looks and that you are able to capture your subject (child) and all of the props in the photo frame. These were my test pictures for Valentine’s Day and Easter (the Easter shot looks a little dark but I adjusted this using the enhance tool on my phone lol).                                                                                                                           east2 vday
  3. Set up your little cutie and snap your photos! FYI this works best with a happy child lol I shot for right after nap time.
  4. After you’re happy with your photos, use the “Phonto” App to add text if you wish. Next I will use the free Walgreen’s app to upload and print my photos for store pick up. Make sure you Google Walgreen’s coupons! For my Easter pics I was able to print 15 photos for $1.71 using a 40% off coupon!!!

TIPS: 

  • If you’re in need of a cute outfit for your babe, Walmart always has holiday themed outfits for between $3.00-4.00. The St. Patty’s Day onsie P is wearing below was $3.25.
  • This is a great idea for a kids holiday party or a play date! Just set it up and let your friends take pics!
  • If you want to add a little extra something pic up a half of a yard of holiday fabric, it’s always cheap and available at your local fabric store. I think the heart fabric I used in the Valentine’s Day pic cost about $1.00.


val2

The wooden crate I already had but was purchased at Walmart for $7.00 (it was good for this pic because P wasn’t sitting up yet). The chalkboard also had but was purchased on Amazon.

val

east


east1

stpat

This one I whipped up quick by simply draping the white sheet over a chair.

Grilled Steak Sandwich with Brie, Arugula, Pears & Sweet Onion Jam

steaksa

So even though I had a jolly ‘ol time hanging by myself, catching up on Grey’s and eating mushroom-inspired dinners while my hubby was in NY this week, I kind of missed the guy! I decided to make him one of our old favorites upon his return, which requires a little more prep and ingredients but is SUPER delicious and always worth the extra effort. We are big red meat eaters but don’t necessarily like the cost of a good cut of beef. Back when I was gainfully employed I usually would have made this sandwich with left over beef tenderloin, but in the interest of making it budget friendly I decided to substitute skirt steak which is awesome on the grill and still super tasty. The use of Brie speaks for itself, as I could eat an entire wheel lol but feel free to use a more generic cheese to cut costs. Here’s my recipes for both the sandwich and the sweet onion jam (which is great for other uses as well!). 

Steak Sandwiches 

*this makes 2 large sandwiches, you can easily adjust the recipe for more :).

Ingredients:

  • 1-1.5 lb. Skirt Steak
  • Olive Oil
  • Salt
  • 4 Slices Bread (I used Sourdough, but whatever you prefer will work fine)
  • 5 oz. Brie, sliced
  • 1 pear, halved and thinly sliced
  • Arugula
  • 2 Tbsp. Onion Jam (See Recipe Below)

Directions:

1. Start by heating your grill or grill pan. Pour a liberal amount of olive oil over the steak and sprinkle with about 1/2 tsp salt.steak

2. Place steak on grill and cook to desired temp. I prefer mine medium, which was about 5-8 mins per side.                                                                                                                  steak1steak3

3. While steak is grilling slice your cheese, pears and bread (I heated my bread for a bit on the grill when the steak was cooking on it’s second side, but this is not necessary).

briepea

4. When steak is done allow it to rest for 5-10 mins before slicing thinly against the grain, this is important with skirt steak, if you slice with the grain it will be very hard to chew. I generally cut my piece in half, then slice each half individually (see picture).

sliceste

5. Now you are ready to assemble your sandwiches. First, spread each piece of bread with about 1 tbsp. of the onion jam, then layer steak, brie, pears and finally, arugula.

onbrea

6. Place sandwiches back on the grill and allow to cook for about 2 mins on each side, just enough for the outside to crisp and cheese to melt. If you prefer to heat them in oven or in a pan this is fine too. These would also be amazing paninis if you have have a panini press

.smagril

7. Slice your sandwiches in half and enjoy! 🙂


Sweet Onion Jam

Ingredients:

  • 1 medium yellow onion, very thinly sliced
  • 1/4 cup red wine vinegar
  • 1/3 cup honey
  • 1 tbsp canola or vegetable oil

Directions:

  1. Start by heating canola oil in pan. Once oil is hot, add onions and cook on medium heat until onions start to release some of their liquid, about 5-10 mins.onjamonjam2
  2. Add the vinegar and honey and cook until liquid begins to thicken, then reduce heat to low and allow to cook until a thick jam forms, about 10-15 mins.onjam3
  3. Allow to cool before serving.