10 Minute Burlap Wreath

10minwreat

Wow, it sure has been a while! I had high hopes for some more consistent blog updates over the past few months but apparently moving can really take a toll on one’s free time, lol. Good news is, we have arrived safely (and mostly sanely, ha) at our new home in Quantico and are so happy to be here! We just love our house and new community and I can’t wait to share all of the fun times and crafts that are sure to come at this new station :).

As usual, even though life has been completely crazy I have somehow still found time for lots of projects, one of which was this 10 minute burlap wreath! In trying to meet new people, one of my new neighbors was sweet enough to host a wreath making party and this is the simple design I chose to create for my August wreath. It’s a good thing this wreath only takes ten minutes because of the several hours we spent chatting and sipping wine, there was only a tiny portion of time actually spent making wreaths, haha. This particular design requires very few supplies and even less time, so it’s easy to throw together in a pinch and most importantly for my fellow mamas – you can create it during naptime and still have time for a nap yourself ;)!

10 MINUTE BURLAP WREATH
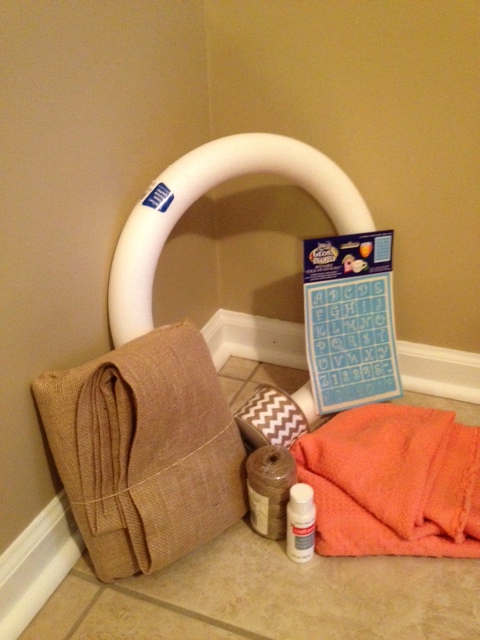
SUPPLIES

  • 12 inch wire frame wreath – available at your local craft store, I purchased mine at Michaels using a 40% off coupon.
  • 2 10-yard rolls of burlap – these usually run about $5-ish per roll at Michaels but if you hold out for a sale or coupon you can usually get them for 40% off. I purchased mine when they were on a 50% off sale so they only ran about $2 a piece!
  • Floral accents – the options for floral accents and greenery are endless so my suggestion would be to choose the ones that are on clearance, as mine were.
  • Plain wooden letter (optional) – while the letter is optional I think it adds a cute flair to the wreath. Mine was the only “S” left so it was on clearance for only $0.79!!! I hit it with a coat of white spray paint I had on hand and voila, done!

INSTRUCTIONS

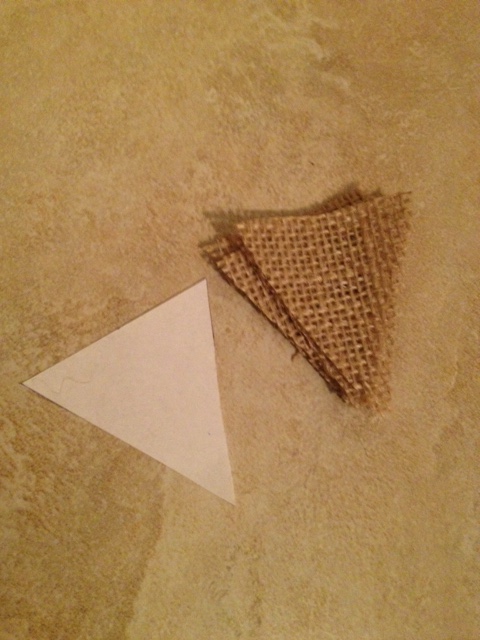
Step 1: Begin by unrolling your burlap garlands and secure the end of your burlap to the frame (sometimes this is done using wire but I simply cut a small slit length-wise to create two small tails on the end an then simply tie it to the frame). For weaving your burlap in and out there are a few different methods, one of them is detailed here in this YouTube tutorial, but another would be to cut it into long strips and weave it in and out in an “under-over-under” manner, making sure to “poof” and bunch your loops along the way. As I mentioned in similar tutorial for my 4th of July Wreath it’s a little hard to describe this method and much easier to learn it visually, that being said YouTube is an excellent resource to actually see this method in action.

Step 2: Once you have created the burlap portion of your wreath simply cut the stems of your floral and greenery accents to a manageable length (about 5-10 inches is good, just long enough to be able to wedge them into the frame) and stick them into the frame at your desired location. You should not need any wire to secure them, mine were able to fit tightly into the frame atop the burlap without issue.

Step 3: If you are using an initial or monogram accent, secure it to the opposing side of the wreath by using a decorative ribbon, twine or clear fishing line to secure it to the wire frame. Once this is done you may go back and manipulate any of the burlap loops and floral accents to your liking!

There you have it! Not much to it at all, huh?! It really does take about ten minutes and if you mind your sales and coupons this can be created for less than $10! Mine cost about $12 total 🙂

DIY Spring Chevron Wreath with Pennant Banner

wreath7

With J gone for fleet week, I’ve been staying up far too late, watching Hulu (I started Nashville, not my fave show so far, but it’s alright) and crafting my little bootay off. I may have mentioned in previous posts that I love to decorate for holidays/seasons and made a promise to myself to do so, especially while baby P and any future babies are growing up. So far I have made good on my promise, and although most of my decorations come from the dollar store, it still counts, haha! I recently found myself at a loss as to what to do decor-wise between Easter and Memorial Day/Independence Day, so I decided to leave the inside be and just make another cute front door wreath since I was so pleased with the way my Easter wreath came out. Since I had picked up a few yards of burlap for some larger pennant banners I plan on making, I thought it would be fun to add a teeny tiny pennant banner to my wreath, especially because it would act as a trial one for my future banners. This wreath was super easy to throw together, once I had created my mini pennant banner and fabric flowers, it took me under 10 minutes to assemble the whole thing! The best part is, with the exception of the ribbon and Styrofoam wreath, I used items I already had on hand so the project cost me about $8 – BOOM! Give this one a try, if you don’t want to make the fabric flowers yourself you can always purchase ready made ones at your local craft store (but first read my tutorial on fabric roses and see how easy they are to make!), the rest is easy breezy!

DIY SPRING CHEVRON WREATH WITH PENNANT BANNER

YOU WILL NEED:

wreath6

  • Styrofoam wreath (I purchased mine at Michael’s using a 40% off coupon, download the Michael’s app if you haven’t already, they will scan coupons right off of your phone)
  •  Chevron Ribbon (Mine was wired but it doesn’t have to be, they sell large rolls of chevron ribbon at Walmart for $3.99)
  • 8-12 Fabric Flowers (Tutorial Here)
  • String or Twine
  • Burlap (since the banner is so tiny just ask for the smallest piece they can cut for you, burlap costs $2.97 at Walmart so a 1/4 yard will cost you about $0.75 and you’ll still have left over fabric)
  • White Acrylic Paint
  • Small Letter Stencils (I had picked some up for another project I’m working on but I’m sure the dollar store has stencils that would work)
  • Paint Brush
  • Glue Gun
  • Scissors

INSTRUCTIONS

Step 1: Assemble your fabric flowers by following this tutorial. The amount you will need depends on the size of the flowers you make and how much area you want them to cover on the wreath. If you are using store bought flowers or none at all skip this step.

Step 2: Start creating your pennant banner by fashioning a triangle guide out of paper (I used a post-it haha), the size of your pennants will depend on the length of your name or words you are using. My last name is seven letters long and a 2″ wide by 2″ long triangle was perfect for mine. Using scissors, cut out your triangles. NOTE: It is optional to use modge podge or fabric stiffener to seal the edges of your burlap triangles so they do not fray. I skipped this and they are fine.

wreath5 wreath4


Step 3: Once your triangles are cut out, using your stencil, paint and paint brush, carefully paint your letters onto the burlap triangles. Be sure to protect your work surface with a piece of paper or wax paper since the paint will seep through the burlap. Allow a few mins to dry, this is a good time to start working on the body of the wreath!

wreath3

Step 4: Take your wreath and ribbon and attach the end of your ribbon to the styrofoam wreath using hot glue. Keep wrapping the ribbon around the wreath, overlapping the previous section each time, place a dot of glue underneath the ribbon each time you wrap it (I suppose this isn’t totally necessary but I didn’t want my ribbon to move at all once I was finished covering the wreath).

wreath2

Step 5: Your burlap letters should be dry by now. If so, take a piece of twine, ribbon or string and use hot glue to attach your burlap triangles to the string by applying a line of top glue to the back top of each and pressing onto the string, it is best to do this over wax paper so that the glue will not stick to anything. Make sure you leave a decent amount of string before the start of your first triangle so you will have a means to attach that side to the wreath.

Step 6: Attach your banner to the wreath by tying each end to each side, you be the judge of placement and tautness of the string. Once I got the banner tied how I wanted, I used a small dot of hot glue on each side to secure the string (again, overkill with the glue but it can’t hurt right? lol). Now, attach your flowers however you see fit, I alternated sizes and colors but feel free to arrange them however you’d like! The bow is optional, I just thought the top looked naked. Now throw that bad boy on your front door and know you’ve now got the best wreath on da block 😛

wreath

Healthy Mini Summer Chicken Pot Pies

potpie

After coming off of a super fun long Easter weekend with my hubby and squishy baby, it was sad to lose J to another dreaded full week of work, lol. Luckily P and I were able to fill our time with lots of outdoorsy things since it was in the high 70s all week! We even got to host our own little belated Easter egg hunt and picnic in our backyard and it was a huge hit  with our baby and mommy friends. Since the weather was going to be questionable today, I figured it would be the perfect time to give the grill a break and try out my idea for a “summer” chicken pot pie recipe. I don’t dabble in paleo (no pasta or potatoes, is that a sick joke!? lol) but apparently cauliflower based everything is all the rage for those folks, so a few weeks ago I gave the cauliflower “alfredo” sauce a go and it was AMAZING (and freezes well which gave me the opportunity to use my left over sauce in tonight’s recipe!). When I triumphantly posted my cauliflower dish on Facebook, a friend of mine had suggested using the sauce as a base in a chicken pot pie – genius! Even without the heavy cream-based sauce I still felt that chicken pot pie was a little heavy a dish for the beautiful weather we have been having so I decided to lighten it up a tad more by using zucchini and summer squash in the veggie mix (plus squash and zucchini were next up for baby P to try food-wise so I was going to be buying them anyway). So tonight with J off early to hang with my sweet squishy (I know I’ve mentioned before how P does not like super involved recipes lol) I gave this recipe a go. Truthfully, I was a little worried that without the hearty sauce the finished product would be too watery and much less flavorful – I could not have been more wrong!!! This was a homerun to say the least, my hubby even said he liked it better than my regular pot pie recipe! I’m literally enjoying my second right now as I type because it was THAT good lol. These will without a doubt be going into our regular recipe rotation, they are hearty but not heavy and the leftovers even make perfect little lunches. If you’re looking for some almost-guilt-free summer comfort food, look no further (and let me know what ya think!).


HEALTHY MINI SUMMER CHICKEN POT PIES

*Recipe makes 6 mini pot pies, using 6 6oz ramekins. If you use 4 or 10oz ramekins your portions will vary.

Ingredients

  • 2 cups diced chicken (I used left over grilled chicken breasts)
  • 1 package frozen or refrigerated pie dough (mine came with 2)
  • 1 small onion, diced
  • 1 yellow summer squash, quartered lengthwise and diced
  • 1 zucchini, quartered lengthwise and diced
  • 1 red potato, diced
  • 2 carrots, diced
  • 1/2 cup frozen peas
  • 1/2 cup frozen corn
  • 2 Tbsp. olive oil
  • 1/2 tsp. salt
  •  1/2 tsp. black pepper
  • 1/2 tsp. dried thyme
  • 2 cups Cauliflower Sauce (I used 1 head of cauliflower instead of the 3 that the recipe calls for, other than that I followed the recipe to the letter. If you are preparing the sauce specifically for this recipe just use an extra cup of the boiling vegetable broth in lieu of the starchy pasta water that is called for)
  • 1 egg + 1 tbsp. water

DIRECTIONS

  1. If your pie dough requires defrosting remove from the freezer, preheat oven to 375 degrees.
  2. Begin by dicing all of your vegetables and chicken.                                                                                                                                                                                                                                                                                   IMG_5787IMG_5788
  3. Heat the oil in a  large pan and add the onions, squash, zucchini, potato, salt, pepper and thyme. Cook until veggies begin to soften (about 7-10 mins. The potatoes will still be hard, they will finish cooking in the oven).
  4. Once veggies begin to soften add frozen peas, corn and cauliflower sauce. Stir and allow mixture to heat through.
  5. Unroll your pie crusts and use one of your ramekins as a guide to cut around the edge of the ramekins and set aside.           IMG_5790    IMG_5792
  6. Add about a cup of the vegetable mixture to each of your ramekins (depending on the size of your ramekins this will vary). IMG_5791
  7. Lay each piece of pie dough over each ramekin then seal the edges using a fork (if your ramekin does not have a flat edge just disregard this step), then using a knife cut a few small slits in the top to vent each pie.IMG_5793IMG_5794
  8. Beat the egg and water and brush the tops of each mini pie, this will help them brown. IMG_5795
  9. Place the ramekins on a cookie sheet and bake for about 1 hour, until tops are golden and filling I bubbling. IMG_5797
  10. Remove from oven and allow to cool for 5-10 mins before serving, enjoy!!! IMG_5798