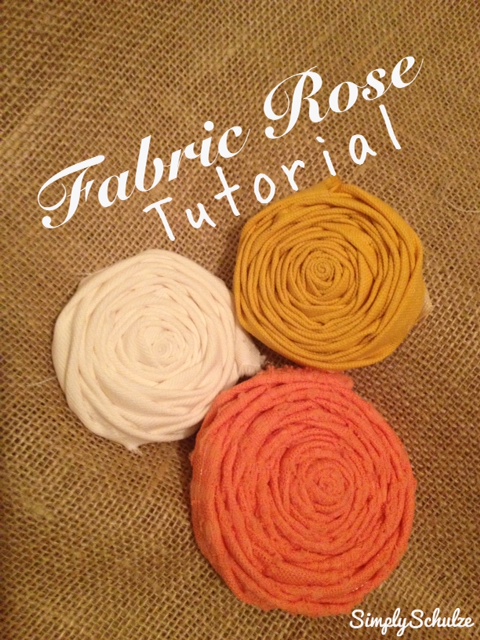
With J gone for fleet week, I’ve been staying up far too late, watching Hulu (I started Nashville, not my fave show so far, but it’s alright) and crafting my little bootay off. I may have mentioned in previous posts that I love to decorate for holidays/seasons and made a promise to myself to do so, especially while baby P and any future babies are growing up. So far I have made good on my promise, and although most of my decorations come from the dollar store, it still counts, haha! I recently found myself at a loss as to what to do decor-wise between Easter and Memorial Day/Independence Day, so I decided to leave the inside be and just make another cute front door wreath since I was so pleased with the way my Easter wreath came out. Since I had picked up a few yards of burlap for some larger pennant banners I plan on making, I thought it would be fun to add a teeny tiny pennant banner to my wreath, especially because it would act as a trial one for my future banners. This wreath was super easy to throw together, once I had created my mini pennant banner and fabric flowers, it took me under 10 minutes to assemble the whole thing! The best part is, with the exception of the ribbon and Styrofoam wreath, I used items I already had on hand so the project cost me about $8 – BOOM! Give this one a try, if you don’t want to make the fabric flowers yourself you can always purchase ready made ones at your local craft store (but first read my tutorial on fabric roses and see how easy they are to make!), the rest is easy breezy!
DIY SPRING CHEVRON WREATH WITH PENNANT BANNER
YOU WILL NEED:
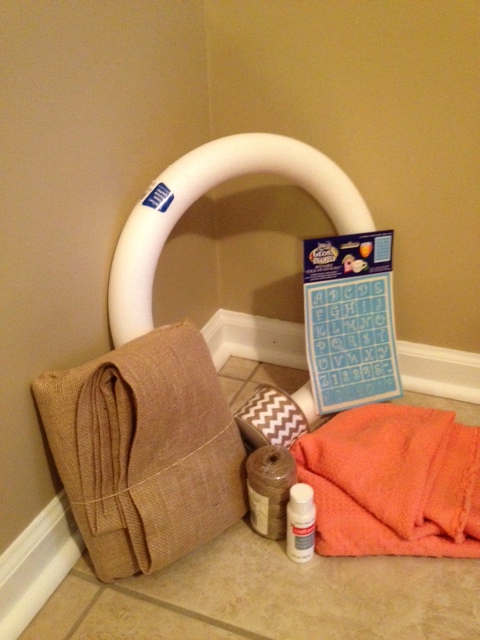
- Styrofoam wreath (I purchased mine at Michael’s using a 40% off coupon, download the Michael’s app if you haven’t already, they will scan coupons right off of your phone)
- Chevron Ribbon (Mine was wired but it doesn’t have to be, they sell large rolls of chevron ribbon at Walmart for $3.99)
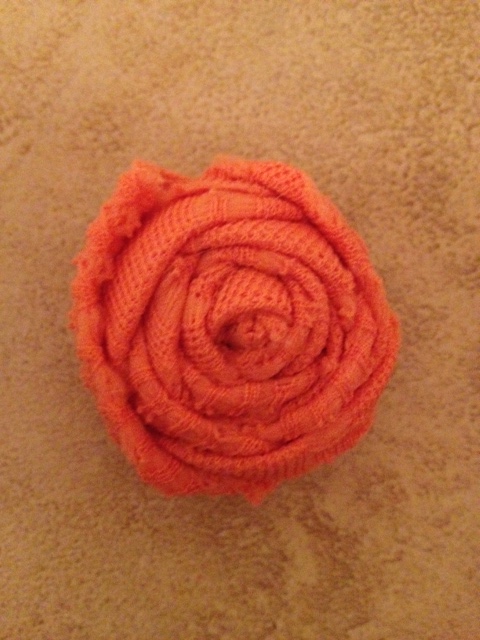
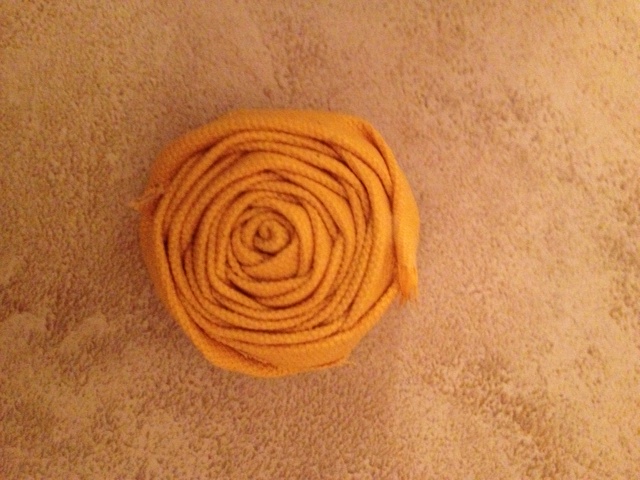
- 8-12 Fabric Flowers (Tutorial Here)
- String or Twine
- Burlap (since the banner is so tiny just ask for the smallest piece they can cut for you, burlap costs $2.97 at Walmart so a 1/4 yard will cost you about $0.75 and you’ll still have left over fabric)
- White Acrylic Paint
- Small Letter Stencils (I had picked some up for another project I’m working on but I’m sure the dollar store has stencils that would work)
- Paint Brush
- Glue Gun
- Scissors
INSTRUCTIONS
Step 1: Assemble your fabric flowers by following this tutorial. The amount you will need depends on the size of the flowers you make and how much area you want them to cover on the wreath. If you are using store bought flowers or none at all skip this step.
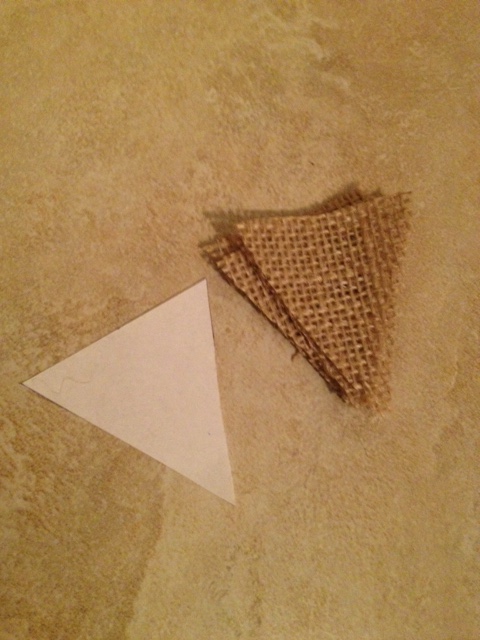
Step 2: Start creating your pennant banner by fashioning a triangle guide out of paper (I used a post-it haha), the size of your pennants will depend on the length of your name or words you are using. My last name is seven letters long and a 2″ wide by 2″ long triangle was perfect for mine. Using scissors, cut out your triangles. NOTE: It is optional to use modge podge or fabric stiffener to seal the edges of your burlap triangles so they do not fray. I skipped this and they are fine.

Step 3: Once your triangles are cut out, using your stencil, paint and paint brush, carefully paint your letters onto the burlap triangles. Be sure to protect your work surface with a piece of paper or wax paper since the paint will seep through the burlap. Allow a few mins to dry, this is a good time to start working on the body of the wreath!

Step 4: Take your wreath and ribbon and attach the end of your ribbon to the styrofoam wreath using hot glue. Keep wrapping the ribbon around the wreath, overlapping the previous section each time, place a dot of glue underneath the ribbon each time you wrap it (I suppose this isn’t totally necessary but I didn’t want my ribbon to move at all once I was finished covering the wreath).

Step 5: Your burlap letters should be dry by now. If so, take a piece of twine, ribbon or string and use hot glue to attach your burlap triangles to the string by applying a line of top glue to the back top of each and pressing onto the string, it is best to do this over wax paper so that the glue will not stick to anything. Make sure you leave a decent amount of string before the start of your first triangle so you will have a means to attach that side to the wreath.
Step 6: Attach your banner to the wreath by tying each end to each side, you be the judge of placement and tautness of the string. Once I got the banner tied how I wanted, I used a small dot of hot glue on each side to secure the string (again, overkill with the glue but it can’t hurt right? lol). Now, attach your flowers however you see fit, I alternated sizes and colors but feel free to arrange them however you’d like! The bow is optional, I just thought the top looked naked. Now throw that bad boy on your front door and know you’ve now got the best wreath on da block 😛