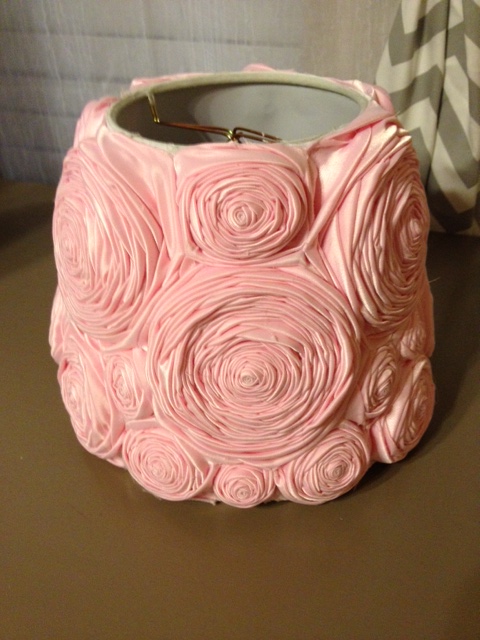
I’m so excited to share this craft with you! These little fabric roses can be used in SO many ways from decor to jewelry the applications are endless, so if you like shabby or cottage chic style decor this craft is right up your alley. I began making these little flowers when I was selling shabby chic style rosette lampshades (pictured below) on Etsy for a short while. Although I didn’t think my lampshades would drum up much business it turns out they were extremely popular and for the year that my Etsy shop was open I made HUNDREDS if not thousands of these little fabric flowers, so needless to say I’m pretty sure I have it down to a science, haha. Unfortunately, when baby P arrived I had to close down my shop indefinitely, as the lampshade process is pretty labor intensive and I was just simply not going to have the time to devote to the shop with a new baby (hopefully I can reopen it one day!), so now I just make lampshades as gifts for friends and use my little flowers in other craft projects. Since I love a project that can be used in multiple ways, I knew that a lot of my future crafts would feature these little fabric flowers and that is why I’d like to share this tutorial with you! Obviously there are lots of different fabric flower tutorials out there, as well as lots of craft stores that sell them ready-made (but after reading this post I hope you are inspired to make them yourself and save some coin!), so this is just my personal method to my fabric flower madness! I think it’s also worth mentioning that these make great embellishments for just about any decor project (I will give some suggestions below!) and are a great way to dress up something simple if you’re looking to decorate on a budget, all you need is a glue gun and the fabric of your choice! Happy “flowering” (as my husband calls it lol)! P.S. I plan to write a separate post on DIY fabric rose lampshades, so be on the lookout for that!
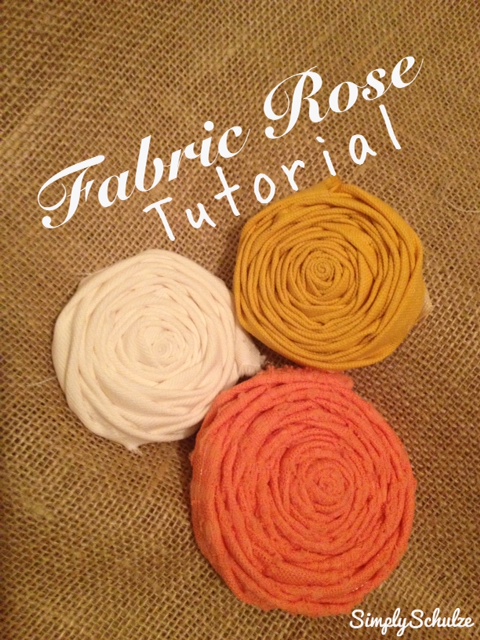
FABRIC ROSE TUTORIAL
YOU WILL NEED:
- Fabric of your choice (anything will work with the exception of maybe organza, tulle and silk where the dried hot glue might show up or wreck the material. The amount of fabric you need is dependent on how many flowers you would like to create.)
- Glue Gun
- Scissors
INSTRUCTIONS
Step 1: Begin by cutting your fabric into 2″ wide strips (this is an approximation, just eyeball it, no need to measure the width of each strip).

all of the fabric I used to make these flowers for my wreath was left over from previous projects, the peach fabric was a thrift store find – 2 yards for $1!!!
Step 2: Starting with the end of one of your strips, fold the corner down to form a point and use a dab of hot glue to secure it.

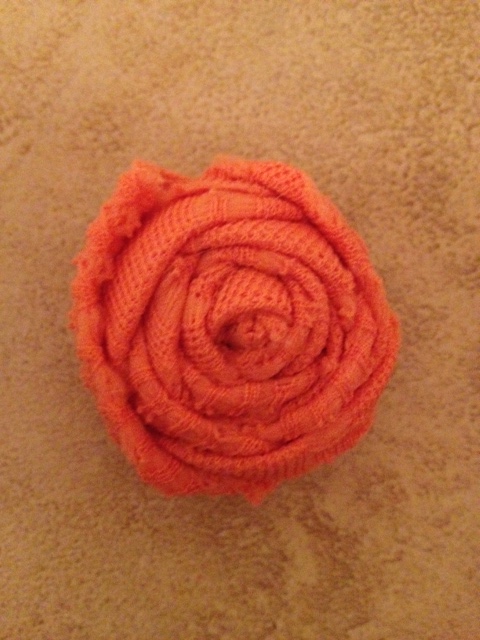
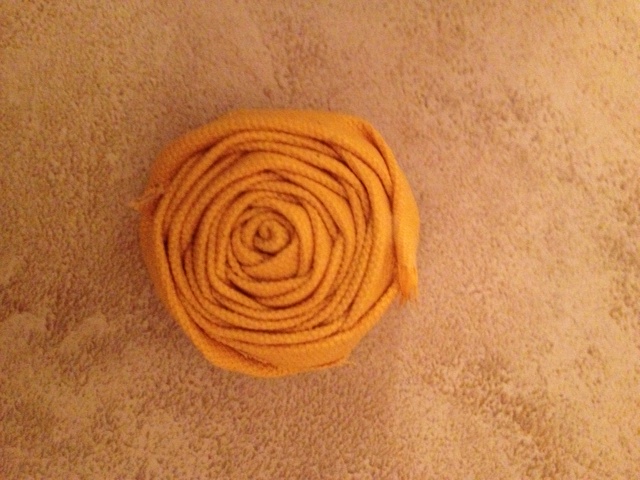
Step 3: Begin to roll your point as if it is a cinnamon bun, then place a dab of hot glue to hold it. Next, begin folding or rolling and turning your fabric simultaneously, placing a dot of hot glue after each fold (or every other fold depending on how tight you want the rose to appear, I do every fold, but if you’re going for a more shabby chic look you can let it appear a little looser). NOTE: For the particular roses shown, as I was folding/turning each piece I was sure that there were no raw edges apparent because that was the look I was going for, if you are looking for more of a shabby chic raw/frayed edge look, instead of “folding” as you turn simply use more of a twisting motion so that there are some raw fabric edges visible on your rose.


Step 4: Once you have reached the end of your fabric use a final dot of hot glue to tuck the tail end of the strip underneath or tight to the side of the flower and you are done! Yup, it was that easy! If you would like your flower to be bigger simply repeat the beginning of step one, but instead of rolling the point into a cinnamon bun, simply fasten it to the side of your finished flower with a dot of glue and continue your folding/rolling and turning process.

Here are just a few ideas for using these roses in decor/fashion (since I have done most of these I will be posting examples of each of the following soon!):
- Shabby chic lampshade (tutorial coming soon)


- Embellish a chalkboard, mirror or frame
- Create a hair band or bow (perfect for a baby shower gift!)
- Create a necklace or earrings
- Embellish a wreath (see my spring/summer wreath post here)

- Embellish a vintage sign