Giant Reversible Holiday Sign – St. Patty’s Day Edition

stpattyboard

Eek! Time keeps on slippin’ and another month has came and went! I have been keeping busy with my not-so-tiny frogman (and of course a few projects in between!) and in some other exciting news we have been busy preparing for our next move which will be taking us to VA! We love the DC area and NOVA so we are super excited to see what this new assignment has in store for us.

Although most of my time recently has been spent trying to purge our useless items rather than take on new projects I did take a quick minute to spruce up our stoop for St. Patrick’s Day. Even though between my husband and myself there is zero Irish heritage that doesn’t mean we don’t love this fun holiday all the same, after all who doesn’t appreciate a little Irish cheer [insert infinite beer emojiis]? 😉 Additionally I appreciate any holiday that gives me the excuse to craft and ever since I created our giant “NOEL” porch sign for our outdoor Christmas display I’ve kind of done the idea to death in my head thinking of ways that I can transition the same idea into other holidays, first in the form of my “XOXO” board for Valentine’s Day and now a “LUCKY” one for St. Patty’s Day! I had mentioned in my Valentine’s Day board post that I had experienced a minor lapse in brain function when I didn’t simply paint the “XOXO” art onto the back of my “NOEL” board so that my holiday porch décor could double as Valentine’s décor by flipping it over once February arrived. With that being said I’m happy to report that I did remember to do that this month which is what makes this holiday sign “reversible” – my “LUCKY” board is actually the back of my Valentine’s Day board which makes this month’s porch sign FREE! I hope this inspires a little outdoor design creativity in you, with a little luck you might wind up with the most fun porch in the neighborhood! 😉

Our St. Patty's Day sign as it is displayed on our porch, with a little leprechaun photo-bombing of course <3

Our St. Patty’s Day sign as it is displayed on our porch, with a little leprechaun photo-bombing of course ❤

For a full length supply list and tutorial for this project check out my “XOXO” Valentine’s Day Sign, but if you would like to duplicate my “LUCKY” board exactly here are the details

vdaywreath2

Side #1 – Valentine’s Day

Side #2 - St. Patty's Day

Side #2 – St. Patty’s Day

FONT: “Christmas on Crack” available for free download via dafont.com. I used font size 970 just be sure to adjust your page margins so that it will fit.

COLOR: “Four Leaf Clover” by Valspar – funny thing, I didn’t actually pick this because of the name I just randomly grabbed a green color chip and that was the name, how fitting right!? lol I purchased a sample sized paint in this color for $2.98 – to learn more about my obsession with sample sized paints for projects check out this post.

CLIPART: For my four leaf clover silhouette I just copied a google-image four leave clover to a word document and enlarged it to my desired size before printing it out. Here is the link to the exact one that I used.

Flashback to St. Patty's Day last year - click on this picture to check out an adorable post about my little DIY St. Patty's Day photo with my little lucky charm <3

Flashback to St. Patty’s Day last year – click on this picture to check out an adorable post about my little DIY St. Patty’s Day photo with my little lucky charm ❤

“Where the Wild Things Are” Birthday Party Invitation

pinvite

So this post is going to be a little redundant if you’ve already checked out my DIY Invites & Greeting Cards without Photoshop post, but since Baby P’s invite was so stinkin’ cute and so special to me, I think it deserves it’s own post :). Additionally, this tutorial will highlight inserting a picture into your invite whereas my last post was text only. Perhaps most importantly (second only to Baby P’s cuteness, of course lol) is that these invitations cost about $8.00 for thirty (depending on where you choose to have them printed)! Talk about a steal, you can’t even get lame, fill-’em-in-yourself Target brand invites for $8.00 let alone an adorable, custom picture invitation. Please keep in mind, if you are interested in having a WTWTA themed birthday party and love this invitation design please contact me and I will sub in your child’s picture and send you the PDF for free 🙂

NOTE: I will reiterate what I said in my other DIY invitation post. It is legal for you to use copywrited images and characters for your own personal use as long as you are not profiting from that use, however, big corporate print stores like Staples and Office Max are weird about printing things with these types of images (like the WTWTA characters on my invite) and will not do it because technically it is trademark infringement on their part as they profit from your payment to them for printing. Some print stores, like my local Postal Anex are a lot more lax about this kind of thing so bear in mind that you will need to seek out one of these smaller establishments or print them yourself at home or at the library.

As mentioned above, the only difference between this invitation and the example in my DIY Invitations and Greeting Cards post is that this one contains a photograph (which is super easy to ad). For creating the text portion of the invite and adding the characters (which I found by doing a Google search for “Where the Wild Things Are characters”) I will refer you to the previously mentioned post. As for adding a picture simply select: INSERT>PICTURE and retrieve the picture from wherever you have it saved on your computer. Once you have added the photograph you may adjust the size and then select: FORMAT>PICTURE>OUTLINE if you wish to change the color or weight of the outline around the picture (I used a thick yellow outline to match the font). Like the font I used? It’s “Hello, Goodbye” available here via dafont.com, the same one I used when creating my DIY Hand-Painted Where the Wild Things Are Sign. Do you absolutely love my photo of Baby P in his wolf suit? Check out the my DIY Wolf Suit Costume tutorial!


DIY Favor Tags & Cupcake Toppers – Where the Wild Things Are

caketopper

So in wrapping up my posts on Baby P’s first birthday bash I figured I’d share one last cute little money saving party idea – DIY favor tags and cupcake toppers! My favor tags were as simple as using the same method I did to create P’s invitation and stapling it to a little baggy of cookies! Due to the wide age range of kids that were going to be in attendance I wasn’t sure what to do for favors but I knew I wanted to do something cost effective, so what’s more cost effective than sugar cookies? Plus I felt that giving something edible really lent itself to the “we’ll eat you up” part of the favor tag. While originally I had planned to make cookies in the shape of a “1” time ended up getting away from me and I just went with simple homemade (and by homemade I mean those ready-to-bake rolls of dough that you buy in Walmart, lol) sugar cookies with sprinkles. I was really happy with how they turned out and even happier that I was able to customize my favor tags to fit the party theme!

close-up of favor tag and cookie bag.

close-up of favor tag and cookie bag.

favors as we displayed them.

favors as we displayed them.

As for the cupcake toppers they were a last minute DIY idea for when I decided that I was going to forgo the idea of having a professional make the cupcakes and smash cake and make them myself. While I’ve gotten crafty with cupcake decorating in the past (check out my margarita and patriotic cupcakes!) I knew that since I needed about sixty cupcakes I didn’t want to commit to any type of elaborate design. In searching various online retailers I came across some pretty adorable cupcake toppers, even some that were already customized to my theme, but in an effort to save some addition money I decided to just create them myself by using Microsoft Word to create little circles with various WTWTA images inside (see my post on DIY Invites & Greeting Cards without Photoshop for more on making some simple designs without fancy computer programs). Once my little circles were printed all I had to do was cut them out and use a glue stick to glue them together around a standard toothpick. While the process was a little tedious it was a super easy and FREE way to jazz up my box cupcakes!

photo 2 (6)photo 5photo 4 (3)


TIP: Want an even easier option? Print the favor tags out on shipping labels and simply stick it to a little colored paper baggy. You can apply this same idea to your cupcake toppers by printing out the characters on circular labels and sticking them together around a toothpick so that you can skip the cutting step altogether.

If you’re interested in throwing your own budget-friendly “Where the Wild Things Are” party and would like to use my caketopper and favor tag designs please contact me and I would be happy to share the document with you free of charge!

DIY Invitations & Greeting Cards – Without Photoshop!

invite4

So while I’m on a roll with sharing my all of my posts related to Baby P’s birthday, I will share another little DIY trick that has come in super handy for me this past year – designing my own invitations and greeting cards! Now, I’ll start by saying one of my goals for the next year (or couple of years if I continue to be as computer illiterate as I currently am, haha) is to learn to use Photoshop to it’s full extent but for now my abilities are extremely limited. So when it came time to design an invitation for J’s surprise 30th (another post that I planned on getting up, oh, about six months ago and have still not gotten around to, lol) I had three choices: (a) become proficient in Photoshop in three days time, (b) purchase an over-priced invitation via Etsy or other online retailer or (c) make one myself using the tools I had at my disposal (spoiler alert: Microsoft Word and Staples print services, lol). Since choices a and b were off the table from the get-go, I remembered that I had very frequently used Microsoft Word to create marketing materials that we didn’t want to pay to outsource when I was working for a gym, so why couldn’t I just apply that same idea to my invitation? I figured I’d give it a try. So while a then six month-old Baby P (*sigh*) napped away in his baby swing, I quickly (and very easily, I might add) created J’s invitation. Once I had gotten the confirmation from others that it actually looked good (not just in my head, lol) I took it up to my local Staples print center and had them printed up on 5X7 high quality cardstock for the cost of about $7.00 for 15! For anyone that has ever purchased cards from Shutterfly, Wedding Paper Divas or another online card retailer, I don’t have to tell you that under forty cents a card is a steal!

Additionally, sometimes the freedom to customize the card to your liking and be able to run up and get extras at your convenience is savings enough. So after my success with J’s invitation I proceeded to use this same idea for a friend’s baby shower invitations, Baby P’s first birthday invites and even my 2014 Christmas card! While I’m sure there are lots of Photoshop tricks that would improve on my method drastically, if you don’t own Photoshop (or you’re like me and own it but are unsure of it’s mysterious ways, lol) this is a great method to creating some cute cards in a pinch, all you need to know are a few simple functions in Microsoft Word and then simply allow your local print store to do the rest!

NOTE: Use of Disney and other copywrited characters is legally allowed for personal use on your part (i.e. using them for your child’s birthday invitation), however, corporate print retailers like Staples will not print your cards for you if they contain these types of copywrite images as it is considered trademark infringement on their part because they would technically be profiting from your use of them. Dumb, I know, but it’s the law. I ran into this problem when creating Baby P’s invitations but was able to have my local postal annex print them for me. So before you

I will use my sweet friend K’s baby shower invite as an example, since it is an easy and trendy little design. This one came in at a cost of just about twenty cents per card since I did four to a page! Check out my post on the “Whale-of-a-Time” Diaper Cake I made for this shower as well. Obviously if you’re proficient in Photoshop this whole post is going to seem extremely silly to you, but if you’re not and are after a cute custom invite or card at a great price this is an easy alternative!

Step 1: Search various online print retailers (like Shutterfly or Tiny Prints) for design inspiration. The inspiration for this particular card actually came from Google when I was searching for whale themed baby shower invitations. Once you have found something you like, try to Google similar background images, for instance, for K’s baby shower invite I Googled “grey chevron background” and for J’s surprise 30th invite I Googled “chalkboard background”, when I found an image that I liked I saved it to my desktop so that it was easily accessible. I also did Google searches for the whale silhouette and saved them to my desktop as well.

this was my inspiration, I found it by way of a Google search for "whale baby shower invitation"

this was my inspiration, I found it by way of a Google search for “whale baby shower invitation”

Step 2: Now I was ready to download a few new fonts. For all of my projects I use http://www.dafont.com to find lots of good free fonts which are simple to download. Once you have downloaded your desired font you can easily add them to your font library by using an online or YouTube tutorial for your specific version of Windows or Mac.

Step 3: To create the actual invite I began by opening Word and inserting an object in your desired shape. NOTE: For cutting purposes a square or rectangle works best, but if you are set on a circle just be prepared to have to cut them each individually. The size of your shape does not matter, just make it large enough for you to work with, the print store will be able to print them to whatever size you want once they receive it. Select: INSERT>SHAPES>RECTANGLE

kinvite1

this is how the dropdown menu appears on Word 2013

Step 4: I then changed the background of the shape to my chevron print that I had saved earlier by selecting: FORMAT>SHAPE FILL>PICTURE and then selecting the chevron background. Then I used the same method to change the outline of the shape to none, however, if you would like a border on your invite simply select FORMAT>SHAPE OUTLINE and then select the weight and color of your shape outline.

kinvite2

Step 5: Now I added my text. This part I played around with a bit to figure out which fonts looked best together (NOTE: It usually works best to interchange script and solid fonts, fi you need more help with this there are lots of “text matching/combining” pins on Pinterest that are very helpful). When I found the ones that worked for me I added each line of text in a separate text box by selecting the following: INSERT>TEXT BOX>SIMPLE TEXT BOX. Next, I edited my text boxes so that they were transparent and had no outline, this way I was able to move different groupings of text as close or far from each other as I wanted. I did this by going to the “text format” dropdown at the top of my toolbar (pictured below) and selecting: FORMAT>SHAPE FILL>NONE and then FORMAT>SHAPE OUTLINE>NONE. The last thing I did to format my text box was to set the “text wrap” option of the text box to “tight”, as I find this to be the easiest setting for manipulating the placement of the box later on, I adjusted the text wrap option by selecting: FORMAT>WRAP TEXT>TIGHT. Now you can enter text in your text box as you wish! I know it seems like a pain to go through these steps for each individual text box SO, good news is – you don’t have to! Once you have customized one text box you can simply copy and paste that same text box as many times as needed and simply change the text within the box. Once I had created my first line of text I copied the text box and pasted it seven times, then once I had changed each text box to contain my desired text I simply manipulated them into my desired positioning.

kinvite3

Inserting the text box.

kinvite4

changing the background and outline of textbox

kinvite5

changing the text wrap option.


Step 6: My final step was to insert the clipart images of the whales onto my invite. This is important for creating transparency of an object, in other words, editing a clipart object that would otherwise have a colored background to be a plain object against the background of your invite or card. I found these cute little whale images via Google and originally they were just black (in a minute I will explain how I changed them to blue and grey). I pasted the image onto my document, changed the text wrap to “tight” (same method as above) and then set transparency using one of two methods, depending on how detailed your image is, since this one was easy I did the following: FORMAT>REMOVE BACKGROUND (I simply clicked the areas that I wanted to keep, the body of the whale and the water drops and then hit “keep changes”. If your image is too detailed to select each individual detail (like Baby P’s invite) you can simply select: FORMAT>COLOR>SET TRANSPERANCY and then click the background of your image to remove the background, sometimes this can cause your picture to look a bit fuzzy on the edges but depending on the background of your invite or card it probably won’t be noticeable at all. Lastly I changed the colors of my whales by selecting FORMAT>COLOR and choosing from one of the options given (see picture below).

setting transparency and changing color of image

setting transparency and changing color of image


That’s it! I know it sounds like a lot of steps but this invite took me about 3/4 of a naptime to create (not very long!) and once you’ve done it once it’s pretty easy to repeat for different designs.

Printing: I saved mine as a PDF file and emailed it to my local Staples print center, letting them know that I wanted to print 4 to a page on cardstock. NOTE: If you want Staples to cut your invites for you they will charge you $2.00 per cut, which doesn’t sound like very much but if you’re doing 4 to a page that makes 8 cuts and will add $16.00 to your print cost, I suggest just using their rotary cutter for free. It’s a little tedious but again, it doesn’t take very long and it looks great so my advice would be to skip the professional cutting and do it yourself.

I will eventually get around to individual posts about each of my greeting cards/invites but for now these are a few I have done

invite

J’s Surprise 30th invite – the theme was “whiskey & cigars”


invite2

Invite for K’s whale themed baby shower

Baby P's "Where the Wild Things Are" 1st Birthday party invite.

Baby P’s “Where the Wild Things Are” 1st Birthday party invite.

invite3

Our 2014 Christmas card! My address list is about 100 people including family and friends so each year I spend close to (if not over) $100.00 on holiday cards and this year I spent just $35 by designing this one myself!

DIY Fabric Covered Photo Mat – Made from a Cereal Box!!!

fabmat4

Who doesn’t love free stuff? I actually have quite a few “free” projects in the works currently that I’m super excited about, but for now I’ll share this one with you as it was part of our gallery wall which I will reveal soon! This project actually happened by accident when I realized that the frame I was using wasn’t a standard photo frame and I was going to need to cut a photo mat to fit it. Since the piece of art (I shouldn’t say art, it was a weird picture of a cat or something, lol) that was originally in the frame had an ivory mat around it I was going to have J cut it to fit using a box cutter. Of course he misunderstood me (anybody else have an issue with their men having selective hearing when it comes to their crafting requests? lol) and cut the wrong part of the mat, rendering the part I needed useless. Boo-hoo! It was time to come up with a plan B, which I thought would be just to buy and cut a standard mat to size but then I realized that a standard mat wouldn’t fit this frame either (gahh!). Just as I was getting super frustrated and about to ax the use of that particular frame altogether, I remembered that I had seen a picture mat that somebody had covered in fabric by simply mod podging fabric onto a plain picture mat. Now, that still didn’t solve my problem of not having the right mat size, but if I thought that if I could only find a thin cardboard to fashion my own mat I could take advantage of my left over fabric from past projects. I knew that a poster board cut to size would work just fine but in the interest of not having to traipse into town to get one I thought to myself “what do I have in the house that is of similar thickness/material to a poster board?” and then it came to me – a cereal box!!! About a half hour and a little mod podge later I had myself another fancy photo mat (check out my first DIY photo mat here) that not only matched the fabric on our side-light window panels but was free!!! All it required was a little thinking outside of the “box”, so to speak (get it? cereal box, ha.ha.ha). I hope this inspires a free photo mat on your end (you need not use a cereal box like I did, any thin cardboard will do) and should you not have the need for a photo mat right now, keep this one in mind as a great DIY gift opportunity come the holidays!

I'll have plenty of more frame projects in the works if I keep catching more adorable moments like this! These two melt my heart <3

I’ll have plenty of more frame projects in the works if I keep catching more adorable moments like this! These two melt my heart ❤


DIY FABRIC PHOTO MAT

SUPPLIES:

  • 1 large cereal box or poster board of some sort
  • fabric of your choice
  • mod podge (I used matte finish but it doesn’t matter what you use)
  • glue gun & hot glue
  • foam brush
  • measuring tape
  • scissors

INSTRUCTIONS:

Step 1: If you are using a cereal box break the box down by cutting along one of the corners so that it can lay flat like a piece of cardboard. Then measure and cut four strips of equal length or four pieces that can come together to form a rectangular mat since it wont matter what your pieces look like beneath the fabric as long as the shape of the mat is even (depending on the size of your box you may not be able to get four equal pieces but rather four pieces just long enough to overlap and connect to form a rectangle). If using a poster board simply measure and draw out your mat and then cut it out already formed.

fabmat

My cereal box! In the interest of pinching our pennies I opt for “crisp rice” instead of rice krispies haha

Step 2: Once you have your four pieces connect them so that your print side (if using a cereal box) is all facing one direction using hot glue to form the mat. Ignore this step if you have used a poster board and your mat is ready to go. Now you are ready to measure and add your fabric!

fabmat1

ensuring that it fits in the frame

fabmat2

Step 3:  Measure your fabric by laying the fabric print side down (upside down) and laying your mat on top, use a pencil or pen to mark an area just a tad bit larger than your mat size or enough to be folded over the edges (I will explain in the subsequent steps). Once you have marked your rectangle on the fabric, cut it out using your scissors (this should be obvious but keep the rectangle in tact! To cut the center simply puncture a hole in the center of your fabric and cut along the insides).

Step 4: Place your mat so that the non-print side is facing up and lay your fabric cut out over the mat to make sure that it will line up correctly. In each of the inner and outer corners cut a small slit that extends from the edge of the fabric to the corner of the mat (this is so your fabric can be tucked underneath without puckering at the corners).

Step 5: Now you are ready to attach the fabric to the mat. Using your foam brush, brush a generous amount of mod podge onto the mat surface and then lay your fabric atop it and press down to secure. Some mod podge will likely seep through the fabric, this is fine, simply use your foam brush to brush it off so that it doesn’t form clumps. At this point your fabric will still be larger than necessary for the mat but allow it to dry this way before moving onto the next step.

Step 6: Once your fabric has dried for the most part, turn your mat upside down and use hot glue to attach your fabric’s edges to the underneath of the mat, making sure to pull it tightly so that isn’t loose along the edges and holds to the mat securely.

Step 7: Now turn your mat back over and add another coat of mod podge to the top of the fabric, ensuring that you are adding and even layer and are not allowing it to pool or clump along the top. Allow it to dry and you are ready to use it in your frame!!! Ta-da!!! 

fabmat5

My DIY frame displayed on our gallery wall!


To see more of our family pictures from baby P’s 6 month photo session see this post! 


Meal Planning – Week of July 20th

So I know I had previously mentioned that I would try and post my weekly meal plans, both for the benefit of anyone that cares and for me to refer back to when trying to plan future weekly meals. Anyone that has tried to stick to a strict budget while maintaining a healthy diet knows the challenges that this combo can pose. In our house we don’t follow any particular diet plan, we just try to eat mostly healthy meals prepared by healthful methods of cooking. I plan on creating a separate post regarding our budget, but we try to stick to a strict $50.00/week grocery budget (this doesn’t include household goods like cleaners, toilet paper and other non-food items available at the grocery store, only food). We also don’t buy lunch food, I just prepare large enough dinner meals that reheat and pack well so that they can be eaten for lunch by both myself and J the following day. Personally, I am always looking for new dinner ideas (a big reason I waste so much time on Pinterest, haha), so the purpose of these “meal planning” posts will mainly be to share some new meal/recipe ideas with my friends, followers and fam! If I can be as diligent as I hope to be with these weekly posts, I plan to eventually make a whole “meal planning” category. 

menu1

The menu, as displayed in our home 🙂 I ended up replacing “summer quiche” with another recipe, however, I will be posting that soon! Check out this pic’s link to my “DIY menu chalkboard”!

SUNDAY // Chicken Cordon Bleu – I stretched a buck by purchasing a large package of chicken breasts and using them in both this meal and my Panini recipe below. Instead of spending the extra money on thin sliced breasts, I slice the large breasts and pound them thin myself.

MONDAY // Fried Rice – I love this recipe! It really is very close to “restaurant quality” as the creator claims it to be and it’s super cheap to prepare! I added some roast pork that I had left over from one of our weekend meals but usually I’ll just add extra scrambled eggs as the protein element. 

TUESDAY // Almond Crusted Shrimp – Prepared in the same fashion as my Almond Crusted Flounder, so simple and delicious and I only use a little bit of oil to fry them up but if you’re trying to be super healthy you could always bake them. 

WEDNESDAY // Baked Felafel – This is one of my favorite recipes! I serve it with my Skinny Tzatziki and yellow rice. I always double this recipe so that we will have enough for lunch the following day. I also tend to add a little extra flour, my mixture is always a little looser than hers looks in her prep pics. 

THURSDAY // Grilled Chicken & Summer Veggie Paninis – This was simple as grilling up some thin sliced chicken breasts, zucchini and summer squash. I like to use veggies in our cooking that I can also steam up and serve to baby P. I finished it off with some sliced gouda (I bought the cheap Sargento slices, well, because they’re cheap, lol, but also because they melt quickly) and some of my simple Red Pepper Aioli that I always keep on hand. Instead of using artisan breads for my paninis I instead buy a loaf of Italian bread, cut it into thirds and slice it (digging a little out of the middles before forming the sandwiches), they crisp up nice and cost as little as $1 for a loaf! 

FRIDAY // Grilled Steak Rolls – This was the first time we tried this recipe and we loved it! We used a cheap cut of thin sliced top round beef and a combo of peppers, onions, zucchini and summer squash. Instead of balsamic glaze we substituted teriyaki sauce to give it an Asian flare, it reminded me a lot of beef negimaki (little beef and asparagus rolls served in a lot of Japanese restaurants).   

SATURDAY // Since we had a birthday party to attend this was our night “out” but typically we will choose one night of the week to either order in or go out to a restaurant, just to give me a break from cooking 🙂

Check out all my favorite recipes on my “Tried and True” Pinterest board!

DIY No-Sew Curtain Panels

curt7

So since it’s too hot outside to work on any of my DIY projects in the garage, I’ll take this time to share one of my recent DIY decor projects – no-sew curtain panels! Now, if you are a sewing expert or enthusiast avert your eyes because this project will probably make you cringe and break out in hives, lol, but if you’re like me and sewing isn’t particularly (or at all) your thing, then this may definitely be of interest to you!

I’m a big fan of this project and this wasn’t my first time attempting it, in fact, at our old house after my first successful attempt on our no-sew bedroom curtains prompted the creation of two other curtain projects (I will post about these soon as well!). When designing our bedroom (a grey and yellow theme with black accents), I couldn’t for the life of me find any curtains that I liked (those I did fancy either didn’t work with my color scheme or were way out of my price range). Now let me just say that my original plan was to finally learn to use the ol’ sewing machine and actually sew the curtains. However, after finding an affordable decorating fabric option in a print that I liked, and a little Pinterest research and found (and became obsessed with) a non-sewer’s dream – iron-on hem! Iron-on hem has become my substitute for sewing in almost all of my projects that would otherwise require a needle and thread (check out my no-sew bow-ties!). Granted in some situations there is no way to duplicate a stitch, but I am always willing to try :). 

These particular curtains were born out of my love for Pottery Barn’s “Kendra Trellis Drape” which came in at $99 per panel … seriously?! Since I didn’t (and probably won’t ever) have that kind of coin lying around to spend on curtains but nonetheless desperately needed a window covering in a fun print to distract from these hospital-white base housing walls, I came back to my trusty DIY curtain project once more. For these particular curtains I chose a grey and white trellis pattern (similar to the one on the overpriced PB curtains), to compliment our grey and orange furniture (see below for details and pricing). It took me about 20 minutes per panel to create these pocket curtain panels, so I would just work on them at night while my hubby and I caught up on our shows, this way I could be certain that any tiny fingers would keep out of the way :). Now that the curtains are hung I am thrilled with the outcome, and while I know I could have very easily gotten some cheap Walmart or Target brand panels for a comparable price I like that I was able to pick from literally thousands of fabric patterns to find exactly what worked for me … and of course that I was able to make a project out of them :). As I do, when you see an interior decorating or design piece in a store that is either outside of your budget or just not quite what you’re looking for always try to get creative and think of a way you can DIY it, chances are you’ll pleasantly surprise yourself!

DIY NO-SEW CURTAIN PANELS

WHAT I USED:

  • Decorator Fabric – purchased from Fabric.com, I used Premier Prints “Fynn” Slub in Ash Grey (no longer available, but there are plenty of the “Fynn” trellis print options available in a variety of other colors). The amount you will need will depend on how many panels you are making and the height of your walls, I simply measure the length in inches and convert it to yards. There are all sorts of complicated methods for taking into account bunching at the top, fabric print repeat etc. Personally this just confused me, I was fine with the width of the fabric so I just paid attention to the necessary length.
curt

It will get delivered in a giant box like this, your UPS man will not be pleased lol

  • Iron-On Hem – available at any major fabric retailer (or super Walmart). I purchased the “Stitch Witchery” brand in heavy-weight, 1″ wide. Again, the amount you need will depend on how many panels you are making and the length of your panels.

curt3

  • Iron
  • Hand Towel
  • Measuring Tape

WHAT I DID:

Step 1: Anytime you order a large quantity of decorator fabric it will usually come rolled on a giant cardboard cylinder (kind of like a giant toilet paper roll, lol). So I began by rolling out my fabric and measuring out the necessary length, which for me was 91″ with three additional inches added to accommodate a one inch hem at the bottom and a two inch fold-over at the top to create a pocket for the curtain rod (the size of your pocket will depend on the girth of your curtain rod, make sure you measure accordingly), for a total of 94″ per panel. After measuring my 94″ length I cut five 94″ pieces, as I was going to be making five panels.

curt1 curt2

Step 2: Starting with my first panel, I began by laying the piece of fabric upside down on a towel. I was too lazy to dig the ironing board out of the garage so I just did this project on the floor, using the towel to protect my carpet. Now, when doing a pocket curtain it is very important that you hem the sides FIRST I made the mistake of reversing this project on one of my panels in our old house and while you couldn’t really tell, I always knew it was wrong and it bothered me to no end.

Step 3: Heat your iron. Starting with one of your sides, lay a long piece of iron-on hem (I find it is easier to work in sections so you can ensure a straight hem) parallel to your fabric edge about an inch in. NOTE: Follow the directions on the iron-on hem package for the actual ironing process, as the method can differ by brand. Mine required that you dampen a towel (where the hand towel comes in), fold the fabric over the iron-on medium then place the wet towel over the hem and iron over that, apparently the steam will activate the “bonding” process. I have, however, used brands that just require you iron directly on the fabric so be sure to read the directions.

curt4

Step 4: After you have completed one side, move onto the other side. Once your sides are complete you are ready to hem the bottom and the top, the order you do this in doesn’t matter. For the bottom simply repeat what you did on the sides, simply fold over about an inch worth of fabric and fuse.

Step 5: For the top of the panel, fold over enough fabric to create your pocket. Be sure your pocket is big enough to fit your curtain rod, I was using a pretty skinny rod so folding over just about two inches of fabric was fine for me. Then simply continue with the same process you used to fuse the bottom and sides, the only difference is you will  have created a pocket at the top.

Voila! You are done! Now, they may not all be 100% even but I’m telling you nobody (probably not even you) will notice, I have gotten so many compliments on my curtains and even though they aren’t perfect they work perfect for me. 🙂        

curt6 curt5  

A FEW TIPS:

  • Try to stick to heavier decorator fabric. I know it may be tempting to use the $2.00/yard cotton options but unless you are using them solely for decor, you’re going to want a heavier fabric to achieve any level of functionality, as you are not lining them.
  • Try to measure as accurately as possible. Once you cut the fabric you cannot return it. I somehow wound up with about three extra yards but plan to use it on other DIY projects.
  • When working on the sides and bottom make your hem as small as the strip of iron-on hem will allow, as you do not want to create an unwanted pocket. 
  • If you find that your second folds (top and bottom) are having a hard time bonding at the corners just use a little dot of hot glue and that will do the trick.

SOURCES:

  • Fabric // Fabric.com Premier Prints “Fynn” Slub in Ash Grey (no longer available, but there are plenty of the “Fynn” trellis print options available in a variety of other colors such as this “Cool Grey“). It cost me $7.18/yard so in purchasing a total of 15 yards the total cost was about $108.00 (so for what one curtain panel would have cost me at PB I got FIVE!). Don’t forget to Google those free shipping coupons!
  • Curtain Rods // “Kenny Ball Deco Curtain Rod” in champagne silver, available here via Amazon for $12.00/piece. They are kind of cheap looking up close but they look just fine up on our walls, nice and simple! 
  • Curtain Tie-Backs // “Urbanest Colette Decor Drapery Tie Back” in Pewter. Available here via Amazon for $6.99/piece. I knew I wanted the “knob” looking tie-backs and was obsessed with one design that I found at Anthropologie but knew that at $32.99 per knob those ones just weren’t going to happen for me, lol. Although these ones are not actually metal they don’t look cheap at all even though they were the cheapest ones I found price-wise!  

Updating Our Master Bathroom

mastbath13

Crazy thing happened this week … we accepted an offer on the house!!! So exciting and sad at the same time, because although putting the house on the market was a good decision and I’m excited to move on base, I’m getting graduation goggles about selling it given all of the memories our little family has made here so far. That being said as long as nothing falls through on the buyer’s end we will be peacin’ out of this bad boy by the end of June, so I better get all of my house transformation posts up before I’m categorized as creepy if I’m technically posting pictures of somebody else’s home, haha.

In my post on refinishing cabinets I spoke a little about my our master bathroom update but would now like share the whole project in detail! Again, most of our updates were cosmetic as we wanted to create the most change for the least cash. This was our final major house project and we were in a race to get it finished given our very important deadline – the arrival of baby P! Now, I’ve spoken before about how I’m a true believer that with a little paint and the right decor you can create a transformation that is budget friendly but will still rival that which would be made by an actual renovation. We applied that idea here as well as in the guest bathroom where a few small changes resulted in a complete revival of an old dingy space. Since this was our last major project, our vision for the space changed many times between the date we purchased the house and the time that we actually got to the project. Originally we came in guns blazing prepared to paint, rip out the vanity, install a new tub surround, basically change everything until we realized that with limited knowledge on how to do the aforementioned and seriously limited cash preventing us from hiring professionals to do it for us, our vision was going to have to change drastically. We decided to ax the idea of installing a tub surround and simply give the old tiles a real good scrub down instead. Still stuck on the idea of replacing the vanity, we held off because that was going to cost us a pretty penny and with paying as we went along (no credit cards) and other house projects in the works, the master bath remained on the back burner. As P’s due date drew closer, we wrapped up a few  other projects and finally decided to tackle the bathroom, going with plan c if you will, our third and final game plan – replace the toilet, repaint the vanity, replace the vanity top, paint the walls, decorate, DONE. We were super motivated to get this done, especially since we had been showering in the guest bathroom for months given the sorry state of our on-suite bath, my big pregnant self even did all of the painting and decorating while J was at a job school in Norfolk because I was too antsy to wait to get it done, haha. Hope this inspires some DIY in your life, remember say no to renos and difficult transformations, chances are you can fake it with some paint and great decor!

master

master1

it is purely coincidental that I am wearing the same shirt in the two pictures taken over 6 months apart haha


WHAT WE DID:

  • Replaced the vanity top.
  • Repainted the vanity cabinets. We decided to repaint the vanity given our frustration over having replaced the other two and wishing we had just gone this route in the first place.
  • Removed old mirror and replaced it with a new beveled edge mirror.
  • Replaced the toilet.
  • Painted the walls.
  • Hung a wine rack that we repurposed as a towel rack.
  • Hung a 5-hook rack for hanging towels.
  • Hung a shabby-chic towel ring.
  • Hung two DIY “paintings”.
mastbath12

me picking up the 5 foot vanity in my Kia Soul haha

SOURCES:

  • Vanity Top // Purchased at Lowes, available through special order (since we were replacing a custom size we needed to order a custom sized top). It cost us in the neighborhood of $500.00, which was a little less than it would have cost us to replace the whole vanity and floor tiling (but a WHOLE LOT less work).
  • Beveled Edge Mirror // Purchased at Lowes, available here for $41.97.
  • Toilet // Purchased at Lowes, available here, for $139.00. Since it is a dual-flush it is supposed to conserve water.
  • Paint // Color is “Montpelier Ashlar Gray” by Valspar.
  • Wine/Towel Rack // Purchased via Amazon for $34.50, available here.
  • Five-Hook Rack // Purchased at Target, available here for $23.79.
  • Towel Ring // Purchased via Etsy from “midwesterntreasures” for $26.50.
  • Shower Curtain // Purchased from Overstock, available here for $24.49.
  • Square Grey/Yellow “Paintings” // DIY project, I simply inserted a piece of fabric into a $4.99 frame from Michael’s (I will write a post about this soon!).


Since the bathroom is attached to the master bedroom which has a grey and yellow color scheme we carried that into the bathroom as well. Sorry I only have one set of before pictures but you’ll still get an idea of how awful it was, don’t worry haha.

 BEFORE

mastbath6mastermastbath10

AFTER

master1mastbath11mastbath1mastbath2mastbath3mastbath4mastbath5mastbath

We estimated this project to have cost us around $850.00 when all was said and done. Although it seems pricey it sure beats a remodel and since we did everything over the course of several months and only purchased items as we had the money to do so, this helped a lot. 

Updating Our Guest Bathroom

upbath13

I’d like to share our guest bathroom update, which was one of the first projects I tackled upon moving into our home. I know I’ve mentioned in my other house posts that I like to stretch our budget by simply updating our rooms with DIY decor and fresh paint, as opposed to doing a complete reno. The upstairs bathroom was in decent shape, the tub surround, toilet and light fixtures were good, and although we decided to replace it, the cabinet portion of the vanity was acceptable as well, so I regret not simply replacing it and purchasing a new vanity top (don’t make the same mistake we did, read my tutorial on repainting cabinets and get to it!). I decided to go with a beachy-chic feel for the bathroom decor, normally I’m into a little more monochromatic design with pops of color because I feel it is a little more modern, but I figured for the guest bathroom it wouldn’t hurt to have a little fun with it, after all we had just moved to the coastal Carolinas! The majority of the bathroom update was simply adding decor, with the only hard part being the replacing of the bathroom vanity (don’t get me wrong, I love the way it looks but it was a major pain in the arse).

Before I get to the specifics of the bathroom update, let me help you to hopefully avoid one of our giant missteps in the project by giving you a much simpler DIY solution. If you are considering replacing a vanity completely, before you tear out the existing one I urge you to first take a lay of the land and ask yourself – is there physical damage, missing or rotten pieces of wood? If so, replacing the piece may be your only option, however, if you are just dealing with something that is ugly but functional read my post on refinishing cabinets, mine were as ugly as they come, a real 1980s builder-grade gem lol. If you are still not convinced, let me tell you this – replacing a vanity, especially one that is original to the home, will involve replacing parts of the floor beneath it before installing your new vanity, and I can assume that since you are reading DIY posts on home updates you are not in fact a professional builder, haha. Once you rip that old vanity out there’s no going back, you’ll be stuck as we were, having to sand and paint the walls (which will be damaged by your removal of the vanity), install new subfloor (oh, and the fact that we owned only a hack saw and drill as far as power tools went made it even more fun – NOT lol), then lay new tiles and grout before you can even THINK about putting in that cute new vanity that has been sitting in your garage for the weeks it took you to prepare the space for it. Still sound like a good idea? If you are up for a challenge, by all means, go nuts but if you are like me and would rather spend your weekends at the beach instead of on your hands and knees grouting a bathroom floor when all you wanted was a new vanity, then I plead with you to go the repainting route haha. That being said, our bathroom did come out super cute and if you do decide to replace your vanity you can still DIY it (if you have any questions about replacing the floor tiles leave a comment, we had no idea what we were doing and it still came out great). Now for the specifics, since this isn’t a tutorial I’ll just explain the update and give sources for all of my decor finds.

upbath9upbath12

WHAT WE DID: 

  • Removed the vanity, replaced the floor tiles around it and installed a new sink/vanity combination. As I mentioned above, I do wish we had simply repainted the vanity in retrospect, however, the smaller vanity open up the bathroom a great deal and made the space seem bigger.
  • Painted the walls.
  • Removed the vanity mirror and replaced it with a hanging mirror.
  • Installed two floating shelves above the toilet.
  • Replaced the towel bar.
  • Installed a hand towel ring.
  • Installed  a three-hook rack for hanging towels.
  • DIYed a free-standing small linen storage unit.
  • Hung pictures.

SOURCES:

  • Vanity  // Purchased at Lowes, available here for $269.00. NOTE: If you don’t care about having extra drawers they have another similar option for $189.00.
  • Floating Shelves // Purchased at Home Depot, available here for $28.80 each. They are also available at Target, but I believe H.D. is still cheaper.
  • Free-Standing Storage Unit // Thrift Store find. After project costs, the item comes in at around $29.00. See my post here on painting laminate furniture to see more about this particular piece.
  • Wall Paint // Color is “Woodlawn Bedroom” by Valspar.
  • Vanity Mirror // Thrift Store find. Purchased for $10.00 and hit it with a coat of gray spray paint.
  • Towel Bar // Purchased at Lowes, Moen Brand Spot Resistant Brushed Nickel 24″ Towel Bar, available here for $19.98. We had a Lowes credit or else we would have hit up Walmart for this item to save a few bucks.
  • Three Hook Towel Rack // Purchased from “TheShabbyShak” via Etsy for $23.00. This shop has lots of great shabby chic decor in a huge variety of colors and finishes. I chose the aqua in keeping with my beach theme.
  • Towel Ring // Purchased from “VeritasInspired” via Etsy for $22.99.
  • Damask Shower Curtain // Purchased from Amazon for $36.00. Available here.
  • Towels // Lime Green Bath Towels – Target, Target brand $4.99 each. Navy Blue Hand Towels – Bed Bath & Beyond, Wamsuetta Brand (these were wedding gifts or else we would have gone for the Walmart or Target option on these, expensive hand towels? Ain’t nobody got time fo dat).
  • Baskets // All three baskets in my bathroom (as well as those hidden under the sink), were purchased from Michael’s. I LOVE baskets. I once saw a Hoarders episode featuring a woman who had over three thousand baskets or something like that and I’m not saying that’s me but I’m well on my way, lol. NOTE: I only purchase baskets from Michael’s with a 40% off coupon or when they are on sale for over 40% off or else they are a total rip off. I would say these three cost somewhere in the neighborhood of $5.00 each for the small ones and $8.00 for the large one.
  • Wall Art // Each item on this wall was virtually free. The beach picture was a picture I had taken myself right on our own Onslow Beach here on Camp Lejeune, I just blew it up at our local drugstore for around $1.00, the frame was the second half of a buy-one-get-one deal they were running at Michael’s so we had it sitting around anyway. The “catch me by the sea” print was one I found on Pinterest, saved as a JPG and printed at our local drug store in size 8X10 (this may or may not be legal, but there was no watermark so I assume it was a free print, if not I’m sorry copyright gods!). If you want to do the same just Google “free whatever-you’re-looking-for images/quotes” and you should find some, the quality may not be so fab but it’s just for looks. The frame for my print was one of the old ones we used in our condo so I just hit it with the same gray spray paint as the mirror. The tiny mirror was a thrift store find for $3.00. Not pictured here is my DIY nautical rope frame, which you can make for under $1.00 read the post to find out how!


BEFORE

upbath6upbath7upbath8

AFTER

upbathupbath1upbath2

upbath3upbath5

We estimate the total cost of the project at around $500.00, and for the transformation we achieved I think this is a GREAT price, keeping in mind a full bathroom reno by professionals can cost you around 5K on the low end, which even if we had the cash (which we definitely don’t, lol), I don’t think I would be able to stomach. Say it with me people, “D-I-Y” it’s a beautiful word!!! 

NOTE: This transformation occurred over about 5-6 months, we only bought things as we could afford them which really made that $500.00 project price tag a little more bearable, because I don’t know about you but even though it’s not a 5K reno, $500.00 is still a lot of money, especially when taking on multiple house projects at a time.

There you have it, our beachy-chic guest bathroom re-do! This would not have been possible without my wonderful hubby J who helped my 7-9-month pregnant self hang and place various items when I couldn’t physically bend that way, lol. Hope this inspires you! XOXO

Baby P’s DIY Father’s Day Photo Gifts

fath5fath

Father’s Day is just a few short weeks away and baby P and I both agree that J is just about the best daddy there is and deserves nothing but the best for his special day! Thing is, the gift that my frugal hubby would love the most is for me not to spend money, haha, lucky for him I had been planning two budget friendly, DIY, grand slam Father’s Day gifts for months now (well actually since baby P was born lol). Since J is up in NY for fleet week for two weeks, I knew this would be the perfect opportunity to get my Father’s Day pics out of the way, printed and wrapped before his return. Additionally, I like to share my holiday crafts with my Mommy friends, so I always like to test out my projects before hand, to ensure it comes out as planned and make it easier for me to host a craft play date without having to wrangle baby P at the same time.

Okay so back to the photos, can I tell you that I literally cried after I saw how amazing these pictures turned out? Baby P is just the squishiest, happiest little thing and I know J is going to DIE when he opens this gift on Father’s Day (if I can wait that long to give it to him lol jk I will)! Don’t worry I made him promise not to read the blog for a few weeks and since he loves surprises so much I know for a fact he won’t peek ;-). Since the pics are self explanatory I’ll just go into a bit more detail with each picture below. Hope this inspires you to have some fun with your little and give their Daddy something fun and meaningful for Father’s Day!

*For more examples of DIY holiday photos check out this post!

“DAD” PHOTO

fath2fath4fath3

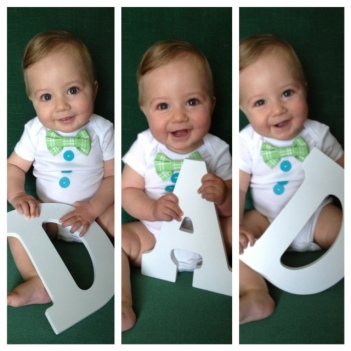
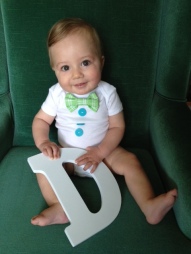
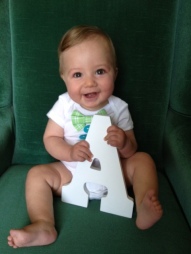
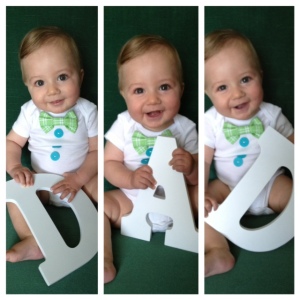
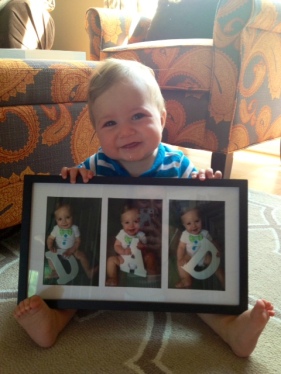
Okay, obviously you’ve seen this one all over Pinterest, so needless to say this isn’t an original idea but sooo stinkin cute nonetheless! I purchased a “D” and an “A” from Michael’s at $3.99 a piece and used a 30% off-entire-purchase coupon, I also returned the following day to purchase the frame (originally priced at $12.99) using a 40% off coupon. Confession: in my super stingy mind I did for a moment consider returning the letters after I was done (I know, terrible)  but I decided it would be best to keep them to repeat this Father’s Day craft  for my crafting play date and with any future children I may have. The onsie is another one of my DIY projects that I came up with specifically for this picture, check out the tutorial for DIY Little Man onsies here, they are super cheap and mostly no-sew! For the picture itself I just sat him on our vintage wing back chair (which actually made for the perfect backdrop!) and snapped his pictures with my smart phone. When I was done, I used the Walgreen’s photo app to upload my pics and picked them up the next time I was out, three 4X6 pictures cost me about $0.40 after coupons!!! Quick plug for the Walgreen’s photo app – I LOVE it, it’s so convenient since it’s all done from your phone, just make sure you Google “Walgreen’s photo coupons” before completing your order since there are always coupon codes for photo prints (this time it was 40% off!). Including all components this project cost me right around $14.00. TIP: If you want to save on framing costs simply purchase an 11X14 frame from a thrift store and arrange the photos side by side over a colored piece of paper or cardstock, as opposed to buying a three hole frame or simply use the app “picstitch” or another photo app/kiosk to turn your three images into a three frame single photo.

fath8

Baby P testing out the chair and modeling his onsie before the pics!

fath5

fath9

so proud of the finished product! lol Look at those curled little toes 🙂

“DADDY’S SHOES” PHOTO

fath

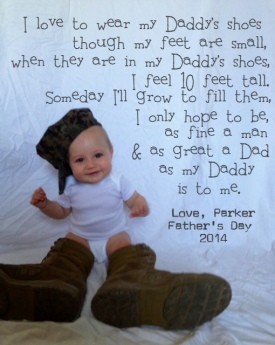
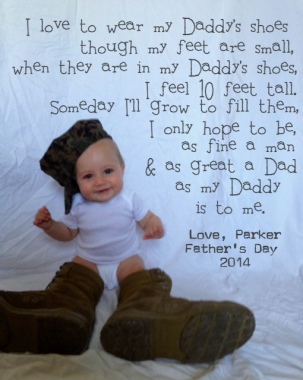
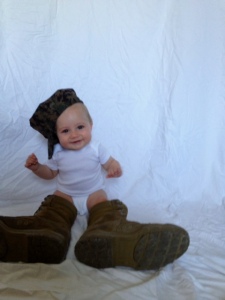
This photo was a copycat of a professional Father’s Day photo I found here on Pinterest, which I then adapted to include my hubby’s military gear. I figured since I was going to be recreating this idea with all of my Mommy friends, who are all military mamas as well, including the military boots and cover would be an extra special touch. To set up the picture I followed my usual steps for a DIY photo backdrop and then added the words using the free photo app “Phonto” (see this post for detailed instructions for use of the app) after taking the picture. This photo I printed in size 8X10 via Shutterfly for $1.79, the frame I will be using is one that we already have so that part will be free, which means … this gift cost me $1.79, say whaaaaaaat??! NOTE: When doing the picture with a little girl I plan to change the end of the poem to “… as great a person and as true a friend, as my Daddy is to me”, since the original poem is specifically for another male.

fd1

the original image before I added the text. I made sure to take the photo off center so that there would be a good amount of empty space for the poem.

There you have it – two ADORABLE Father’s Day gifts coming in right at around $15.00!!! My hubby will LOVE these gifts, and love their price tag as well!

fath1

We’ll be celebrating this wonderful man come Father’s Day! He does it all and then some, we love him so much! I caption this photo “look, here’s my Dad!” lol