DIY Scrap Fabric Wreath – St. Patty’s Day

stpatt

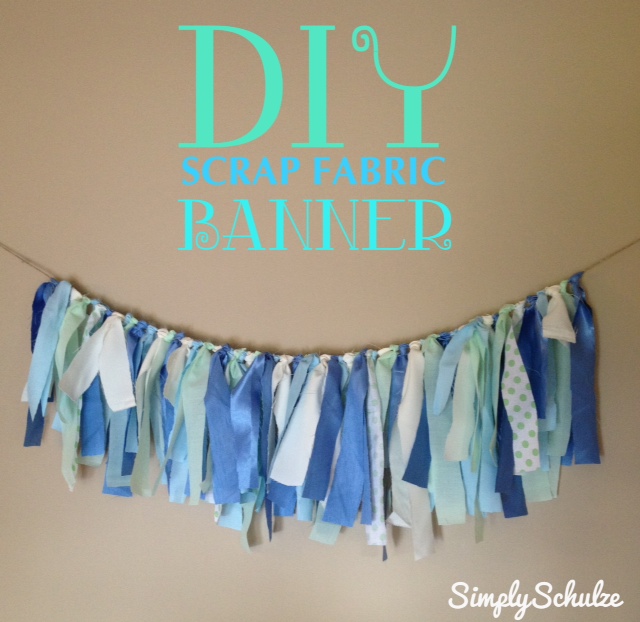
After creating my very first DIY wreath last April (hey, I’ll have to pay it a special tribute this year for prompting twelve months worth of creative wreath making! lol), I was determined to try out a different style of wreath each month. Since I gear each wreath toward either the season or whatever holiday happens to fall within that month, I wanted this wreath to be St. Patrick’s Day themed. While browsing Pinterest for style inspiration I came across this adorable St. Patty’s Day Rag Wreath (pictured below) via The Magic of Ordinary Things blog. I immediately knew that this had to be my next wreath since scrap fabric banners are basically my favorite go-to party décor item of all time (check out my tutorial here). Additionally, I already had a ton of left over green fabric from the various DIY décor projects I had created for Baby P’s “Wild One” party so I was happy to put that to use and the rest of the fabric I found at my local fabric store on the sale rack and in the remnants bin. This wreath is now in my top three favorites (I’ll have to do a “wreath year in review” come April and rank them all, lol), mostly because it resembles my beloved scrap fabric banners but also because it is SUPER cost effective, coming in at just under $7.00!!! If you’re ready for a little more variety among your conventional DIY wreaths, this is super fun and different and can be customized to fit any holiday or color scheme, so dig into your scraps and give this one a try!

my inspiration via "the magic of ordinary things" blog

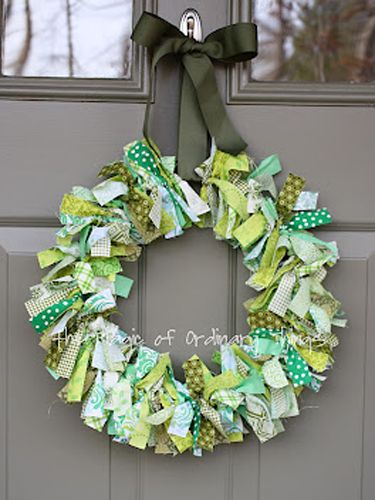
my inspiration via “the magic of ordinary things” blog

SUPPLIES

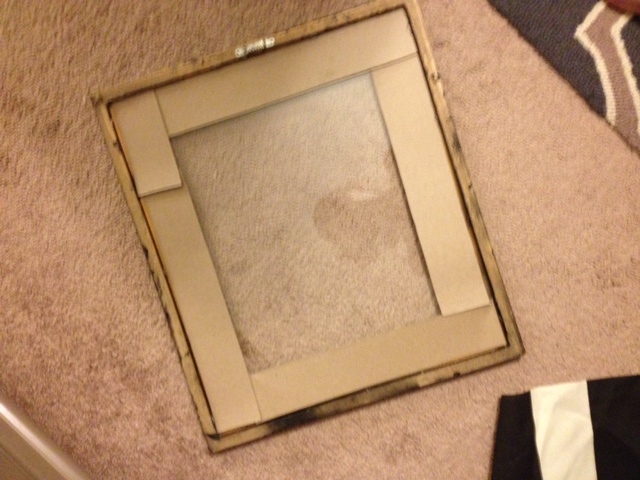
  • wire – since lovely home *eye roll* is the only one in the neighborhood without a storm door my wreaths need a fighting chance of standing up to the elements so I used about 3 feet of thick plastic covered wire that I found at Lowes (near the rope) this way the wire couldn’t rust and turn the color of the fabric, it cost about $0.30/ft. (so less than $1 to create a makeshift 12″ wreath frame). If you have a storm door or sheltered front door you can do what was done in the previously mentioned tutorial above and form a wire hanger into a circle.
  • fabric – the amount you need is entirely up to you and depends on how full you want your wreath to be and how many colors you would like to use. I used well over 100 strips, measuring about 1X6″ (as per the first tutorial).
  • duct tape

INSTRUCTIONS

  • Begin by forming your wire into a circle and securing it with duct tape (shipping or packing tape will also do). Mine was about 12″ in diameter.
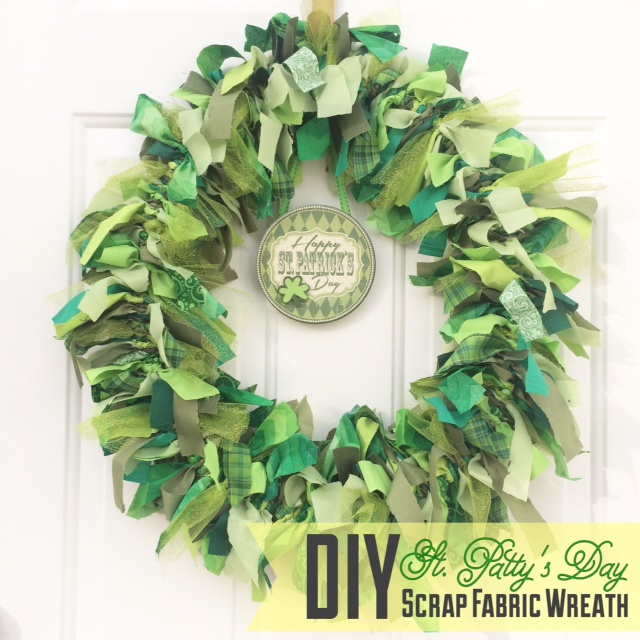
  • Next, tie your fabric scraps around the wreath until it is completely covered and none of the wire is showing. You don’t even need to knot it, just a simple single tie will do! At this point you can embellish the wreath in any additional manner that you please. I added a mini St. Patrick’s Day sign that I found at Hobby Lobby for 50% off.
stpattt

Finished product!

stpattyboard2

Click on this photo to check out my post on how I created my giant reversible “lucky” sign!

DIY Fall Wine Bottle Decor – Perfect for any season!

image (95)

So before I get too ahead of myself with incessant posts about baby P’s first birthday and DIY Halloween decor I just wanted to share this little tid bit of my fall decor that I whipped up using things I always have on hand – wine bottles and scrap fabric 🙂 Now as I do on at least one day most weeks, I found myself in the fabric store buying the fall themed burlap for my DIY Autumn Pennant Banner and happened to walk past their display of little seasonal over-priced chochkies (is that how you spell that word? lol) and saw a cute little decorated wine bottle. As I do with most of the fabric store ready-made decor I passed since I was not about to pay $12.99 for a bottle (a small one at that, if it had actually contained wine at any point I feel bad for the person who emptied it – they got jipped! lol) wrapped in twine, however I did snap a picture and make a mental must-DIY-that note.

Before I get to the tutorial I think it’s worth mentioning that as I fulfill my holiday decorating goal of keeping my home decor themed with each holiday, I’m realizing the fact that Halloween falls right in the middle of the start of fall and Thanksgiving really messes with decor in that I came up with a whole bunch of autumn-y type ideas for our home only to remember that I would have to put up Halloween pieces and then pull the fall stuff out again for the whole harvest/autumn theme that goes along with Thanksgiving. Super complicated stuff this decorating business is, lol! Anyway, before I figured out that I would wind up in a decorating pickle, I decided to re-create the little wine bottle craft that I saw in the fabric store the week before only I would go a step further and create a set of four! Two things I love about this project: first, it is super easy and cheap to create and while I know wine isn’t free but lets be real, wine bottles are plentiful at the Schulze home, lol. Second, since there are four bottles and the embellishments are interchangeable I can easily swap out the wording for any holiday for instance, “noel” for Christmas, “love” for Valentine’s Day, “booo” for Halloween and so on. This can be made with any scrap fabric if you have a particular color scheme in mind or want it to fit the theme of a particular room instead of a holiday that would work too!

my inspiration!

my inspiration!

my version :)

my version 🙂

SUPPLIES

*this supply list is for my specific creation, any scrap fabric combinations can be used!

  • 4 wine bottles, labels removed
  • scrap burlap (plain and printed)
  • scrap lace
  • scrap fall print fabric
  • twine
  • gold ribbon
  • faux fall leaves
  • crafting letters or stencils
  • orange acrylic paint
  • hot glue/glue gun

DIRECTIONS

Step 1: I began by removing the labels from my wine bottles by soaking them in some warm soapy water then scrubbing off with a sponge. Since I drink relatively cheap wine the labels remove pretty easily but if yours are a little more stubborn Goo-Gone will take them right off.

image (89)

Step 2: I then cut my strips of plain burlap and lace and secured them around each of the wine bottles using a few dots of hot glue.

image (90)

my lace was actually cut from a pair of curtains that I found at a thrift store for $0.50!

my lace was actually cut from a pair of curtains that I found at a thrift store for $0.50!

image (92)

Step 3: Next I prepared my “fall” portion of the decor by cutting four small squares of fall themed fabric and then four smaller squares of printed burlap to be glued atop the first squares. Next took my faux fall leaves (purchased at Walmart for $0.98 for a package of about 12!) and used a dot of hot glue to attach two to each fabric square.

image (93)

98 cent Walmart leaves!

98 cent Walmart leaves!

Step 4: At this point I took my craft letters left over from another project and painted them orange (they were originally brown but I felt that the orange stuck out better, at this point you can also stencil the wording directly onto your fabric squares using acrylic paint). Once they had dried I glued each to the front of my fabric squares. To attach the square to the bottles I cut two small holes in the top of each of the fabric piece and ran a piece of twine through each and tied them around the body of the wine bottles. Finally I tied a decorative ribbon bow atop each of the bottle necks – done!

finished product :)

finished product 🙂

Rustic Burlap “Autumn” Pennant Banner

photo (8)

So as I’ve mentioned, last year I made a commitment to myself to keep up with my holiday and seasonal decor. As a kid my Mom always put a lot of time (that she didn’t have) and effort into decorating my childhood home for the holidays and I’d like to do the same for baby P and any other future children I may have. Since in my opinion it’s a tad early for Halloween decor (it still feels like summer!) I thought I’d get my decorating started with a few easy fall themed pieces that compliment our regular home decor. This pennant banner is super easy to create and is both fun and elegant and most importantly – cheap! Mine cost about $3.00 to create. Happy fall, now go make a cute pennant banner to celebrate 🙂

pennantbur

This project was inspired by my DIY Rustic Pennant Banners that I use for party decor, follow this link to see how you can jazz up your next event!

My fall version!

My fall version!

SUPPLIES:

  • Burlap – the amount you need depends on what you would like your banner to say and how many letters it will contain, but you will likely need less than 1/4 of yard which will cost you about $1.00-$2.00.
  • Twine
  • Brown acrylic paint
  • Small paint brush
  • Large stencils – I used my reusable stencils that I used to create my DIY Rustic Burlap Pennant Banners, they are available at Staples.
  • scrap fabric (optional)
  • Scissors
  • Scrap paper

INSTRUCTIONS:

Step 1: Begin by creating a pattern out of scrap paper (I just used a piece of computer paper out of my recycling bin) in whatever shape you would like your pennants to be. I chose a square shape with an inverted triangle at the bottom which measured about 7″ wide by 10″ long.

I made sure that my letter fit atop the pattern.

I made sure that my letter fit atop the pattern.

Step 2: Once you have your pattern, use it as a guide and use a marker to trace as many as you need onto the back of your burlap then cut them out.

photo 2 (4)photo 3 (4)

Step 3: After all of your pieces have been cut. Use your stencils and acrylic paint to apply your letters to the tops of the burlap using your small paint brush. Use a generous amount of paint. Set aside to dry.

Step 4: Once your letters have dried use your scissors to poke a small hole in either end of each of the tops of the pennants through which you will thread a piece of twine. At this point if you wish you can dab some mod podge on the ends of your pennants to keep them from fraying but since mine was going to be up high out of tiny finger reach (lol) I didn’t bother.

Step 5 (optional): If you want to add little fabric tassels to the ends to jazz it up use the same method I used in creating my Scrap Fabric Banner but instead with a few pieces knotted together.

IMG_0168 IMG_0167

DIY Fabric Covered Photo Mat – Made from a Cereal Box!!!

fabmat4

Who doesn’t love free stuff? I actually have quite a few “free” projects in the works currently that I’m super excited about, but for now I’ll share this one with you as it was part of our gallery wall which I will reveal soon! This project actually happened by accident when I realized that the frame I was using wasn’t a standard photo frame and I was going to need to cut a photo mat to fit it. Since the piece of art (I shouldn’t say art, it was a weird picture of a cat or something, lol) that was originally in the frame had an ivory mat around it I was going to have J cut it to fit using a box cutter. Of course he misunderstood me (anybody else have an issue with their men having selective hearing when it comes to their crafting requests? lol) and cut the wrong part of the mat, rendering the part I needed useless. Boo-hoo! It was time to come up with a plan B, which I thought would be just to buy and cut a standard mat to size but then I realized that a standard mat wouldn’t fit this frame either (gahh!). Just as I was getting super frustrated and about to ax the use of that particular frame altogether, I remembered that I had seen a picture mat that somebody had covered in fabric by simply mod podging fabric onto a plain picture mat. Now, that still didn’t solve my problem of not having the right mat size, but if I thought that if I could only find a thin cardboard to fashion my own mat I could take advantage of my left over fabric from past projects. I knew that a poster board cut to size would work just fine but in the interest of not having to traipse into town to get one I thought to myself “what do I have in the house that is of similar thickness/material to a poster board?” and then it came to me – a cereal box!!! About a half hour and a little mod podge later I had myself another fancy photo mat (check out my first DIY photo mat here) that not only matched the fabric on our side-light window panels but was free!!! All it required was a little thinking outside of the “box”, so to speak (get it? cereal box, ha.ha.ha). I hope this inspires a free photo mat on your end (you need not use a cereal box like I did, any thin cardboard will do) and should you not have the need for a photo mat right now, keep this one in mind as a great DIY gift opportunity come the holidays!

I'll have plenty of more frame projects in the works if I keep catching more adorable moments like this! These two melt my heart <3

I’ll have plenty of more frame projects in the works if I keep catching more adorable moments like this! These two melt my heart ❤


DIY FABRIC PHOTO MAT

SUPPLIES:

  • 1 large cereal box or poster board of some sort
  • fabric of your choice
  • mod podge (I used matte finish but it doesn’t matter what you use)
  • glue gun & hot glue
  • foam brush
  • measuring tape
  • scissors

INSTRUCTIONS:

Step 1: If you are using a cereal box break the box down by cutting along one of the corners so that it can lay flat like a piece of cardboard. Then measure and cut four strips of equal length or four pieces that can come together to form a rectangular mat since it wont matter what your pieces look like beneath the fabric as long as the shape of the mat is even (depending on the size of your box you may not be able to get four equal pieces but rather four pieces just long enough to overlap and connect to form a rectangle). If using a poster board simply measure and draw out your mat and then cut it out already formed.

fabmat

My cereal box! In the interest of pinching our pennies I opt for “crisp rice” instead of rice krispies haha

Step 2: Once you have your four pieces connect them so that your print side (if using a cereal box) is all facing one direction using hot glue to form the mat. Ignore this step if you have used a poster board and your mat is ready to go. Now you are ready to measure and add your fabric!

fabmat1

ensuring that it fits in the frame

fabmat2

Step 3:  Measure your fabric by laying the fabric print side down (upside down) and laying your mat on top, use a pencil or pen to mark an area just a tad bit larger than your mat size or enough to be folded over the edges (I will explain in the subsequent steps). Once you have marked your rectangle on the fabric, cut it out using your scissors (this should be obvious but keep the rectangle in tact! To cut the center simply puncture a hole in the center of your fabric and cut along the insides).

Step 4: Place your mat so that the non-print side is facing up and lay your fabric cut out over the mat to make sure that it will line up correctly. In each of the inner and outer corners cut a small slit that extends from the edge of the fabric to the corner of the mat (this is so your fabric can be tucked underneath without puckering at the corners).

Step 5: Now you are ready to attach the fabric to the mat. Using your foam brush, brush a generous amount of mod podge onto the mat surface and then lay your fabric atop it and press down to secure. Some mod podge will likely seep through the fabric, this is fine, simply use your foam brush to brush it off so that it doesn’t form clumps. At this point your fabric will still be larger than necessary for the mat but allow it to dry this way before moving onto the next step.

Step 6: Once your fabric has dried for the most part, turn your mat upside down and use hot glue to attach your fabric’s edges to the underneath of the mat, making sure to pull it tightly so that isn’t loose along the edges and holds to the mat securely.

Step 7: Now turn your mat back over and add another coat of mod podge to the top of the fabric, ensuring that you are adding and even layer and are not allowing it to pool or clump along the top. Allow it to dry and you are ready to use it in your frame!!! Ta-da!!! 

fabmat5

My DIY frame displayed on our gallery wall!


To see more of our family pictures from baby P’s 6 month photo session see this post! 


DIY Scrap Fabric Banner

scrap4

Let me start by saying I am in love with this craft. This is the quicker, shabby-chic version of a traditional fabric pennant banner (if this isn’t quite your thang, check out my DIY no-sew fabric pennant banner tutorial or my DIY rustic burlap pennant banner tutorial). I plan to come back to this craft time and time again, especially for holiday and party decor. I have seen these done before, however, never had a reason to attempt one until it came time to throw my friend a baby shower and of course I got way carried away when it came to decor and decided that this would make a great last minute addition. Using scrap fabric left over from the wreath I had made the mama-to-be (I will post about the wreath and the shower itself soon!), I was able to create this adorable scrap fabric banner in about 20 minutes! I think my favorite thing about this banner (aside from the fact that it was free to make since I reused left over supplies), is that while it is simply strips of fabric tied to a string, it is a great way to tie all of your decor together by incorporating all of the colors in your color scheme. This would also make an adorable addition to a nursery, I will absolutely come back to this idea for any future nurseries I may be decorating in the distant future! If you have an event coming up and are looking to add a little something extra, just dig around in the depths of your fabric scraps and chances are you can throw something together with scrap that you already have. If you are making this with no fabric on hand, no problem – hit up the remnants or clearance bin at your local fabric store or Walmart, you can often get close to a yard for under a dollar which is much more than you will need for this project anyway! I hope this inspires your next holiday or party decor project and remember not to throw away any of those fabric scraps along the way 🙂 

scrap5

The banner as we displayed it at the baby shower over a chalkboard with baby’s monogram!

DIY SCRAP FABRIC BANNER

YOU WILL NEED:

  • Fabric – the amount and color will depend on your color scheme and the size/length of your banner. There is no limit to the kind of fabric either, mix textures and prints and get creative!
  • Twine/Ribbon/String – to tie your scraps around, I used left over twine from another project but a ribbon of a complimentary color would have been nice as well!
  • Scissors

INSTRUCTIONS:

Step 1: Begin by cutting your strips of fabric. Whether or not all of your strips are the same width and length is up to you. When cutting my strips I started with one fabric and cut a bunch of the same width and length, then moved onto the next fabric and cut them about the same width but a different length from the original group. 

scrap3

Step 2: Lay out a piece of twine or ribbon, the length will depend on how long you want your banner to be. Make sure you leave enough slack on either end for hanging.

Step 3: Fold a fabric strip in half (as shown) and lay it across the twine or ribbon, then pull the two “tails” of the fabric under and through the “loop” (see picture), pulling it tight to form a knot. 

scrapscrap1

Step 4: Continue in this fashion, after each knot is made slide it down so that it fits snugly against the one before. I arranged mine in no particular order but you can follow a pattern of colors to make the banner look more uniform if you wish. 

scrap6

Finished product! This would be great to hang above the crib in a nursery, I know my hubby was too paranoid to let me hang anything heavy over baby P (even wooden letters lol) so this would be a great worry-free piece of decor! 🙂