So if you’ve seen my post on DIY holiday photos with my squishy baby, you better believe I was going to do a Mother’s Day pic with P as well :). Let me entice you into doing this craft by saying, it cost me about $3.00 (and depending on how often you craft and the supplies you have available, it very well could be free). Since there aren’t any real Mother’s Day props, this sparked my idea for a DIY pennant banner – simple and spring-y and able to double as both prop and springtime home decor! This project is super quick and easy (no sewing, yay!) and only cost a few dollars to make. The finished product was super cute and made the perfect backdrop for my Mother’s Day photo, I liked it so much in fact, I will definitely be revisiting this project next time I need some quick party decor and especially when I have to decorate the next nursery! Speaking of party decor, if you’re into pennant banners, check out my friend Courtney’s DIY chalkboard pennant banner that she made for her son’s first birthday party, it’s adorable as is her blog! Here is how I made and used my pennant banner:
YOU WILL NEED:
- Fabric of your choice (the amount depends on how long you would like your banner to be)
- Fabric stiffener (available anywhere fabric is sold, if you are using a stiff or heavy fabric you may not need this)
- Glue Gun
- Ribbon of your choice
- Scissors
- Wax Paper (optional, it is just so you have a surface to work on)

TIP: I hit up the remnants bucket at my local fabric store and purchased these random 12X12 squares for less than $1.00 each. If you don’t have a print/fabric preference you can use an old clothing item or one that you purchase from a thrift store.
INSTRUCTIONS:
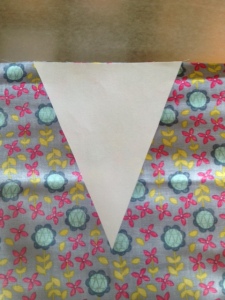
- First, create a pattern for your pennant in whatever shape you would like. I chose a traditional triangular shape and using a ruler and a blank piece of scrap paper, drew a triangle 6″ wide and 7″ long and cut it out using scissors.
- Next, lay your fabric print side down and using a pen or other writing instrument, trace as many triangles as necessary onto to fabric, then cut each one out.

- Arrange your fabric on the wax paper (or other surface) and spray each one with an even coat of fabric stiffener. Mine was the “quick dry” kind so it only took about an hour to dry, mine also gave me the option to put it in the microwave for 30 secs to speed up the drying process but I didn’t feel like doing the extra work, but if you are in a rush the microwave is apparently a drying option. Also, as I mentioned above, fabric stiffener is not vital to the project, but because I was using a lightweight material I wanted to be sure it laid flat and stiff when hung.

Don’t mind the markers, I was just weighing down the edges for the pic.
- Once your pennants have all dried, lay them face up, tip to tip on a piece of wax paper. Heat your glue gun then, working one by one, apply a thin line of hot glue to the top of each triangle and then apply your ribbon pressing down firmly (be sure to leave enough ribbon length before the start of the first pennant for hanging). Once you have finished display however you would like! See my example below of how I used it for a photo prop and be sure to read my post on baby P’s Mother’s Day pic and his other holiday pics!


Here is my most adorable squishy baby hangin out under my banners! Check out my post on baby P’s Mother’s Day Pic to see how I added the lettering using only my smart phone!

Pingback: DIY Scrap Fabric Banner | simplyschulze