DIY “Where the Wild Things Are” Tissue Paper Character Poms

wtwtapoms

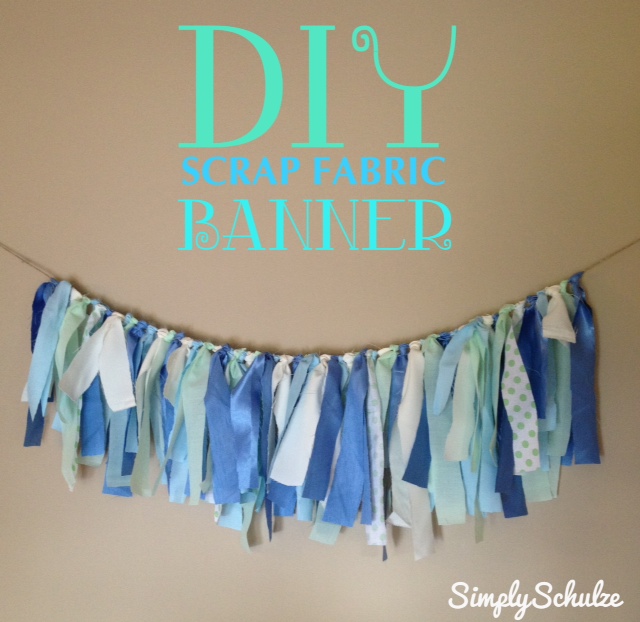
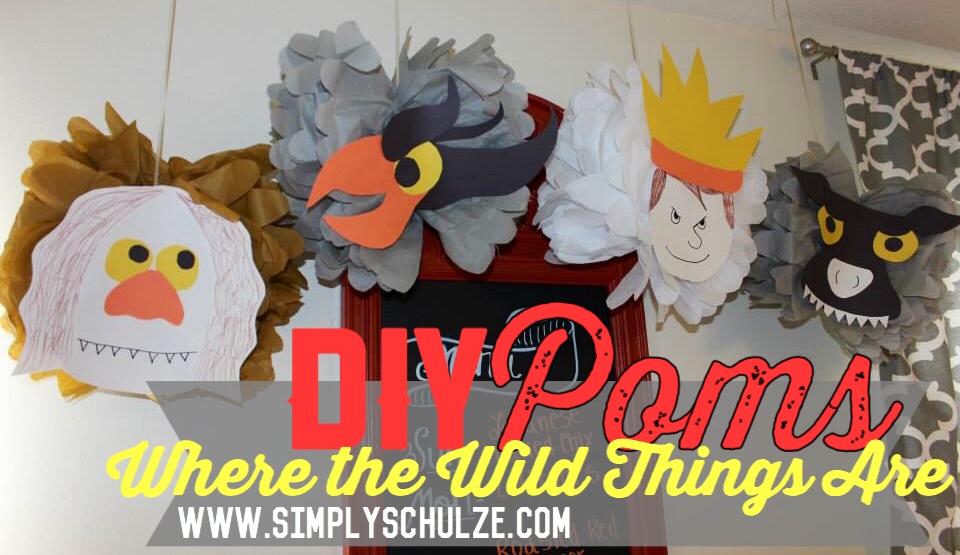
Okay, so I’m slowly but surely catching up on posts about Baby P’s “Where the Wild Things Are” first birthday bash (check out my last two posts on my DIY hand painted sign and DIY Pinata) so I’m going to follow those up with a DIY post creating a piece of party décor that seem to be all the rage on Pinterest – tissue poms! Let me start by saying that I love tissue poms, they are SO easy to create (despite the fact that they are sold on Etsy and at local craft stores for much more than they are worth) and are the perfect addition to any party theme, adding a sort of whimsical feel for just a few dollars. Needless to say anytime I host a party of any kind I can always be found floofing (is that a word? lol) and hanging tissue poms right before the event, haha.

When it came time for P’s party I was trolling Etsy for “Where the Wild Things Are” design ideas that I could possibly DIY and came across the most adorable set of character tissue poms that were listed for (hold on to your hats) $54.00!!! That’s right folks, five-four dollars, almost double what it costs me to fill the tank of my SUV (off topic but are you not loving gas prices right now? lol), for an item made up of mostly tissue paper – unreal. I didn’t do any further investigation to see if the item was actually a hot seller (I am to this day blown away by the price, haha) but I’m glad that I was able to use it as inspiration, after all it was as simple as creating a few basic tissue poms and gluing on some construction paper faces!

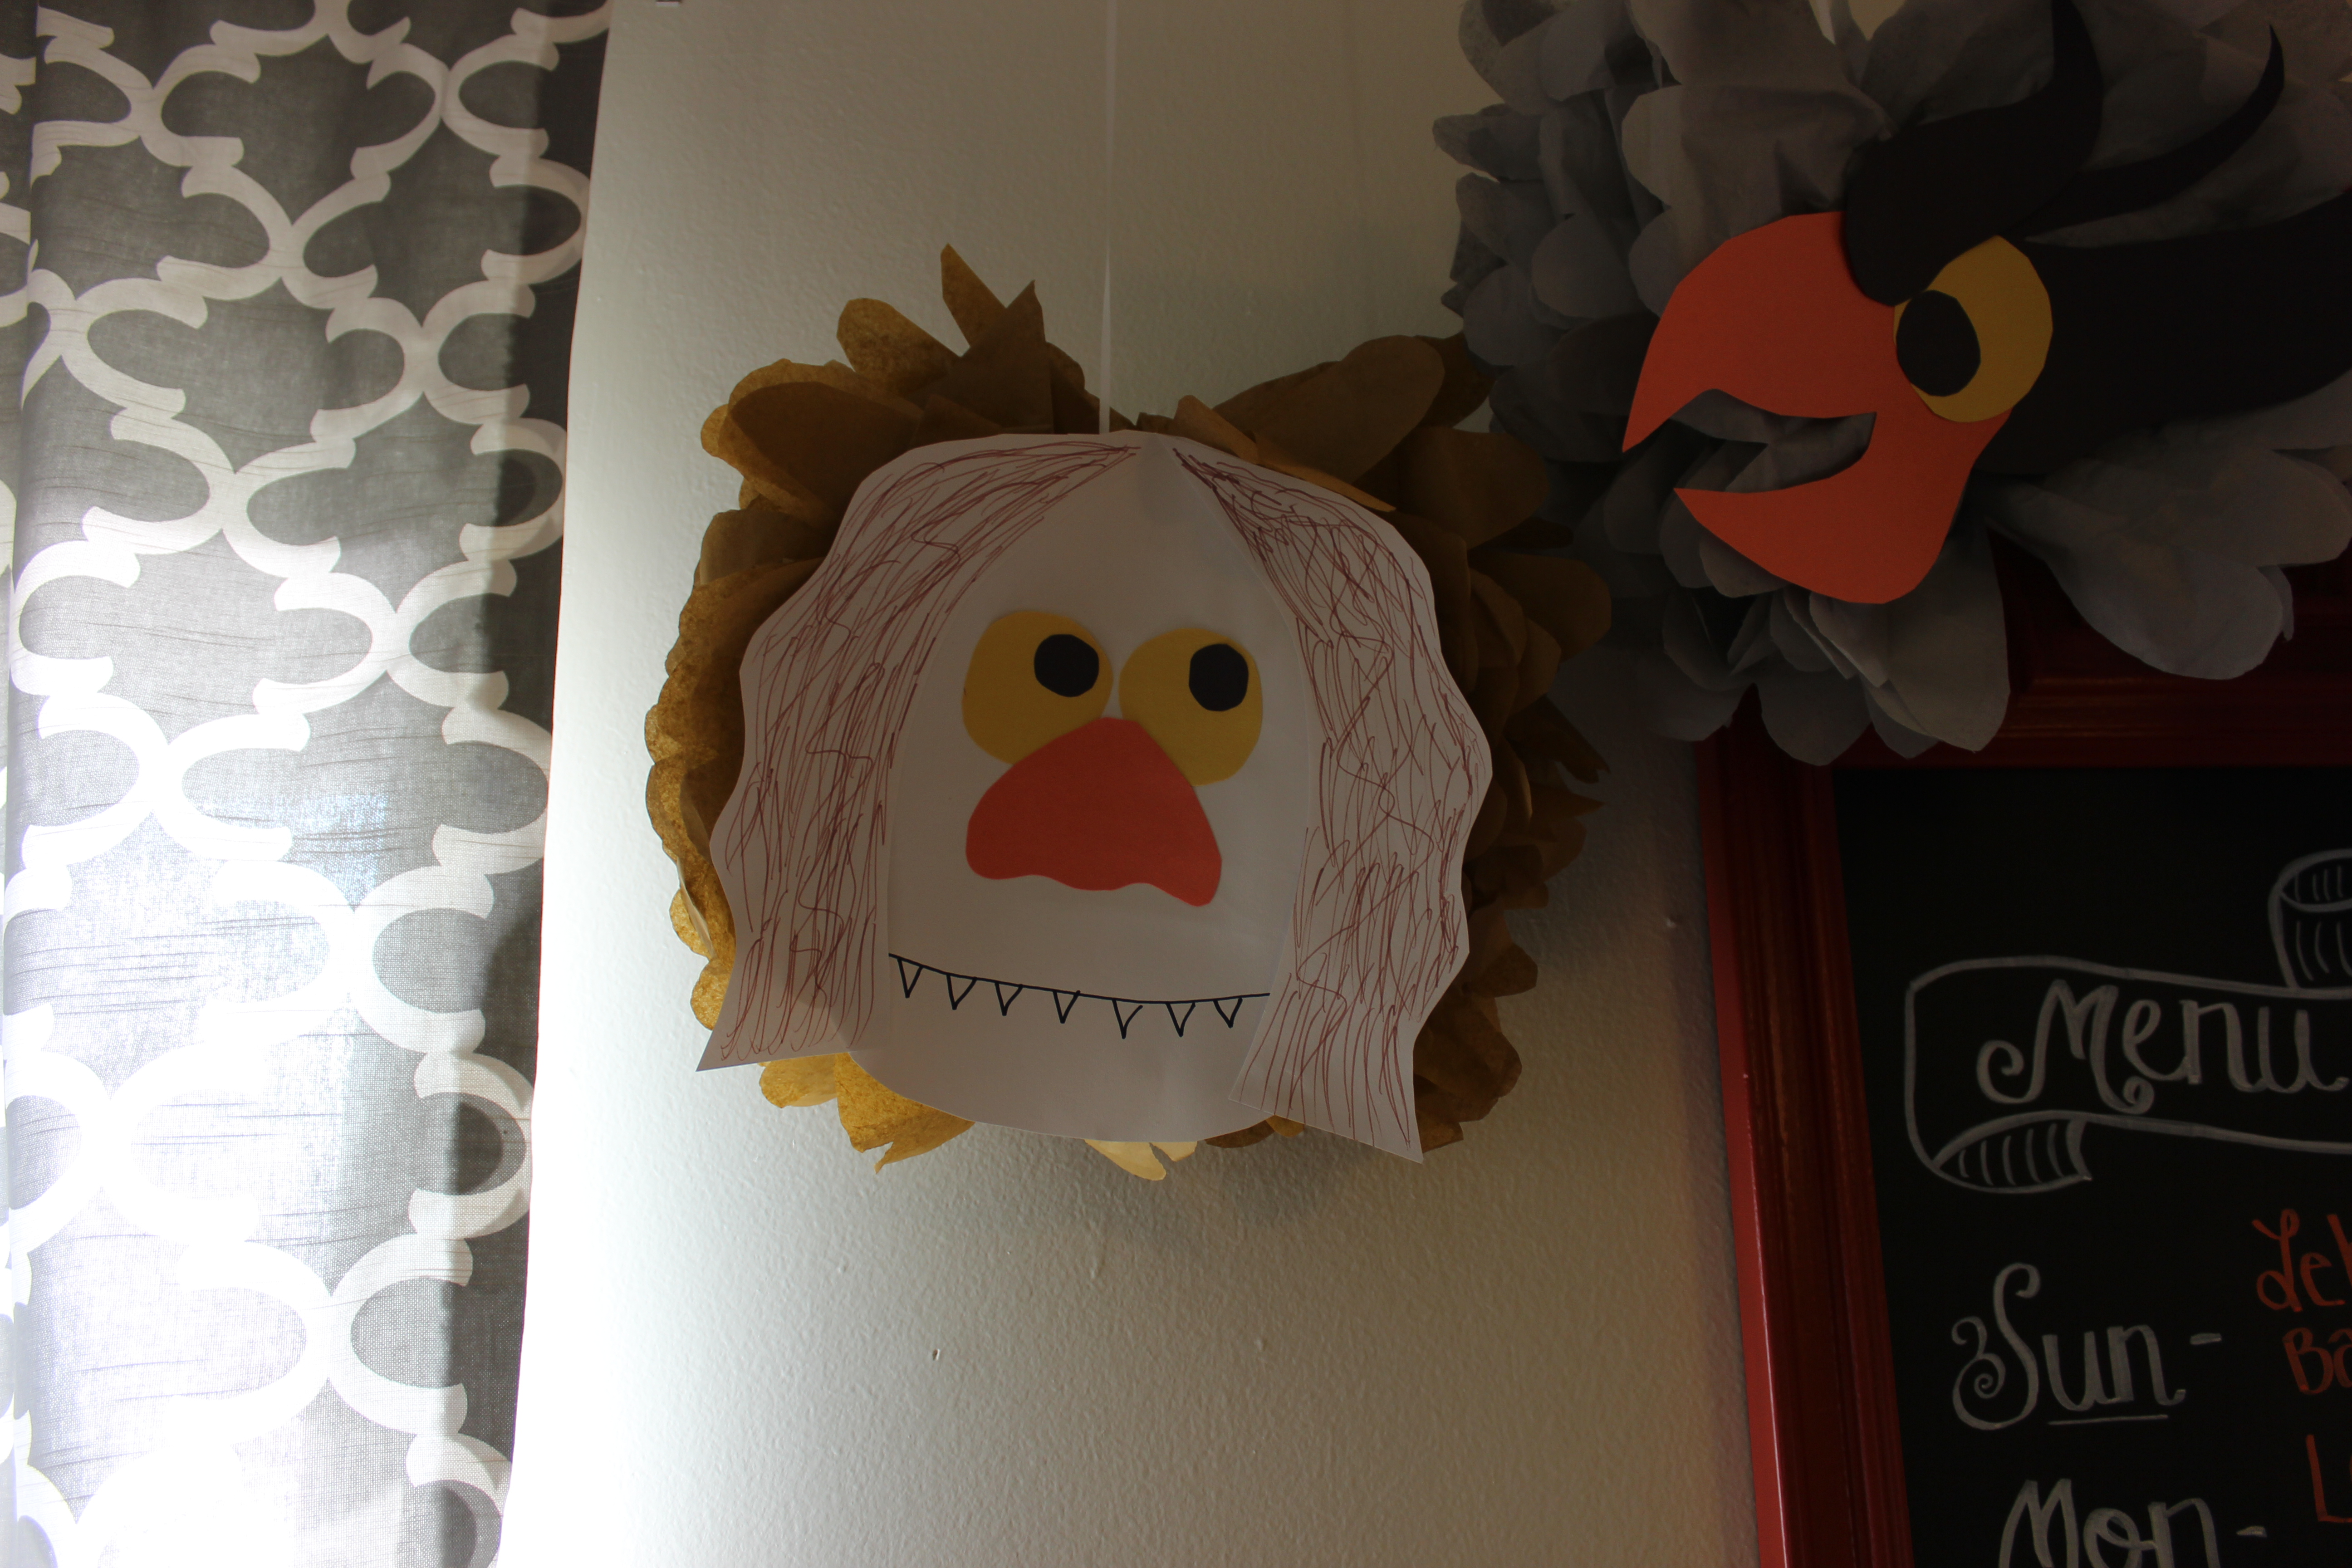
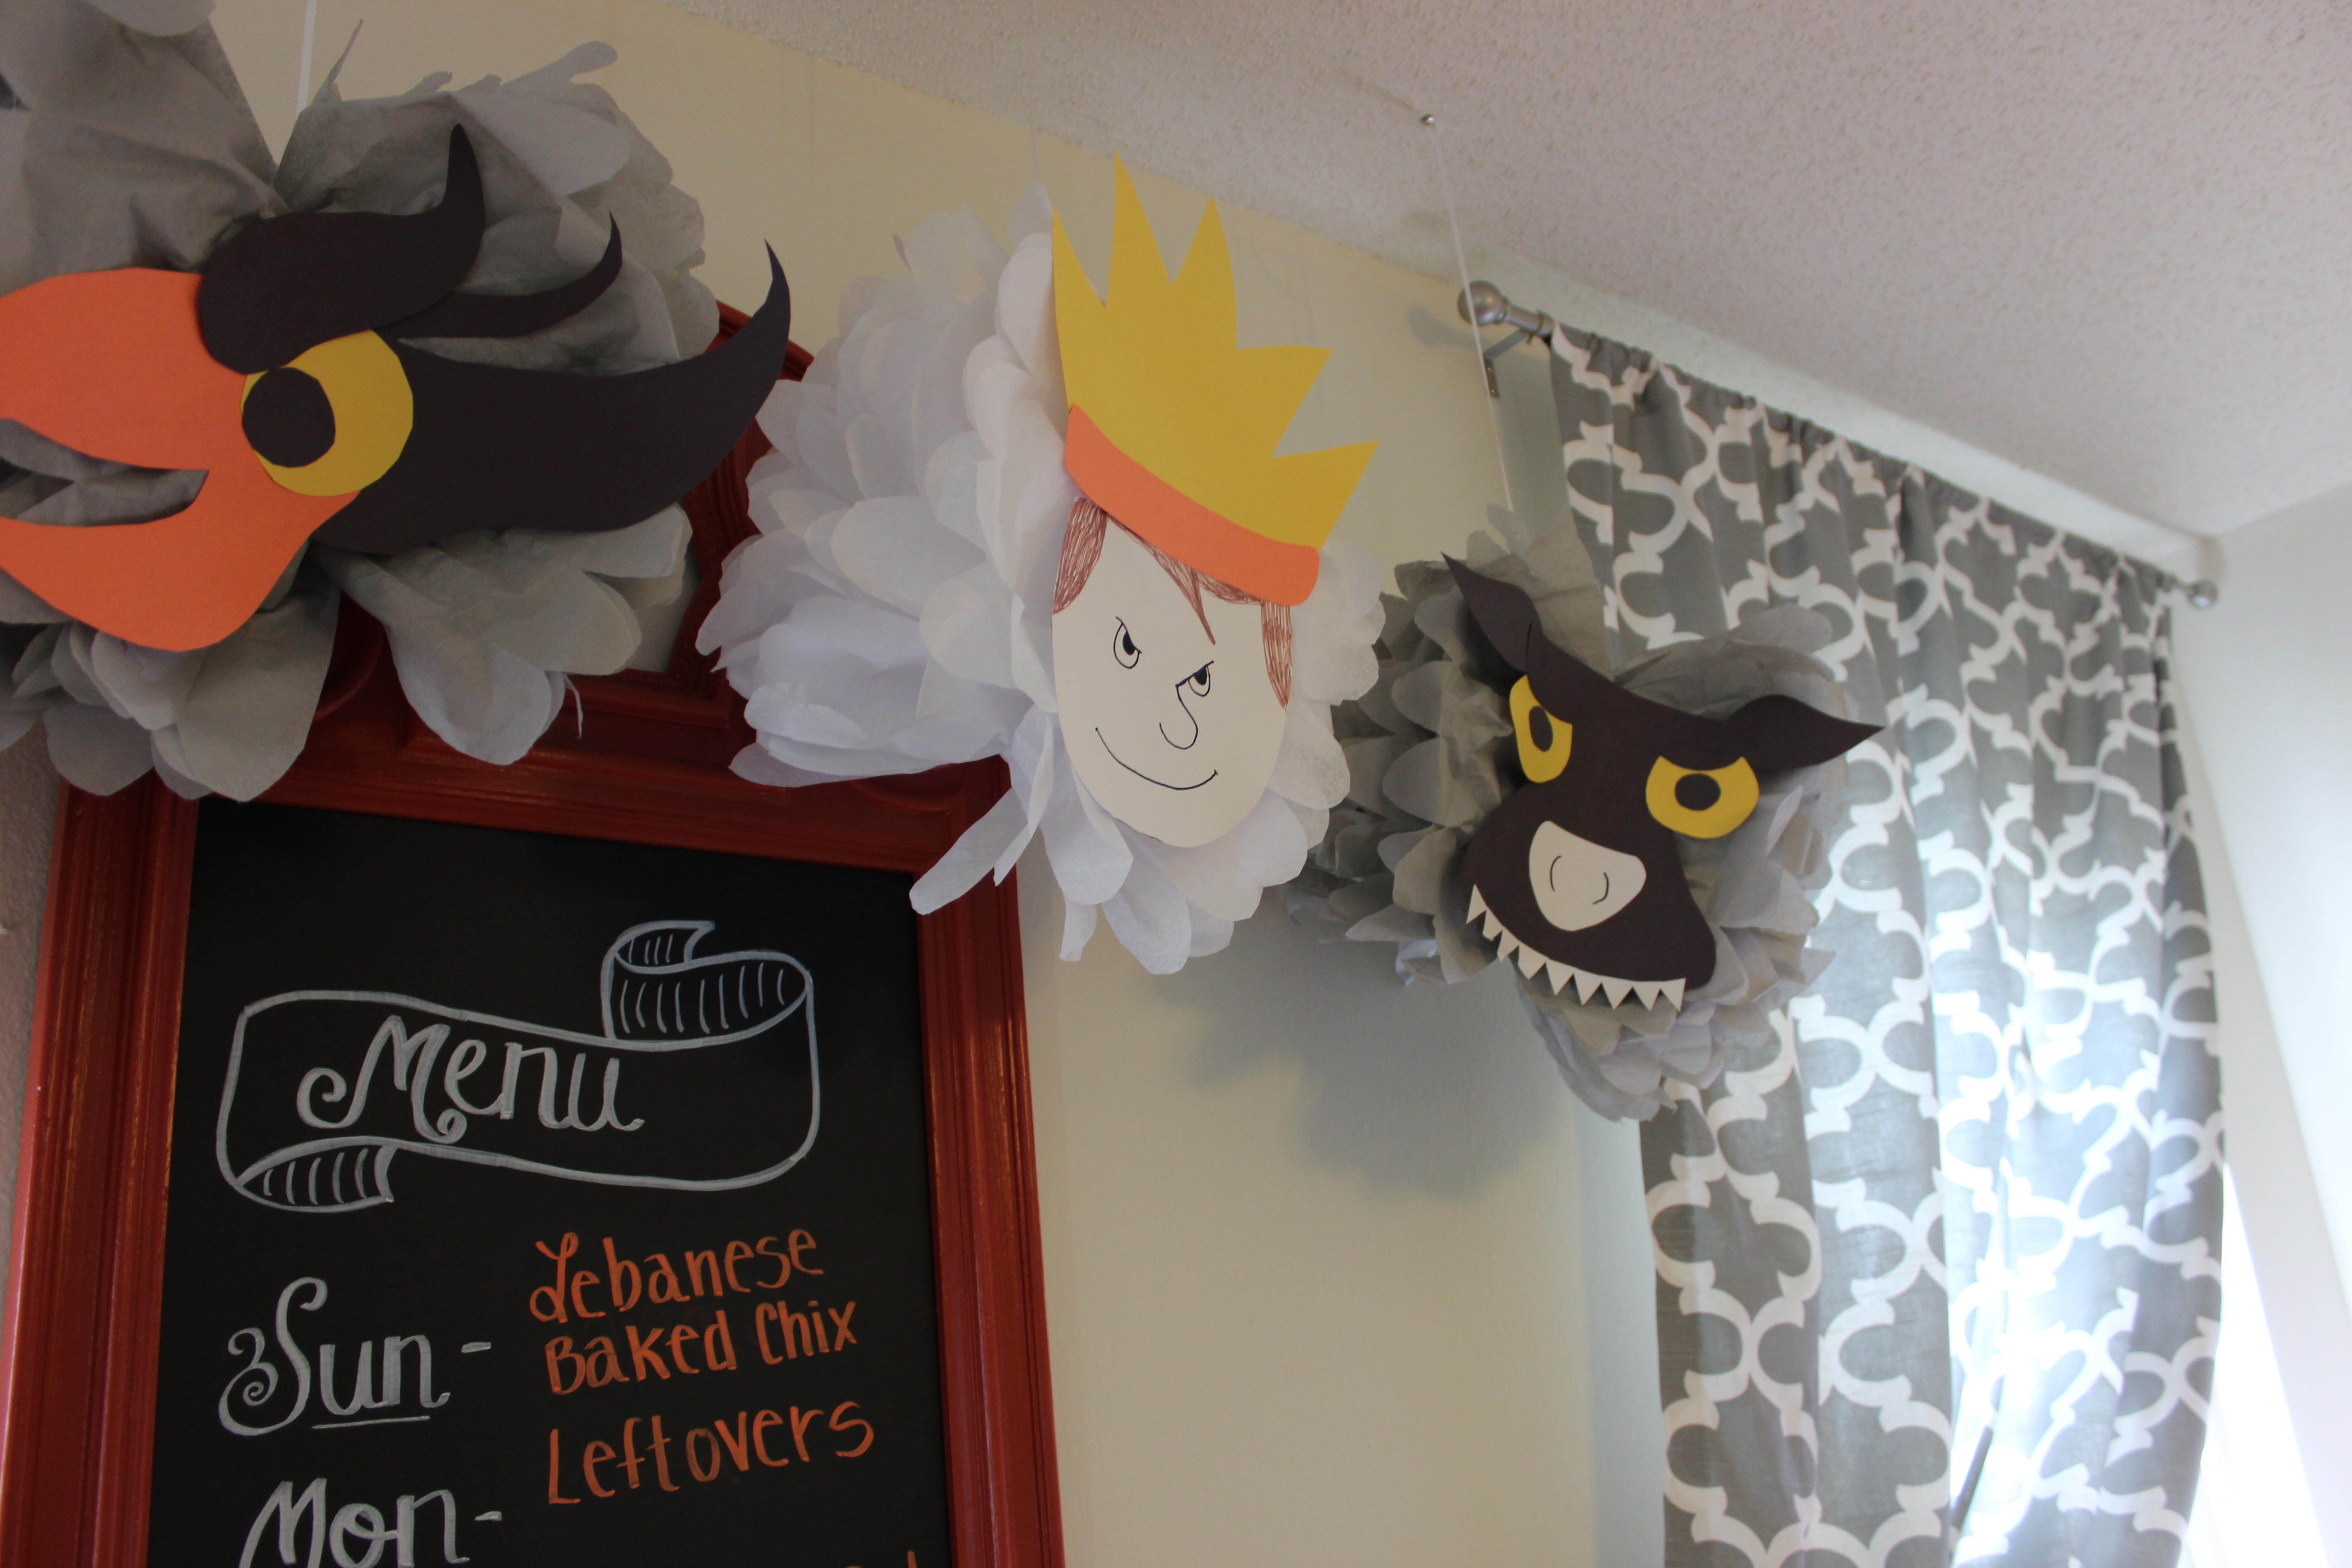
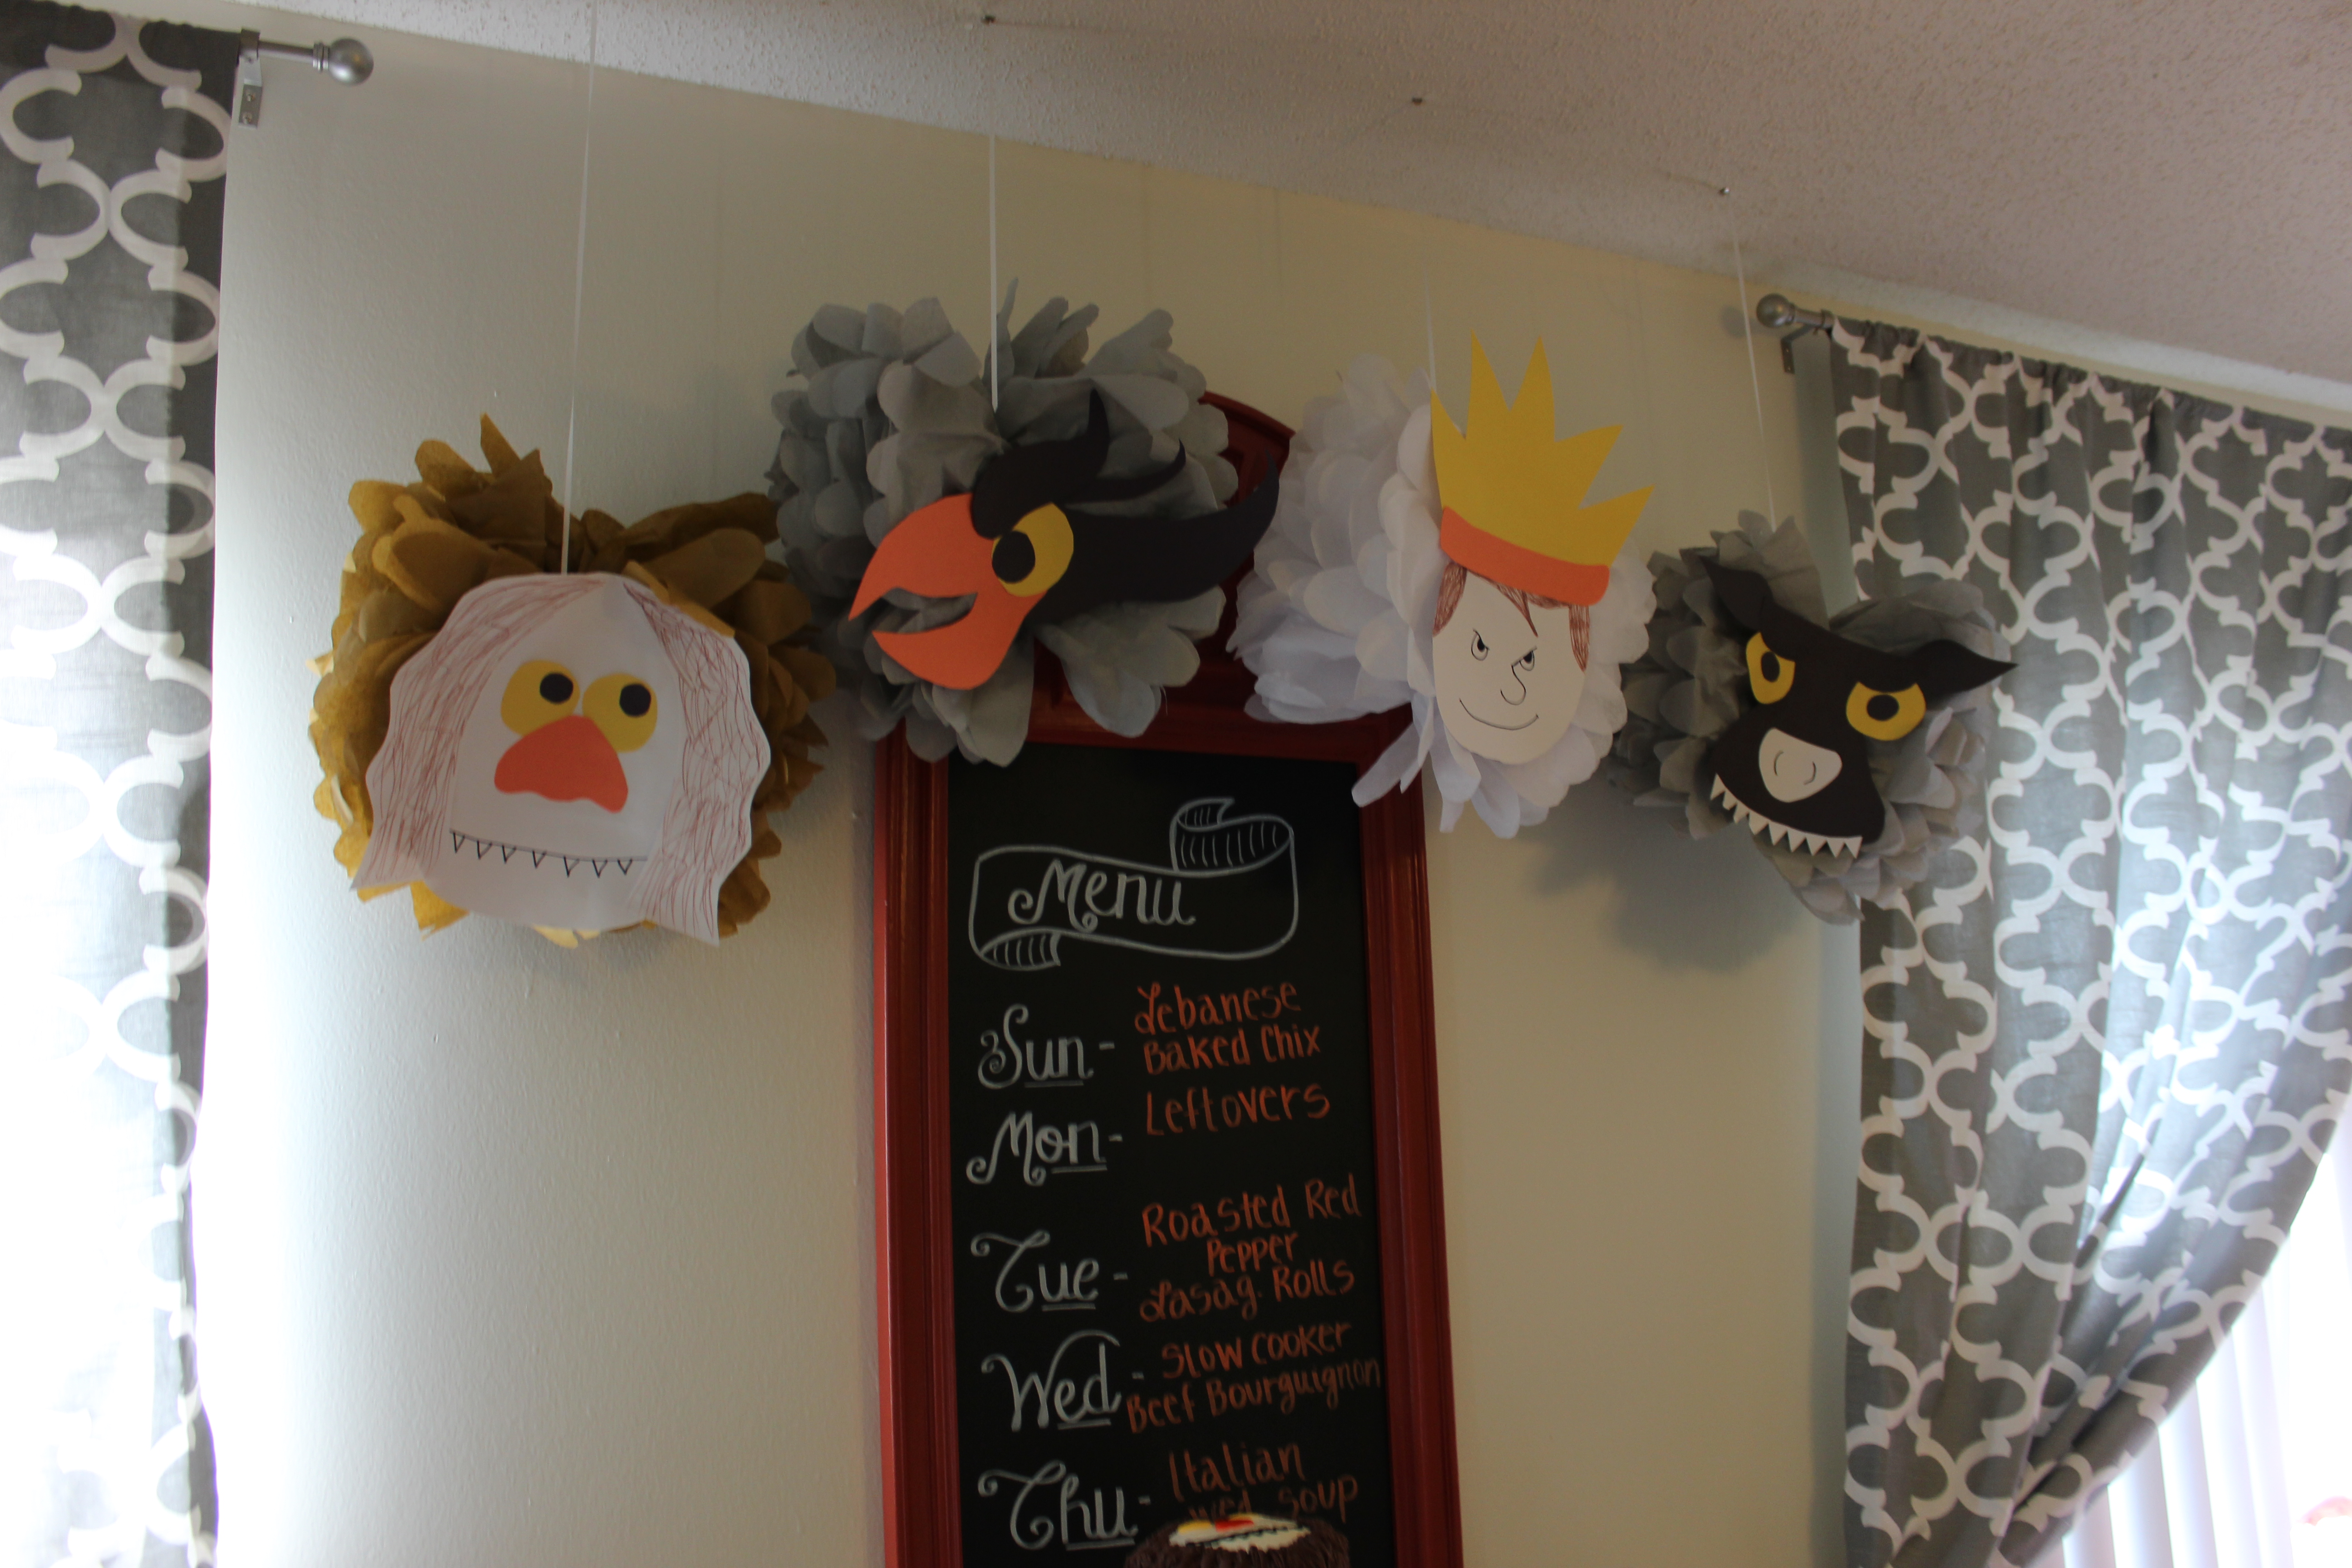
I don’t have step-by-step photos for this one because as long as you can figure out how to make the poms themselves using either YouTube or Pinterest tutorials then the rest will be pretty self explanatory, all I did was cut the various shapes for the “wild thing” faces out of construction paper and used magic markers to color in where needed. Once I assembled the faces I used Elmers glue to attach them to the front of each of the poms, allowed them to dry and that was that! This was a super easy and fun way to jazz up the party décor and I definitely see myself returning to this idea for future parties, as you can basically create a character from any pom.

IMG_0342

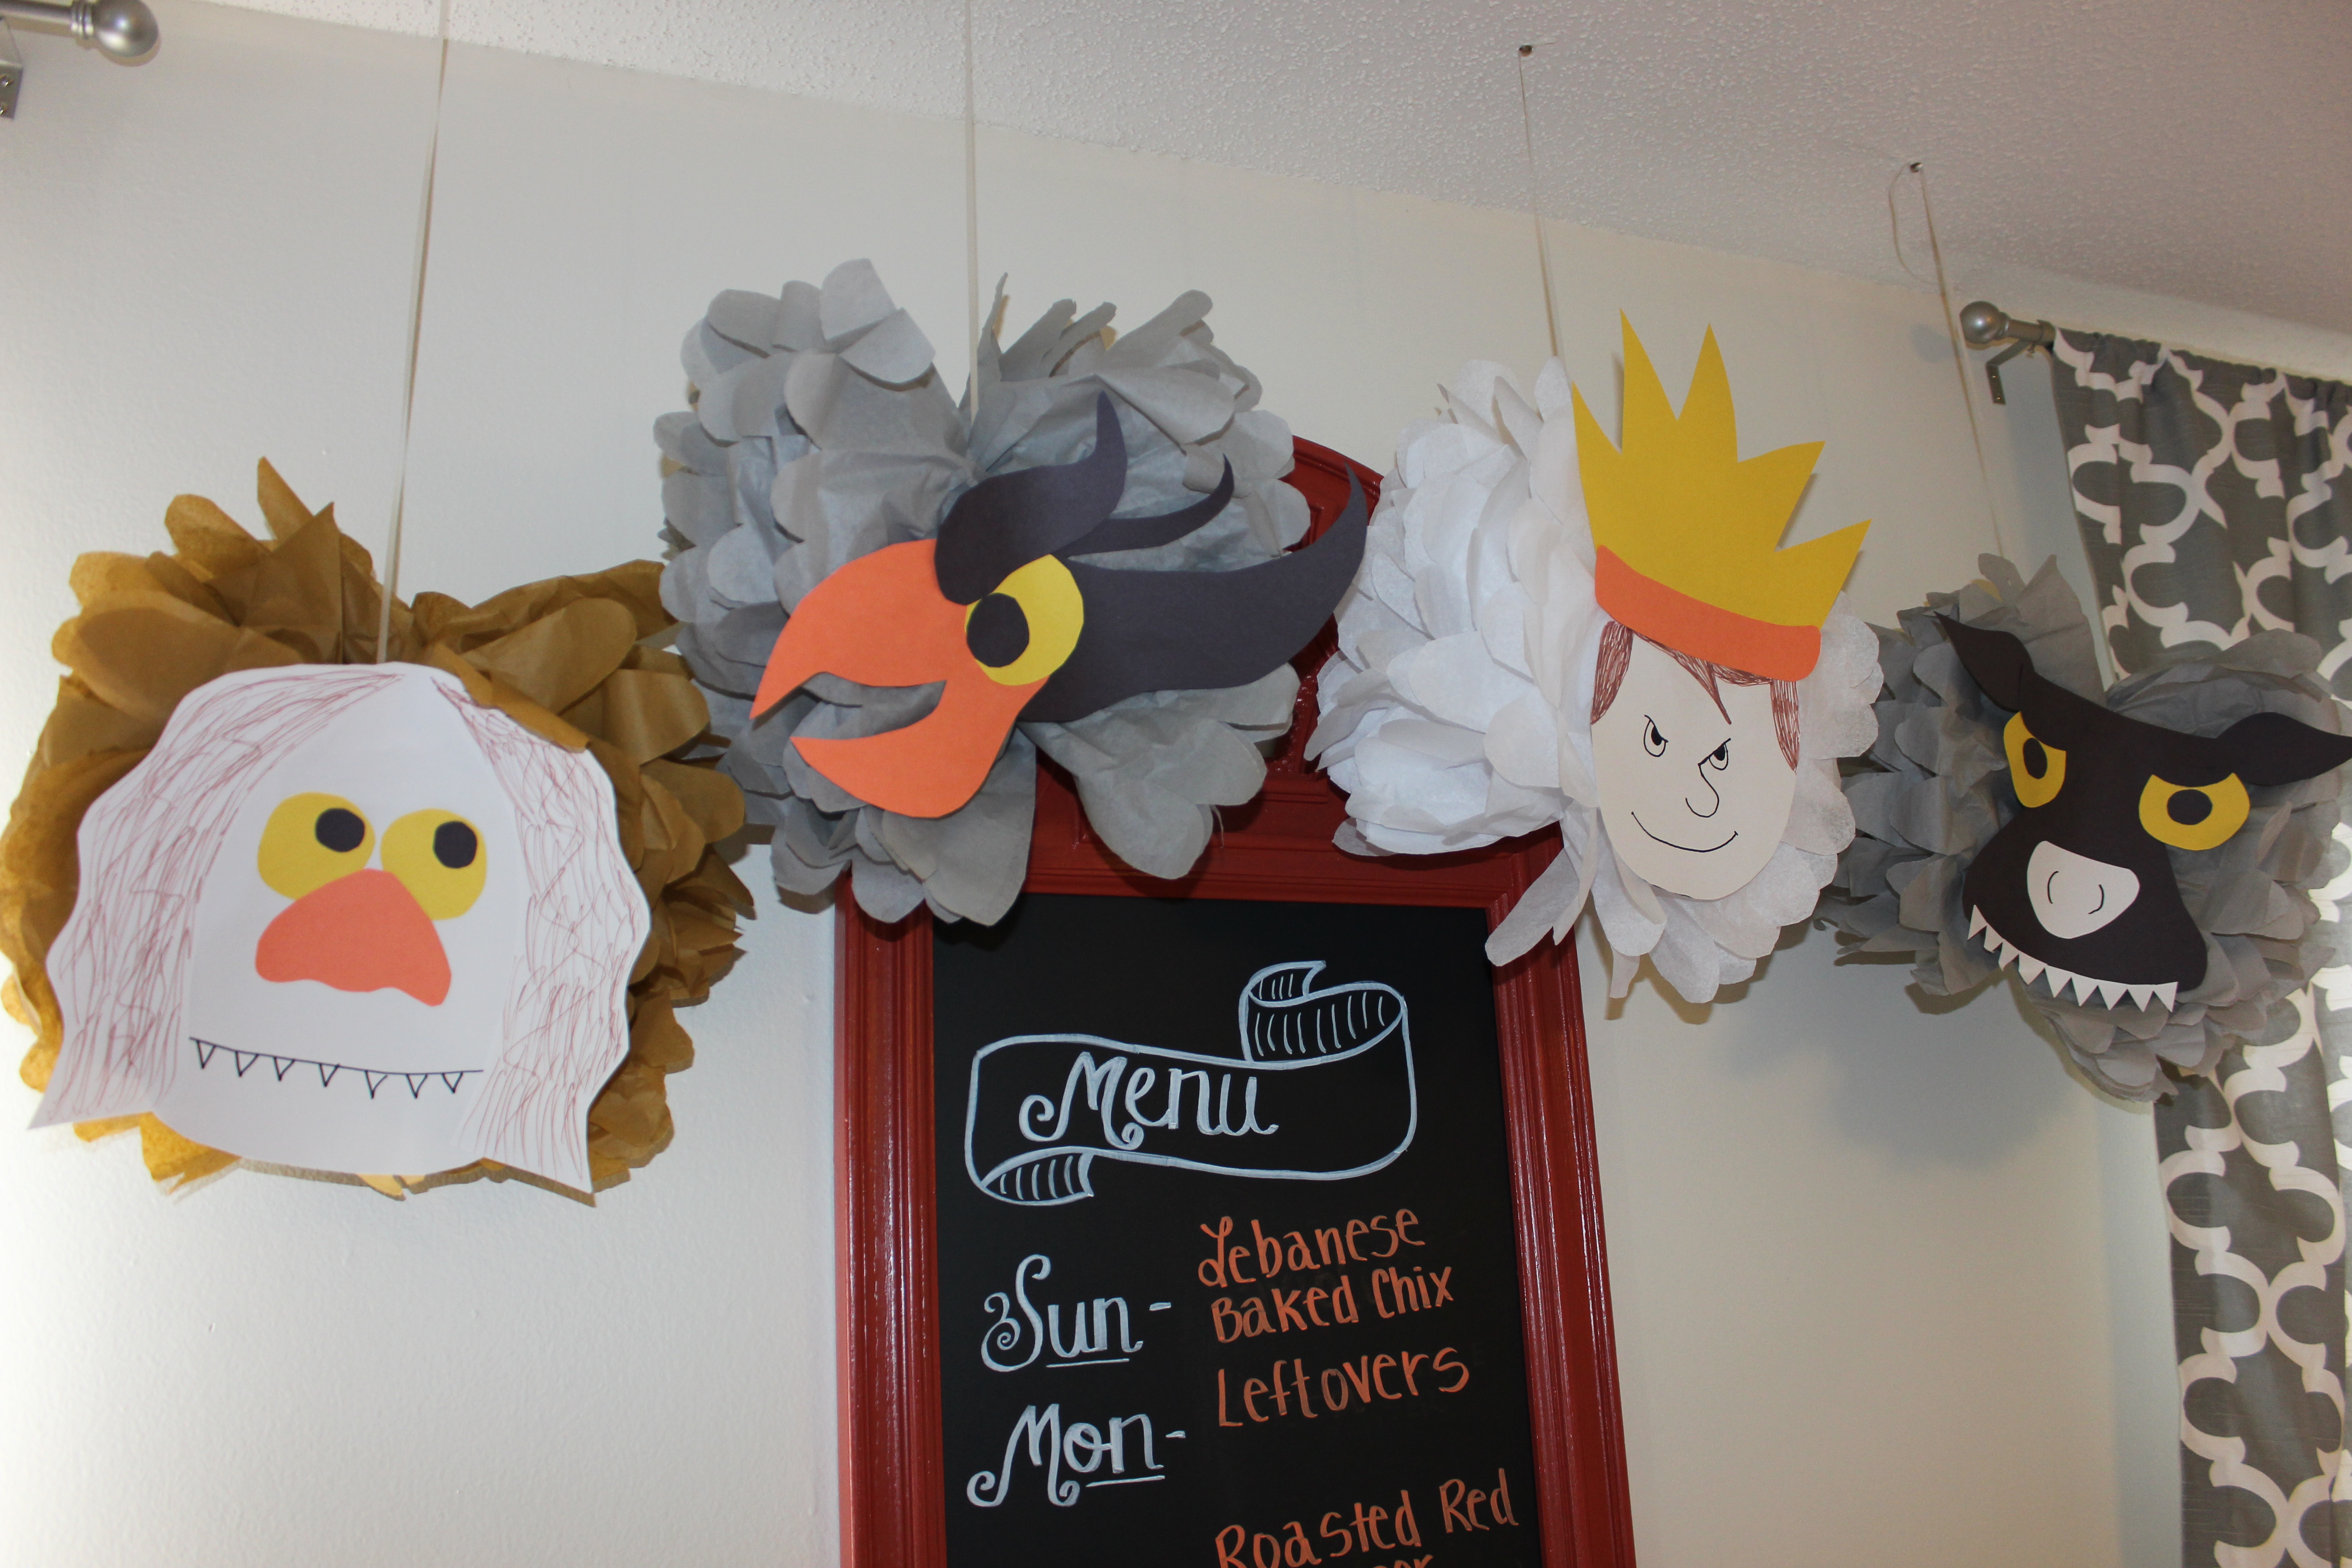
everyone loved these character poms!

IMG_0341

.. a few of the various other poms I used as décor over the food table.

IMG_0343 IMG_0344 IMG_0345

DIY Pinata – “Where the Wild Things Are”

  As I dive back into blogland after my extended hiatus I figure I will get back into the mix by sharing a few posts about Baby P’s first birthday which although is now three months past (how is time … Continue reading

DIY Scrap Fabric Banner

scrap4

Let me start by saying I am in love with this craft. This is the quicker, shabby-chic version of a traditional fabric pennant banner (if this isn’t quite your thang, check out my DIY no-sew fabric pennant banner tutorial or my DIY rustic burlap pennant banner tutorial). I plan to come back to this craft time and time again, especially for holiday and party decor. I have seen these done before, however, never had a reason to attempt one until it came time to throw my friend a baby shower and of course I got way carried away when it came to decor and decided that this would make a great last minute addition. Using scrap fabric left over from the wreath I had made the mama-to-be (I will post about the wreath and the shower itself soon!), I was able to create this adorable scrap fabric banner in about 20 minutes! I think my favorite thing about this banner (aside from the fact that it was free to make since I reused left over supplies), is that while it is simply strips of fabric tied to a string, it is a great way to tie all of your decor together by incorporating all of the colors in your color scheme. This would also make an adorable addition to a nursery, I will absolutely come back to this idea for any future nurseries I may be decorating in the distant future! If you have an event coming up and are looking to add a little something extra, just dig around in the depths of your fabric scraps and chances are you can throw something together with scrap that you already have. If you are making this with no fabric on hand, no problem – hit up the remnants or clearance bin at your local fabric store or Walmart, you can often get close to a yard for under a dollar which is much more than you will need for this project anyway! I hope this inspires your next holiday or party decor project and remember not to throw away any of those fabric scraps along the way 🙂 

scrap5

The banner as we displayed it at the baby shower over a chalkboard with baby’s monogram!

DIY SCRAP FABRIC BANNER

YOU WILL NEED:

  • Fabric – the amount and color will depend on your color scheme and the size/length of your banner. There is no limit to the kind of fabric either, mix textures and prints and get creative!
  • Twine/Ribbon/String – to tie your scraps around, I used left over twine from another project but a ribbon of a complimentary color would have been nice as well!
  • Scissors

INSTRUCTIONS:

Step 1: Begin by cutting your strips of fabric. Whether or not all of your strips are the same width and length is up to you. When cutting my strips I started with one fabric and cut a bunch of the same width and length, then moved onto the next fabric and cut them about the same width but a different length from the original group. 

scrap3

Step 2: Lay out a piece of twine or ribbon, the length will depend on how long you want your banner to be. Make sure you leave enough slack on either end for hanging.

Step 3: Fold a fabric strip in half (as shown) and lay it across the twine or ribbon, then pull the two “tails” of the fabric under and through the “loop” (see picture), pulling it tight to form a knot. 

scrapscrap1

Step 4: Continue in this fashion, after each knot is made slide it down so that it fits snugly against the one before. I arranged mine in no particular order but you can follow a pattern of colors to make the banner look more uniform if you wish. 

scrap6

Finished product! This would be great to hang above the crib in a nursery, I know my hubby was too paranoid to let me hang anything heavy over baby P (even wooden letters lol) so this would be a great worry-free piece of decor! 🙂

DIY No-Sew Pennant Banner

pen8

So if you’ve seen my post on DIY holiday photos with my squishy baby, you better believe I was going to do a Mother’s Day pic with P as well :). Let me entice you into doing this craft by saying, it cost me about $3.00 (and depending on how often you craft and the supplies you have available, it very well could be free).  Since there aren’t any real Mother’s Day props, this sparked my idea for a DIY pennant banner – simple and spring-y and able to double as both prop and springtime home decor! This project is super quick and easy (no sewing, yay!) and only cost a few dollars to make. The finished product was super cute and made the perfect backdrop for my Mother’s Day photo, I liked it so much in fact, I will definitely be revisiting this project next time I need some quick party decor and especially when I have to decorate the next nursery! Speaking of party decor, if you’re into pennant banners, check out my friend Courtney’s DIY chalkboard pennant banner that she made for her son’s first birthday party, it’s adorable as is her blog! Here is how I made and used my pennant banner:

YOU WILL NEED:

  • Fabric of your choice (the amount depends on how long you would like your banner to be)
  • Fabric stiffener (available anywhere fabric is sold, if you are using a stiff or heavy fabric you may not need this)
  • Glue Gun
  • Ribbon of your choice
  • Scissors
  • Wax Paper (optional, it is just so you have a surface to work on)
pen

TIP: I hit up the remnants bucket at my local fabric store and purchased these random 12X12 squares for less than $1.00 each. If you don’t have a print/fabric preference you can use an old clothing item or one that you purchase from a thrift store.

INSTRUCTIONS:

  1. First, create a pattern for your pennant in whatever shape you would like. I chose a traditional triangular shape and using a ruler and a blank piece of scrap paper, drew a triangle 6″ wide and 7″ long and cut it out using scissors.
  2. Next, lay your fabric print side down and using a pen or other writing instrument, trace as many triangles as necessary onto to fabric, then cut each one out. pen1
  3. Arrange your fabric on the wax paper (or other surface) and spray each one with an even coat of fabric stiffener. Mine was the “quick dry” kind so it only took about an hour to dry, mine also gave me the option to put it in the microwave for 30 secs to speed up the drying process but I didn’t feel like doing the extra work, but if you are in a rush the microwave is apparently a drying option. Also, as I mentioned above, fabric stiffener is not vital to the project, but because I was using a lightweight material I wanted to be sure it laid flat and stiff when hung.

    pen2

    Don’t mind the markers, I was just weighing down the edges for the pic.

  4. Once your pennants have all dried, lay them face up, tip to tip on a piece of wax paper. Heat your glue gun then, working one by one, apply a thin line of hot glue to the top of each triangle and then apply your ribbon pressing down firmly (be sure to leave enough ribbon length before the start of the first pennant for hanging). Once you have finished display however you would like! See my example below of how I used it for a photo prop and be sure to read my post on baby P’s Mother’s Day pic and his other holiday picspen4

    pen6

    Here is my most adorable squishy baby hangin out under my banners! Check out my post on baby P’s Mother’s Day Pic to see how I added the lettering using only my smart phone!