DIY Valentine’s Day Wreath

vdaywreath1

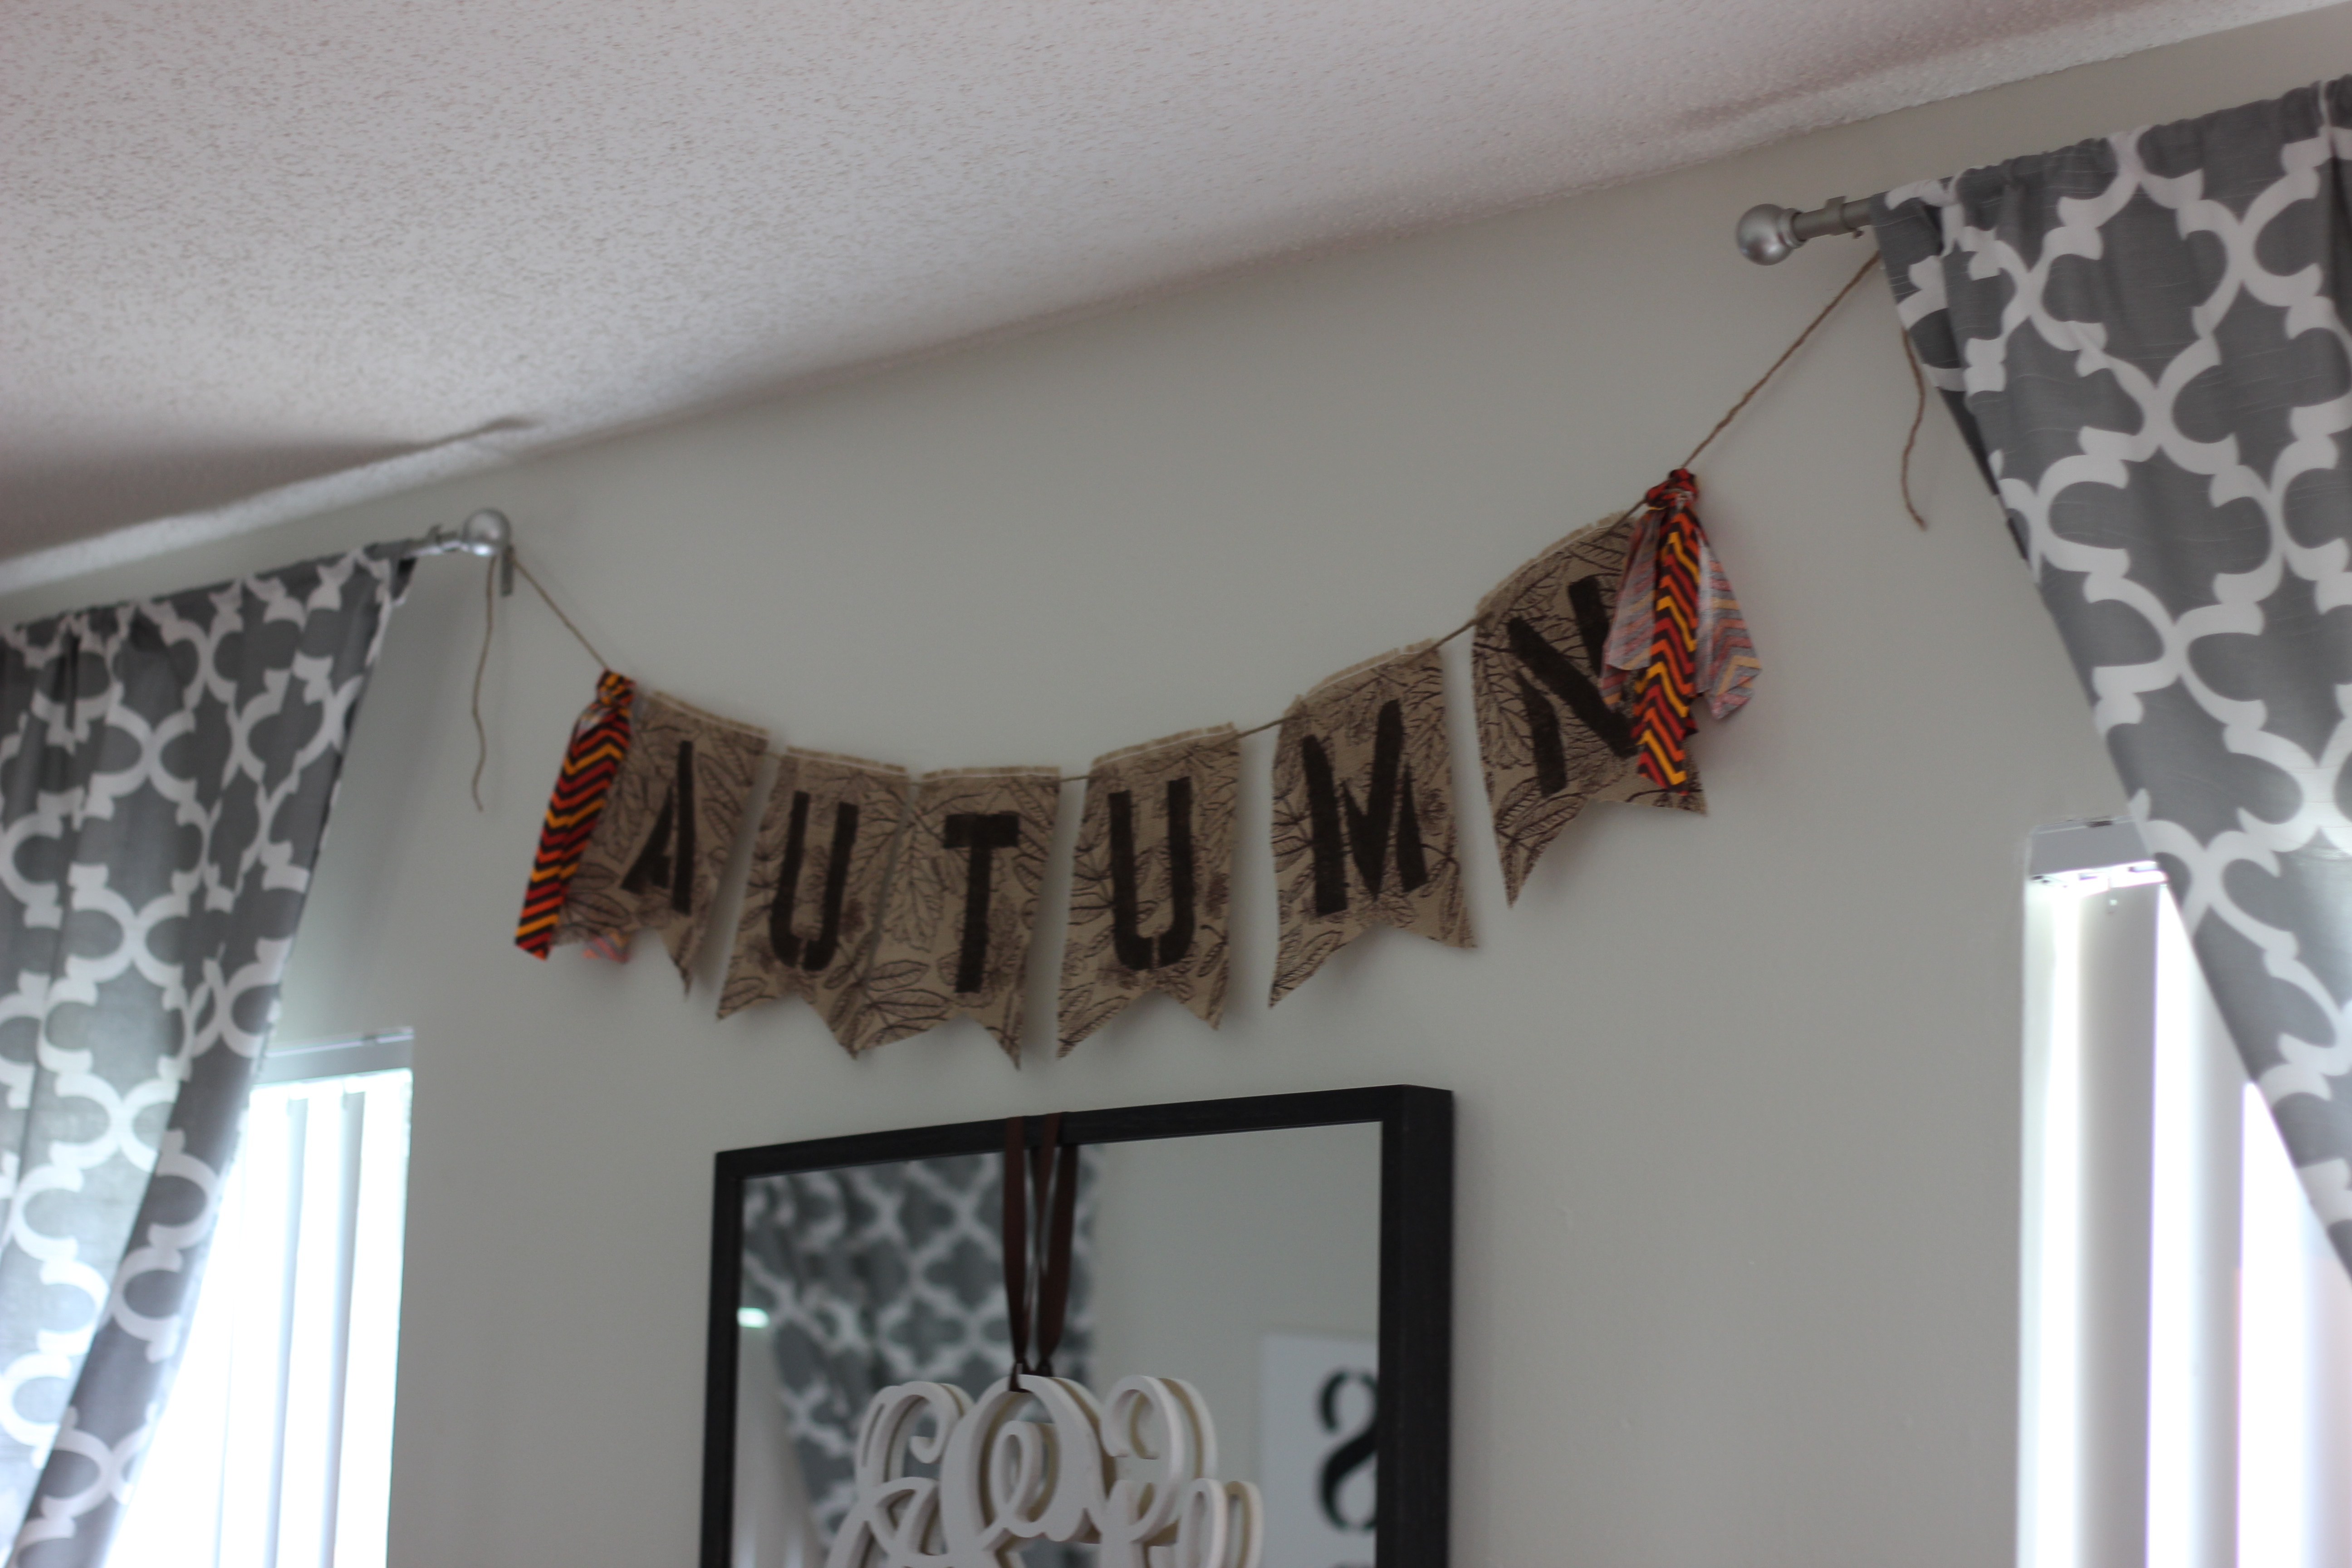
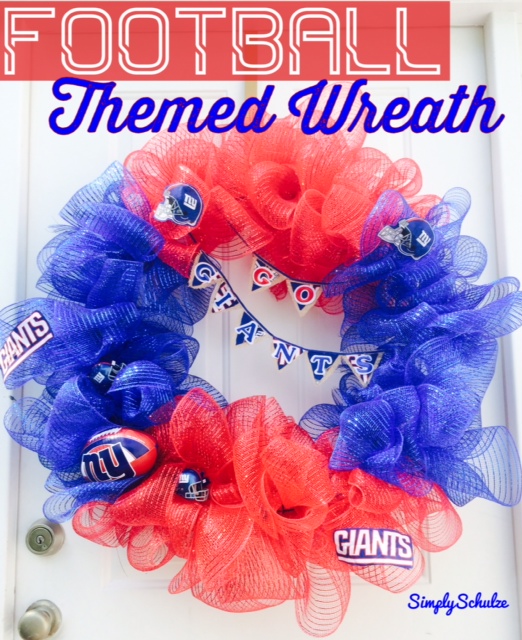
Okay, so I know I’ve been skipping around a lot as far as my posts go and I’m doing my best to finish up those featuring Baby P’s First Birthday Bash so that I can finally share that with you. However,  in the meantime I want to share a cute little Valentine’s Day inspired wreath I whipped up last week because believe it or not, just because I don’t post my holiday décor in correct holiday order doesn’t mean that I am not actually decorating in a timely fashion, lol. This wreath is similar to my DIY Mini-Pennant Banner Wreath that I made last spring and is super easy to create! Since we were headed up to DC to visit friends for MLK weekend I wanted to go ahead and get my Valentine’s Day stoop all set up before we left and wanted to stick to what I knew when it came to my décor and keep it simple. Here is a quick little tutorial for my Valentine’s Day wreath just in time for Valentine’s Day, it’s so quick and easy that you’ll have plenty of time to enjoy it even though the 14th is just a few short weeks away 🙂

vdaywreath2

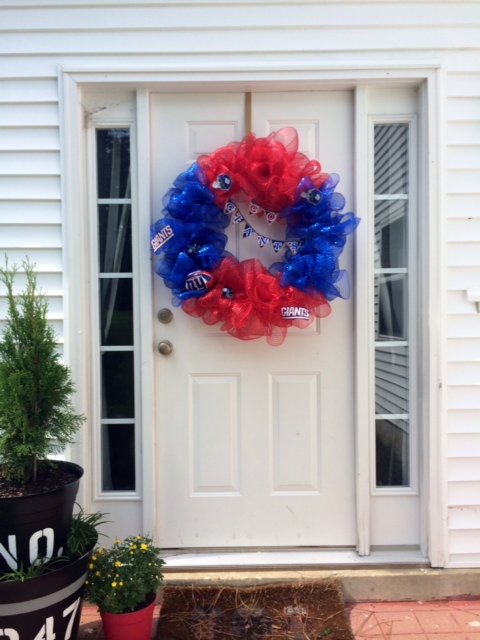
Valentine’s Day stoop with my sweet little frog photo-bombing! Like my GIANT “XOXO” sign? You can find the tutorial on how to make your own for $9 here!
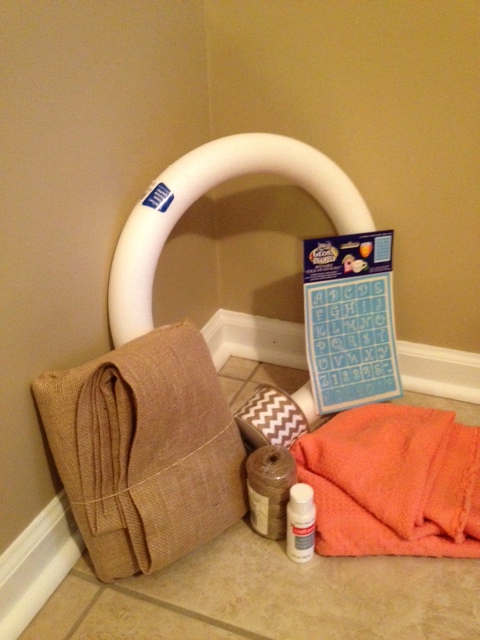
SUPPLIES

  • 18″ Styrofoam wreath frame (available at local craft stores)
  • 2″ wide ribbon of your choice – I went with a red and beige chevron which I found at Hobby Lobby. This wreath required about 2 1/4 spools of ribbon but it may be more or less depending on the ribbon you choose.
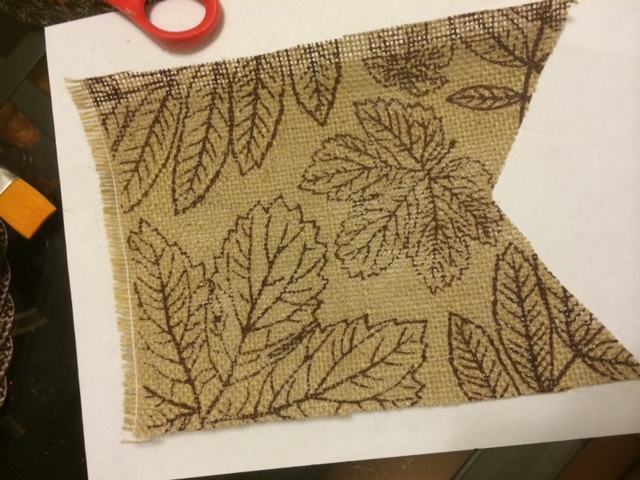
  • 2-3″ wired burlap ribbon
  • twine
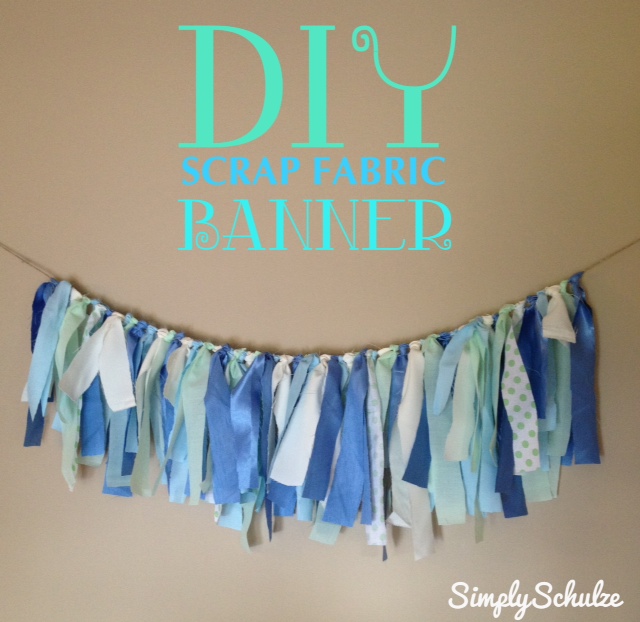
  • scrap fabric – the amount will depend on how many fabric roses you want on your wreath
  • glue gun & hot glue
  • small stencils
  • black acrylic paint
  • paint brush
  • scissors

INSTRUCTIONS

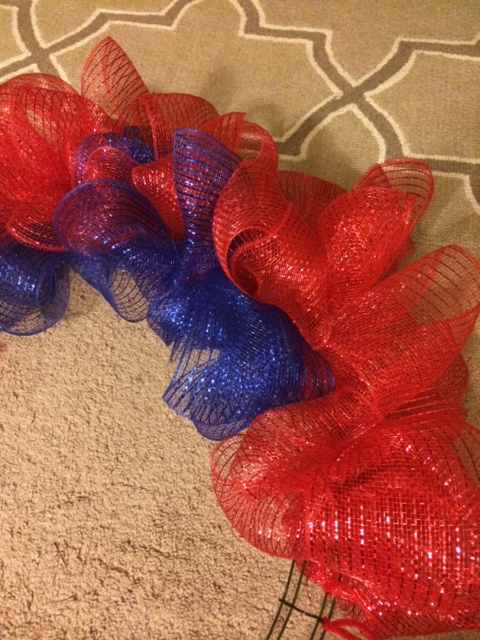
Step 1: Begin by wrapping your ribbon around your Styrofoam wreath, securing with little lines of hot glue along the way.

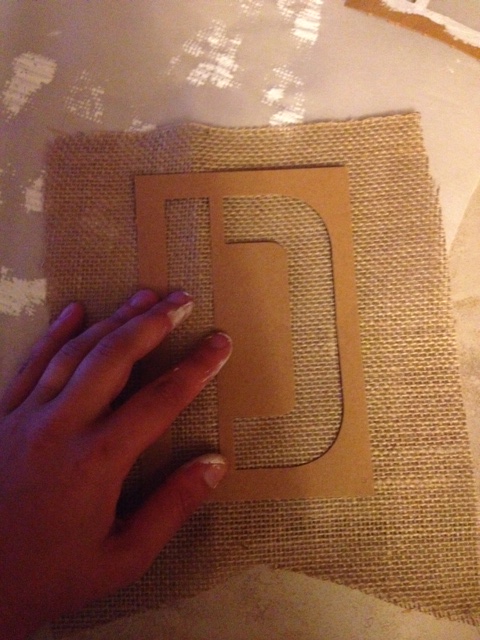
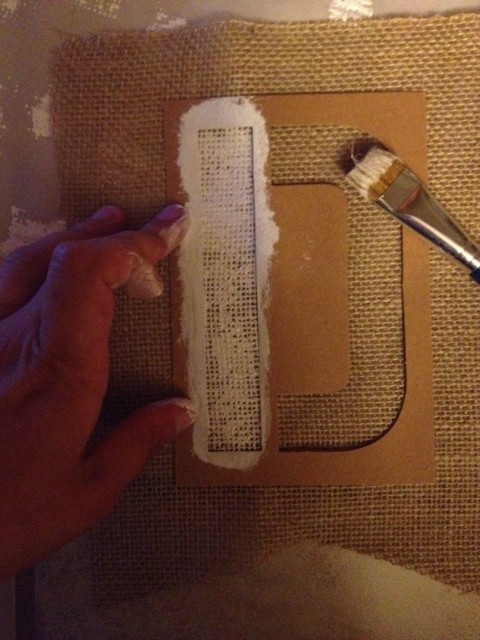
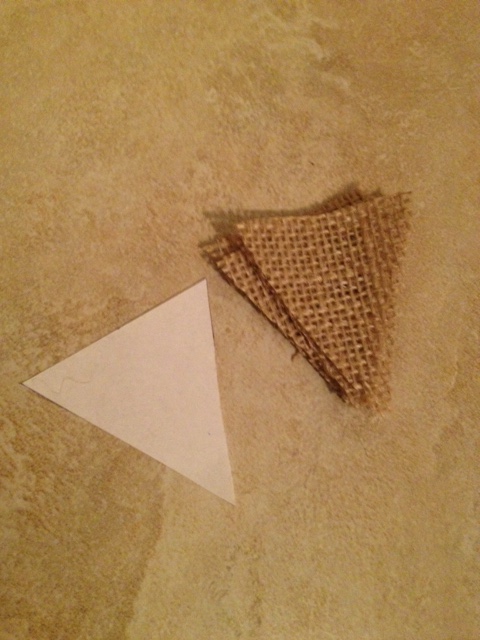
Step 2: Once your wreath is covered cut small pennants using your wired burlap ribbon. NOTE: you can also use regular burlap if you have that on hand, I have just found that the wired burlap holds up better to the elements for me as I do not have a storm door. Next, using your small stencils and acrylic paint, paint each letter of L-O-V-E individually onto each of your pieces and allow to dry.

Step 3: In the mean time, create your fabric flowers, for a detailed tutorial on these adorable flowers check out this post. Once you have the amount of flowers that you desire use hot glue to secure them to the bottom right quadrant of your wreath (or wherever you’d like, this is just how I placed them). NOTE: If you do not have the time or will to create your own flowers you can buy ready made fabric flowers from your local craft store but PLEASE try making them yourself, I promise it is super easy!

Step 4: Since your pennants should be dry by now, use hot glue to attach them carefully to your piece of twine then securing your mini pennant banner to the upper left area of your wreath by wrapping the ends of the twine around the body of the wreath then securing it with a tiny dot of hot glue on the back (or just knotting it in back).

Step 5: This is optional, but if you’re so inclined go ahead and fashion a bow out of any left over ribbon and attach it to the bottom center of your wreath using hot glue. Just adds a little extra somethin’ 🙂

THAT’S IT! There are so many ways to customize this by changing up the colors or saying. I look forward to coming back to this wreath for future holidays and simply changing up the theme!

A picture of our new doormat - just for funsies :)

A picture of our new doormat – just for funsies 🙂

Rustic Burlap “Autumn” Pennant Banner

photo (8)

So as I’ve mentioned, last year I made a commitment to myself to keep up with my holiday and seasonal decor. As a kid my Mom always put a lot of time (that she didn’t have) and effort into decorating my childhood home for the holidays and I’d like to do the same for baby P and any other future children I may have. Since in my opinion it’s a tad early for Halloween decor (it still feels like summer!) I thought I’d get my decorating started with a few easy fall themed pieces that compliment our regular home decor. This pennant banner is super easy to create and is both fun and elegant and most importantly – cheap! Mine cost about $3.00 to create. Happy fall, now go make a cute pennant banner to celebrate 🙂

pennantbur

This project was inspired by my DIY Rustic Pennant Banners that I use for party decor, follow this link to see how you can jazz up your next event!

My fall version!

My fall version!

SUPPLIES:

  • Burlap – the amount you need depends on what you would like your banner to say and how many letters it will contain, but you will likely need less than 1/4 of yard which will cost you about $1.00-$2.00.
  • Twine
  • Brown acrylic paint
  • Small paint brush
  • Large stencils – I used my reusable stencils that I used to create my DIY Rustic Burlap Pennant Banners, they are available at Staples.
  • scrap fabric (optional)
  • Scissors
  • Scrap paper

INSTRUCTIONS:

Step 1: Begin by creating a pattern out of scrap paper (I just used a piece of computer paper out of my recycling bin) in whatever shape you would like your pennants to be. I chose a square shape with an inverted triangle at the bottom which measured about 7″ wide by 10″ long.

I made sure that my letter fit atop the pattern.

I made sure that my letter fit atop the pattern.

Step 2: Once you have your pattern, use it as a guide and use a marker to trace as many as you need onto the back of your burlap then cut them out.

photo 2 (4)photo 3 (4)

Step 3: After all of your pieces have been cut. Use your stencils and acrylic paint to apply your letters to the tops of the burlap using your small paint brush. Use a generous amount of paint. Set aside to dry.

Step 4: Once your letters have dried use your scissors to poke a small hole in either end of each of the tops of the pennants through which you will thread a piece of twine. At this point if you wish you can dab some mod podge on the ends of your pennants to keep them from fraying but since mine was going to be up high out of tiny finger reach (lol) I didn’t bother.

Step 5 (optional): If you want to add little fabric tassels to the ends to jazz it up use the same method I used in creating my Scrap Fabric Banner but instead with a few pieces knotted together.

IMG_0168 IMG_0167

Football Themed Wreath – NY Giants

photo (4)

The past two nights have been all about wreaths! One of which was my “September” wreath which I decided to make football themed to both support our favorite team and because I felt weird putting out a fall themed wreath when it’s still too hot to go outside most days, lol. The other was a faux succulent wreath I made for our dear Aunt Maryann who patiently waited for it while my scatter-brained self took forever to get around to making it (and even longer to send it out, shame on me!) but I finally got them both done – yay! In this post I will be sharing my September football wreath which happened to be my first attempt at a mesh wreath. While we have been transplanted to the south we’re still NY fans to boot so since we don’t have cable at casa de Schulze (we pinch our pennies, remember? lol) this wreath will be our method of team support for the season. Aside from the fact that this wreath turned out HUGE (which I decided was fitting because “Giants” lol) I was very happy with the results and even happier with how easy it was to create! My only gripe with this wreath is that mesh is more expensive in comparison to burlap, however, I do like that mesh gives you the option for super bright fun colors which are great for holidays like Halloween and Christmas which is what will keep me coming back to this method. If you’re yet to jump on the deco mesh bandwagon give this method a shot, it’s just as easy as creating a burlap wreath and super fun!

Squishy baby wearing his Giants tie onsie! :)

Squishy baby wearing his Giants tie onsie! 🙂


SUPPLIES:

photo 1 (2)

  • Wire Wreath Frame – I used a 24″ frame because my craft store was out of 18″ frames but I would definitely suggest going with the 18″ or even a 12″ frame unless your door is exceptionally massive. The mesh adds a LOT of volume to the wreath so a small frame goes a long way!
  • Blue and Red 5″ X 45′ Rolls of Wired Deco Mesh – I used two of each, but if you were to use a smaller wreath frame you would definitely only need one of each.
  • Red and Blue Pipe Cleaners
  • NY Giants Scrap Fabric – left over from my DIY Little Man Tie Onsies
  • Mini Giants Football
  • 2 Mini Giants Helmets
  • Blue 1/4″ ribbon
  • Scrap Burlap Fabric – left over from my DIY Rustic Burlap Pennant Banners
  • Stick-On Fabric Letters
  • Glue Gun & Hot Glue

WHAT I DID:

Step 1: I began by cutting the pipe cleaners into thirds to shorten them, then twisting the shorter pieces around the wreath frame wherever I was planning to bunch up the mesh. Then I used basically the same method I used to create my 4th of July Burlap Wreath, by weaving the mesh in and out of the wire frame (in an over-under-over-under manner) using the pipe cleaners to secure the mesh to keep it “poufed” up. NOTE: Another method would be to use a styrofoam wreath frame (as I did to create my Chevron Wreath) and create loops out of the mesh by stapling them directly to the styrofoam frame to achieve the same look.

photo 2 photo 3

Step 2: After I had finished creating the mesh portion of the wreath I attached my embellishments. I cut a small hole in the back of the mini football and threaded a pipe cleaner through the whole and attached it to the wire frame. I did the same with the mini footballs which already had holes in the sides that were perfect for threading the pipe cleaners through.

Step 3: I then moved on to my mini “Go Giants” pennant banner which I created by cutting mini triangles out of my scrap burlap and then smaller triangles out of my scrap Giants fabric to fit atop the burlap triangles which I attached using hot glue. After I had created all of my little triangles I went ahead and attached my fabric letters which were actually stick-on but I used a bit of hot glue on the backs of the letters as well to ensure that they really stuck since my wreath was going to have to brave the elements. After adding the letters I created the pennant banners by gluing the triangles to my blue 1/4″ ribbon, one reading “go” and the other “giants”. I secured it to the wreath by tying each opposing end to the wire frame.

Step 4: My final step was not planned but after finishing my wreath the episode of SVU I was watching still had a few minutes left (lol) so I took that time to play around with the idea of adding the Giants logo and helmet to the mesh. I cut the logos and helmets out of my fabric and used hot glue to secure the fabric to the top of the mesh and another piece of scrap fabric to hold it in place on back (inside of the mesh) since the hot glue would not fully secure the logo/helmet to the mesh without a backing.

photo 4

please disregard my disgusting doormat! hehe This is the GIANT wreath in all it’s glory, you can see it from space! ha

TA-DA that was it! Now that I’ve attempted this method I will most likely be making another deco mesh wreath for my Halloween/October wreath (except I will use the appropriate wreath frame this time, haha).


DIY Scrap Fabric Banner

scrap4

Let me start by saying I am in love with this craft. This is the quicker, shabby-chic version of a traditional fabric pennant banner (if this isn’t quite your thang, check out my DIY no-sew fabric pennant banner tutorial or my DIY rustic burlap pennant banner tutorial). I plan to come back to this craft time and time again, especially for holiday and party decor. I have seen these done before, however, never had a reason to attempt one until it came time to throw my friend a baby shower and of course I got way carried away when it came to decor and decided that this would make a great last minute addition. Using scrap fabric left over from the wreath I had made the mama-to-be (I will post about the wreath and the shower itself soon!), I was able to create this adorable scrap fabric banner in about 20 minutes! I think my favorite thing about this banner (aside from the fact that it was free to make since I reused left over supplies), is that while it is simply strips of fabric tied to a string, it is a great way to tie all of your decor together by incorporating all of the colors in your color scheme. This would also make an adorable addition to a nursery, I will absolutely come back to this idea for any future nurseries I may be decorating in the distant future! If you have an event coming up and are looking to add a little something extra, just dig around in the depths of your fabric scraps and chances are you can throw something together with scrap that you already have. If you are making this with no fabric on hand, no problem – hit up the remnants or clearance bin at your local fabric store or Walmart, you can often get close to a yard for under a dollar which is much more than you will need for this project anyway! I hope this inspires your next holiday or party decor project and remember not to throw away any of those fabric scraps along the way 🙂 

scrap5

The banner as we displayed it at the baby shower over a chalkboard with baby’s monogram!

DIY SCRAP FABRIC BANNER

YOU WILL NEED:

  • Fabric – the amount and color will depend on your color scheme and the size/length of your banner. There is no limit to the kind of fabric either, mix textures and prints and get creative!
  • Twine/Ribbon/String – to tie your scraps around, I used left over twine from another project but a ribbon of a complimentary color would have been nice as well!
  • Scissors

INSTRUCTIONS:

Step 1: Begin by cutting your strips of fabric. Whether or not all of your strips are the same width and length is up to you. When cutting my strips I started with one fabric and cut a bunch of the same width and length, then moved onto the next fabric and cut them about the same width but a different length from the original group. 

scrap3

Step 2: Lay out a piece of twine or ribbon, the length will depend on how long you want your banner to be. Make sure you leave enough slack on either end for hanging.

Step 3: Fold a fabric strip in half (as shown) and lay it across the twine or ribbon, then pull the two “tails” of the fabric under and through the “loop” (see picture), pulling it tight to form a knot. 

scrapscrap1

Step 4: Continue in this fashion, after each knot is made slide it down so that it fits snugly against the one before. I arranged mine in no particular order but you can follow a pattern of colors to make the banner look more uniform if you wish. 

scrap6

Finished product! This would be great to hang above the crib in a nursery, I know my hubby was too paranoid to let me hang anything heavy over baby P (even wooden letters lol) so this would be a great worry-free piece of decor! 🙂

DIY Rustic Burlap Pennant Banners

pennantbur

As usual last night I was up way too late crafting, but I was excited to get these done and off of my to-do list. I have a few parties coming up and I knew these burlap pennant banners would add a little extra something to the table displays and make for a great piece of decor to have on hand for future events. There is nothing too special about these and as I’m sure you’ve seen on Pinterest they are extremely popular, lol. However, since I used cheap store bought stencils for my project, I thought my tutorial would be worth sharing as I noticed that a lot of tutorials as that you create your own stencils which is just way too time consuming for my lazy butt. I would say more but there isn’t much else to say, just easy breezy party decor at it’s finest! Hope this tutorial comes in handy for your next shindig, I will be posting pics of how I use them at each event at a later date! Happy Memorial Day everyone, thank you to those who have served, past and present and of course, to those who made the ultimate sacrifice for our freedom.

Squishy baby says thank you to our troops!

Squishy baby says thank you to our troops!


DIY RUSTIC BURLAP PENNANT BANNERS

NOTE: If you’re interested in making these with a different fabric check out my post on DIY fabric pennant banners, great for parties or photo backdrops!

YOU WILL NEED:

pennantbur1

  • Burlap Fabric (the amount you need will depend on how many letters are in your words, I was able to get over 30 large squares out of 2.5 yards)
  • White Acrylic Paint
  • Paint Brush
  • Large Alphabet Reusable Stencils (available at Staples for about $7.00, I will be using these for several projects so it was a good investment, alternatively you could print your letters out on paper and use an X-acto knife to cut them out and create your own stencil)
  • Glue Gun
  • Twine or Ribbon

DIRECTIONS:

Step 1: Create a template for your pennants in whatever shape you would like, I chose a rectangle with an inverted point at the bottom. The measurements will depend on the size of your stencils but if you are using the large 5″ ones as I did, I found a good measurement to be 7.5X7.5 inches.

pennantbur2

Step 2: Using your pattern as a guide, cut out as many pieces of burlap as you need. NOTE: I did not care about fraying as I though it added to the rustic look, however, to keep your piece from fraying you can spray it with a bit of fabric stiffener or brush the edges with mod podge and allow to dry before going on to the next step.

pennantbur3

Step 3: Using your stencils, holding each steadily in place paint your letters onto the burlap and set aside to dry.

pennantbur6

soooo many letters! lol

pennantbur4 pennantbur5

Step 4: Once letters are dry (I allowed mine to sit overnight), lay out a piece of twine long enough to accommodate the letters with slack on either end for tying the banner up for display.

Step 5: Apply a line of hot glue to the top of each burlap square and fold it onto itself, pressing down to create a firm seal. The spacing of the letters is up to you, I did not measure it out, just eyeballed it. Once you are finished your banner is ready for display!!! Check back to see how I display mine 🙂

Fun idea: If you want your letters to be interchangeable simply do not glue them to the twine but rather use a small hole punch to punch two holes along the top of each pennant and weave the twine through or use mini clothes pins to hold them to the twine!


DIY Spring Chevron Wreath with Pennant Banner

wreath7

With J gone for fleet week, I’ve been staying up far too late, watching Hulu (I started Nashville, not my fave show so far, but it’s alright) and crafting my little bootay off. I may have mentioned in previous posts that I love to decorate for holidays/seasons and made a promise to myself to do so, especially while baby P and any future babies are growing up. So far I have made good on my promise, and although most of my decorations come from the dollar store, it still counts, haha! I recently found myself at a loss as to what to do decor-wise between Easter and Memorial Day/Independence Day, so I decided to leave the inside be and just make another cute front door wreath since I was so pleased with the way my Easter wreath came out. Since I had picked up a few yards of burlap for some larger pennant banners I plan on making, I thought it would be fun to add a teeny tiny pennant banner to my wreath, especially because it would act as a trial one for my future banners. This wreath was super easy to throw together, once I had created my mini pennant banner and fabric flowers, it took me under 10 minutes to assemble the whole thing! The best part is, with the exception of the ribbon and Styrofoam wreath, I used items I already had on hand so the project cost me about $8 – BOOM! Give this one a try, if you don’t want to make the fabric flowers yourself you can always purchase ready made ones at your local craft store (but first read my tutorial on fabric roses and see how easy they are to make!), the rest is easy breezy!

DIY SPRING CHEVRON WREATH WITH PENNANT BANNER

YOU WILL NEED:

wreath6

  • Styrofoam wreath (I purchased mine at Michael’s using a 40% off coupon, download the Michael’s app if you haven’t already, they will scan coupons right off of your phone)
  •  Chevron Ribbon (Mine was wired but it doesn’t have to be, they sell large rolls of chevron ribbon at Walmart for $3.99)
  • 8-12 Fabric Flowers (Tutorial Here)
  • String or Twine
  • Burlap (since the banner is so tiny just ask for the smallest piece they can cut for you, burlap costs $2.97 at Walmart so a 1/4 yard will cost you about $0.75 and you’ll still have left over fabric)
  • White Acrylic Paint
  • Small Letter Stencils (I had picked some up for another project I’m working on but I’m sure the dollar store has stencils that would work)
  • Paint Brush
  • Glue Gun
  • Scissors

INSTRUCTIONS

Step 1: Assemble your fabric flowers by following this tutorial. The amount you will need depends on the size of the flowers you make and how much area you want them to cover on the wreath. If you are using store bought flowers or none at all skip this step.

Step 2: Start creating your pennant banner by fashioning a triangle guide out of paper (I used a post-it haha), the size of your pennants will depend on the length of your name or words you are using. My last name is seven letters long and a 2″ wide by 2″ long triangle was perfect for mine. Using scissors, cut out your triangles. NOTE: It is optional to use modge podge or fabric stiffener to seal the edges of your burlap triangles so they do not fray. I skipped this and they are fine.

wreath5 wreath4


Step 3: Once your triangles are cut out, using your stencil, paint and paint brush, carefully paint your letters onto the burlap triangles. Be sure to protect your work surface with a piece of paper or wax paper since the paint will seep through the burlap. Allow a few mins to dry, this is a good time to start working on the body of the wreath!

wreath3

Step 4: Take your wreath and ribbon and attach the end of your ribbon to the styrofoam wreath using hot glue. Keep wrapping the ribbon around the wreath, overlapping the previous section each time, place a dot of glue underneath the ribbon each time you wrap it (I suppose this isn’t totally necessary but I didn’t want my ribbon to move at all once I was finished covering the wreath).

wreath2

Step 5: Your burlap letters should be dry by now. If so, take a piece of twine, ribbon or string and use hot glue to attach your burlap triangles to the string by applying a line of top glue to the back top of each and pressing onto the string, it is best to do this over wax paper so that the glue will not stick to anything. Make sure you leave a decent amount of string before the start of your first triangle so you will have a means to attach that side to the wreath.

Step 6: Attach your banner to the wreath by tying each end to each side, you be the judge of placement and tautness of the string. Once I got the banner tied how I wanted, I used a small dot of hot glue on each side to secure the string (again, overkill with the glue but it can’t hurt right? lol). Now, attach your flowers however you see fit, I alternated sizes and colors but feel free to arrange them however you’d like! The bow is optional, I just thought the top looked naked. Now throw that bad boy on your front door and know you’ve now got the best wreath on da block 😛

wreath

DIY Mother’s Day Picture!

moth

As I’ve mentioned before, I’m big on sending cards to family and friends for just about every holiday, so now that Mother’s Day is just a short week away this was no exception! Quick money saving tip I want to mention – if you’re like me and have 10+ people on your holiday card list (and I’m not talking Christmas, this is just a simple holiday like Mother’s Day lol), DO NOT get sucked into buying your cards at the local drug store or supermarket (if I did this I would easily spend upwards of $30.00 on cards per holiday), I head to the Dollar Tree and get all of my holiday cards for $.50 each, they’re not anything spectacular but they have a good selection and you won’t have to spend $4.99 on one card, haha. Okay, back to the picture. Since baby P has a lot of awesome moms/grandmas/aunts in his life I wanted to whip up a cute little pic to send along with my cards. This pic was super easy, all I used was my DIY pennant banners, a white sheet and a smart phone (check out my post on other DIY holiday pictures here). For a more detailed step-by-step description check out the previously mentioned post, but I will give you a quick rundown of what I did below. I hope this inspires you to do your own little holiday photo with your little, I love taking advantage of this squishy age because lets be real, how long is he really going to let me torture him like this? haha Happy Mother’s Day to all my fellow mommies xoxo.

WHAT I USED:

  • White Sheet
  • Smart Phone or other camera
  • DIY Pennant Banners
  • “Phonto” free picture editing app (if you would like to add text to your photo)

HOW I DID IT:

  1. First, I set up my white sheet on a wall facing a window (so I had lots of natural light), by laying half the sheet on the floor and using tape to secure the other half against the wall.
  2. Next I hung my pennant banners, securing them with tape.
  3. I took a test shot using my smart phone to make sure that I was happy with the area captured in the picture as well as the lighting.

    pen15

    I simply secured the banners using clear tape

  4. I sat my squishy baby down and gave him a bouquet of fake flowers that we use as decor in the bathroom and snapped away until he started eating the flowers, haha.
  5. After I chose the picture I wanted to use the free “phonto” app to add the words “Happy Mother’s Day” to the pennant banners. This was extremely easy because the app will allow you to add as much text as you would like and manipulate the placement, tilt and color. Since the app automatically reverts back to the previously used font, size and color when adding multiple text to the same picture, it made it super simple for me to arrange the letters so it looked as if they were already on the pennants.
  6. Once I was finished adding text to the picture, I used the free Walgreen’s app to upload my photo and purchase 10 copies for under $1.00, using a 40% off coupon code (every time I am ordering photos I always google “walgreens photo coupon” and there is usually always one available). I love this app because your photos are usually ready within minutes for store pick-up and our Walgreen’s is just three miles from home!
pen7

Isn’t my squishy baby sweet? Unfortunately, the change in seasons has him a little under the weather so I could only snap a few pics before he started getting mad (and eating the fake flowers lol), but even though he’s not looking at the camera it’s still SUPER cute!

DIY No-Sew Pennant Banner

pen8

So if you’ve seen my post on DIY holiday photos with my squishy baby, you better believe I was going to do a Mother’s Day pic with P as well :). Let me entice you into doing this craft by saying, it cost me about $3.00 (and depending on how often you craft and the supplies you have available, it very well could be free).  Since there aren’t any real Mother’s Day props, this sparked my idea for a DIY pennant banner – simple and spring-y and able to double as both prop and springtime home decor! This project is super quick and easy (no sewing, yay!) and only cost a few dollars to make. The finished product was super cute and made the perfect backdrop for my Mother’s Day photo, I liked it so much in fact, I will definitely be revisiting this project next time I need some quick party decor and especially when I have to decorate the next nursery! Speaking of party decor, if you’re into pennant banners, check out my friend Courtney’s DIY chalkboard pennant banner that she made for her son’s first birthday party, it’s adorable as is her blog! Here is how I made and used my pennant banner:

YOU WILL NEED:

  • Fabric of your choice (the amount depends on how long you would like your banner to be)
  • Fabric stiffener (available anywhere fabric is sold, if you are using a stiff or heavy fabric you may not need this)
  • Glue Gun
  • Ribbon of your choice
  • Scissors
  • Wax Paper (optional, it is just so you have a surface to work on)
pen

TIP: I hit up the remnants bucket at my local fabric store and purchased these random 12X12 squares for less than $1.00 each. If you don’t have a print/fabric preference you can use an old clothing item or one that you purchase from a thrift store.

INSTRUCTIONS:

  1. First, create a pattern for your pennant in whatever shape you would like. I chose a traditional triangular shape and using a ruler and a blank piece of scrap paper, drew a triangle 6″ wide and 7″ long and cut it out using scissors.
  2. Next, lay your fabric print side down and using a pen or other writing instrument, trace as many triangles as necessary onto to fabric, then cut each one out. pen1
  3. Arrange your fabric on the wax paper (or other surface) and spray each one with an even coat of fabric stiffener. Mine was the “quick dry” kind so it only took about an hour to dry, mine also gave me the option to put it in the microwave for 30 secs to speed up the drying process but I didn’t feel like doing the extra work, but if you are in a rush the microwave is apparently a drying option. Also, as I mentioned above, fabric stiffener is not vital to the project, but because I was using a lightweight material I wanted to be sure it laid flat and stiff when hung.

    pen2

    Don’t mind the markers, I was just weighing down the edges for the pic.

  4. Once your pennants have all dried, lay them face up, tip to tip on a piece of wax paper. Heat your glue gun then, working one by one, apply a thin line of hot glue to the top of each triangle and then apply your ribbon pressing down firmly (be sure to leave enough ribbon length before the start of the first pennant for hanging). Once you have finished display however you would like! See my example below of how I used it for a photo prop and be sure to read my post on baby P’s Mother’s Day pic and his other holiday picspen4

    pen6

    Here is my most adorable squishy baby hangin out under my banners! Check out my post on baby P’s Mother’s Day Pic to see how I added the lettering using only my smart phone!