Rustic Burlap “Autumn” Pennant Banner

photo (8)

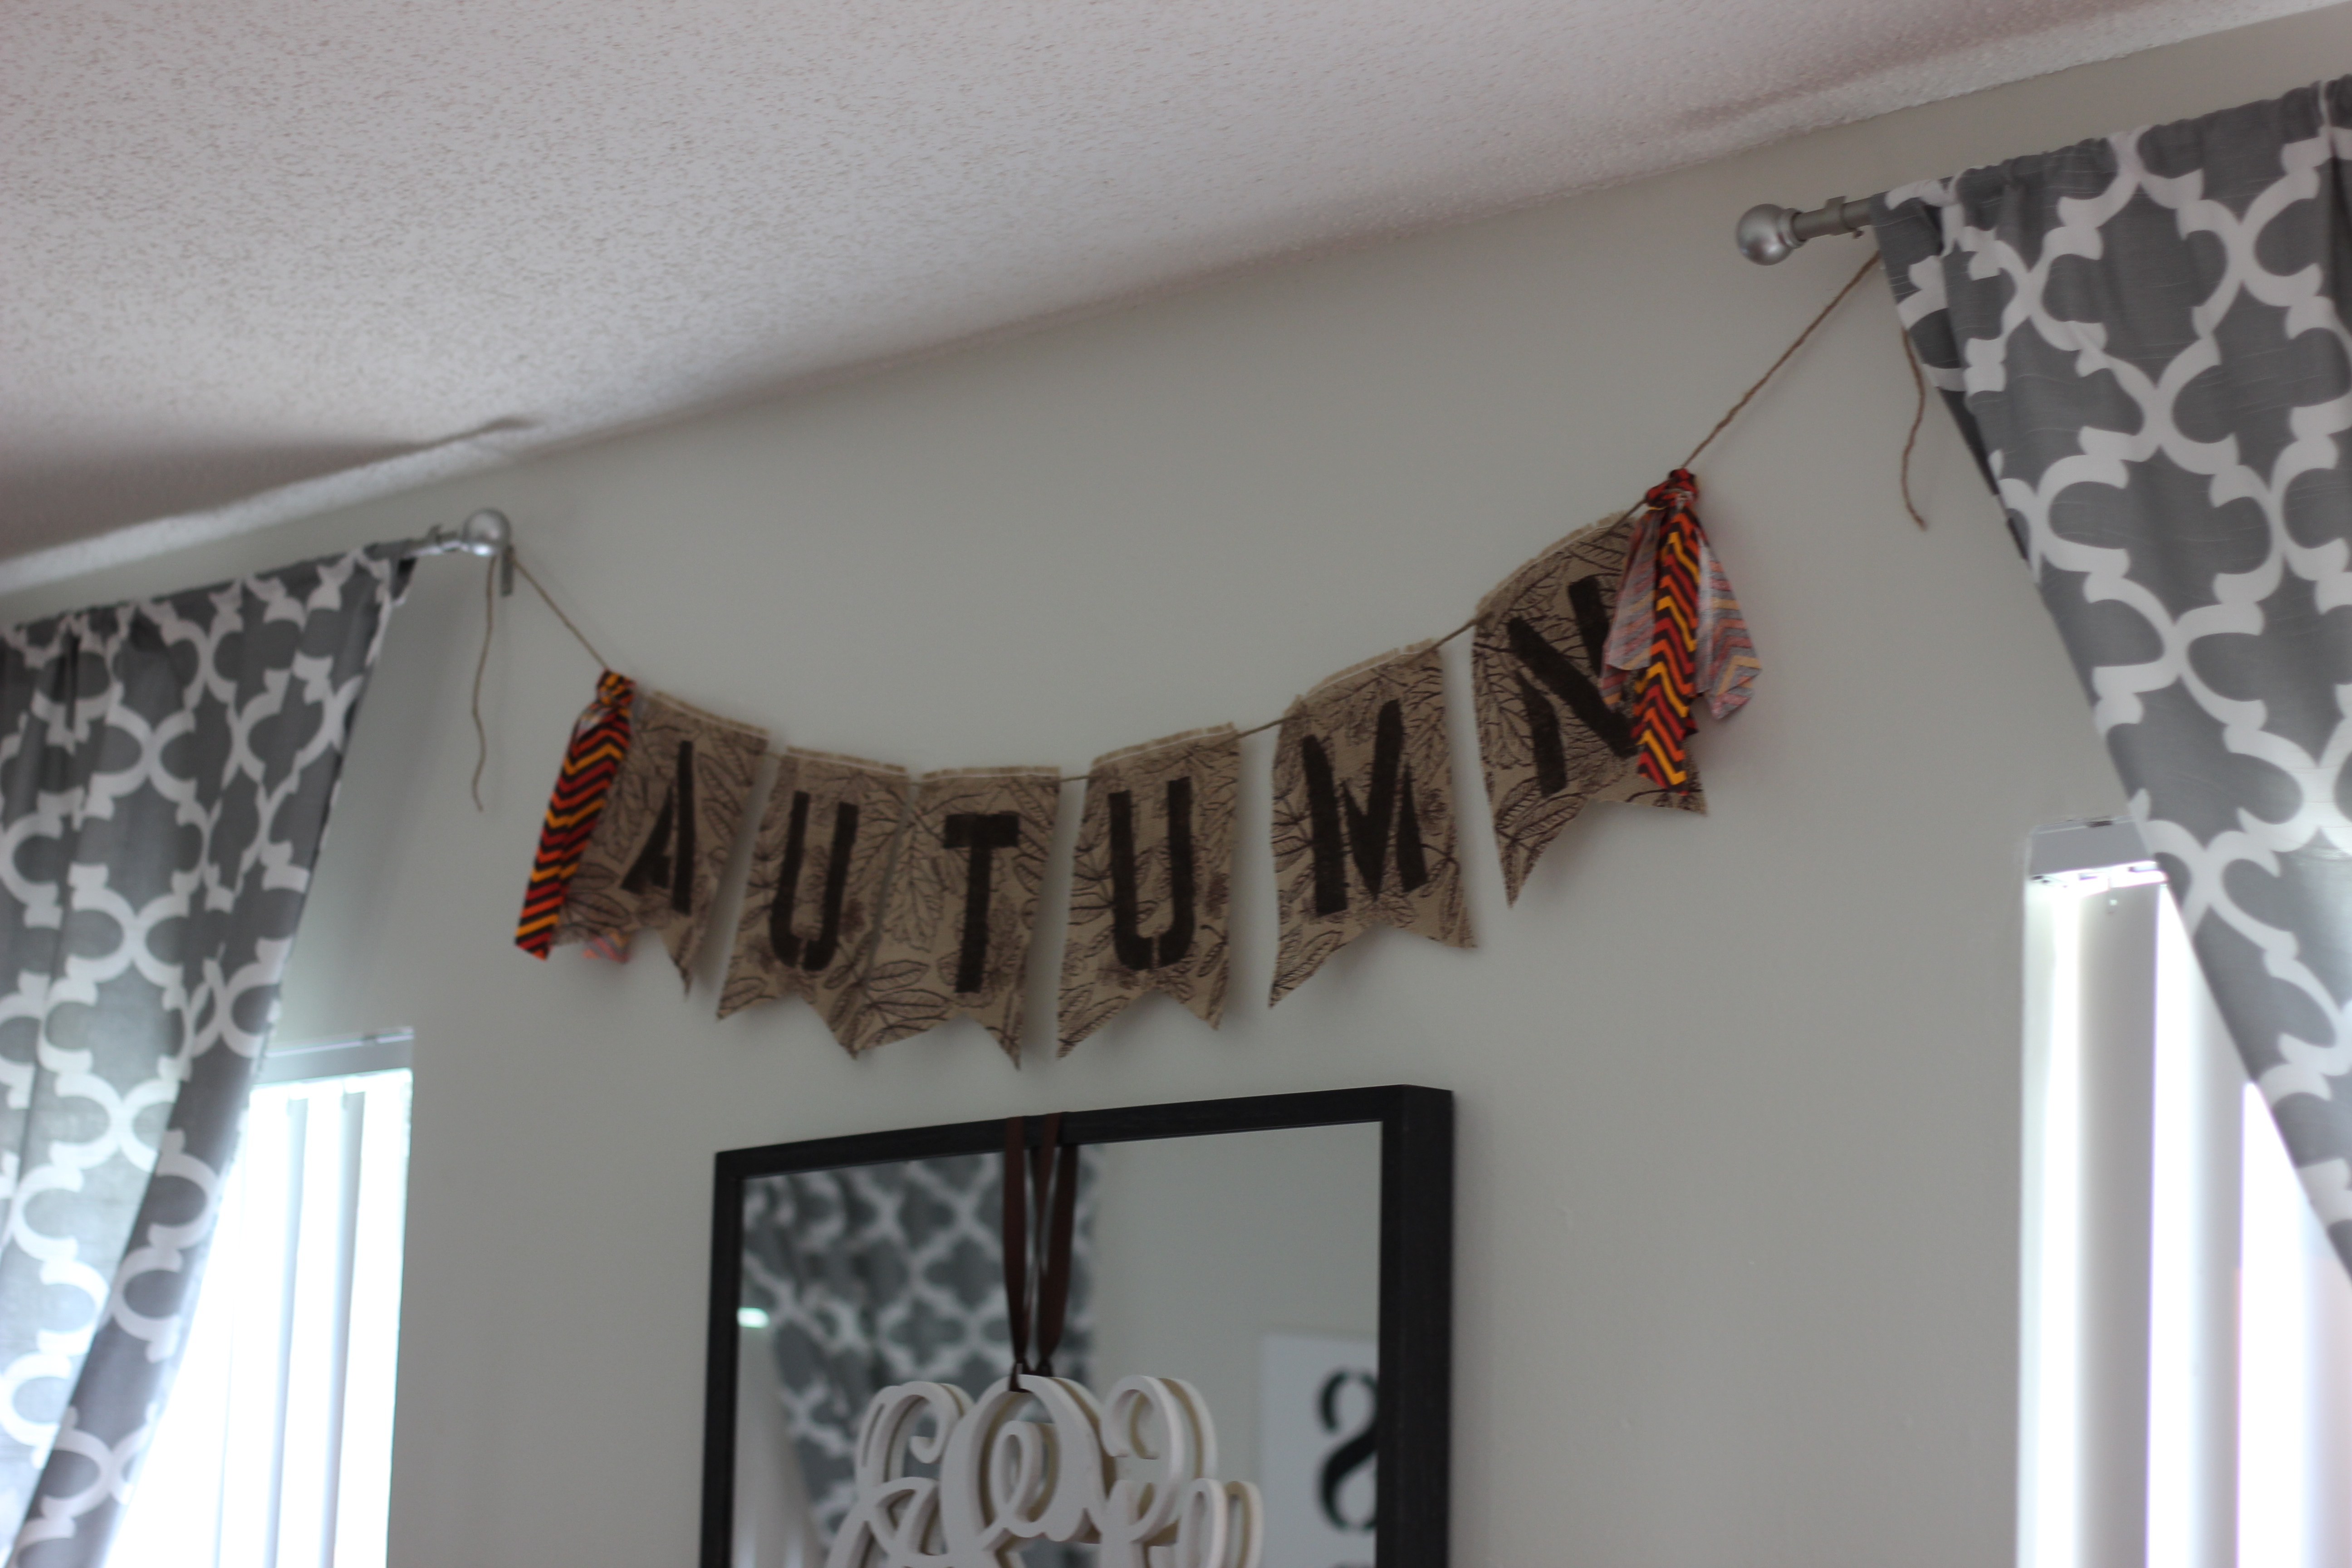
So as I’ve mentioned, last year I made a commitment to myself to keep up with my holiday and seasonal decor. As a kid my Mom always put a lot of time (that she didn’t have) and effort into decorating my childhood home for the holidays and I’d like to do the same for baby P and any other future children I may have. Since in my opinion it’s a tad early for Halloween decor (it still feels like summer!) I thought I’d get my decorating started with a few easy fall themed pieces that compliment our regular home decor. This pennant banner is super easy to create and is both fun and elegant and most importantly – cheap! Mine cost about $3.00 to create. Happy fall, now go make a cute pennant banner to celebrate 🙂

pennantbur

This project was inspired by my DIY Rustic Pennant Banners that I use for party decor, follow this link to see how you can jazz up your next event!

My fall version!

My fall version!

SUPPLIES:

  • Burlap – the amount you need depends on what you would like your banner to say and how many letters it will contain, but you will likely need less than 1/4 of yard which will cost you about $1.00-$2.00.
  • Twine
  • Brown acrylic paint
  • Small paint brush
  • Large stencils – I used my reusable stencils that I used to create my DIY Rustic Burlap Pennant Banners, they are available at Staples.
  • scrap fabric (optional)
  • Scissors
  • Scrap paper

INSTRUCTIONS:

Step 1: Begin by creating a pattern out of scrap paper (I just used a piece of computer paper out of my recycling bin) in whatever shape you would like your pennants to be. I chose a square shape with an inverted triangle at the bottom which measured about 7″ wide by 10″ long.

I made sure that my letter fit atop the pattern.

I made sure that my letter fit atop the pattern.

Step 2: Once you have your pattern, use it as a guide and use a marker to trace as many as you need onto the back of your burlap then cut them out.

photo 2 (4)photo 3 (4)

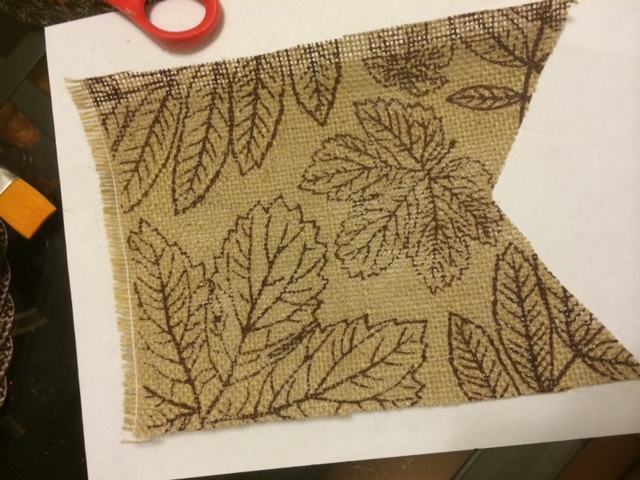
Step 3: After all of your pieces have been cut. Use your stencils and acrylic paint to apply your letters to the tops of the burlap using your small paint brush. Use a generous amount of paint. Set aside to dry.

Step 4: Once your letters have dried use your scissors to poke a small hole in either end of each of the tops of the pennants through which you will thread a piece of twine. At this point if you wish you can dab some mod podge on the ends of your pennants to keep them from fraying but since mine was going to be up high out of tiny finger reach (lol) I didn’t bother.

Step 5 (optional): If you want to add little fabric tassels to the ends to jazz it up use the same method I used in creating my Scrap Fabric Banner but instead with a few pieces knotted together.

IMG_0168 IMG_0167

DIY Painted Plastic Planters

pot

When we moved into our house on base I was pretty set on not doing anything to spruce up the landscaping. After all we are technically renting this house, so what bigger waste of money than to landscape somebody else’s property? Well after about one week of staring at the ugly, weed infested pine straw “garden bed” that lies around the front of the house, my will to want my home (renting or not) to look it’s best got the better of me and I decided we needed to do something to spruce it up even if it was just changing out the pine straw for mulch.

In my landscaping-on-a-budget post I discussed how we went about sprucing up our Honey Tree home with basically empty pockets, so we decided to apply the same principals here to make our new happy little home look a little more happy on the outside. I will most likely be posting about our new little landscaping project in detail but for now I wanted to share my little pièce de résistance of my outdoor decor – my painted plastic planters! These were inspired by a pair of painted terracotta pots I found on Pinterest (see picture below) and had the terracotta pots at Lowes been on sale I probably would have duplicated the project exactly, but at clearance prices of $2.99 and $1.49 and I couldn’t resist purchasing the large plastic containers that I ended up using instead. Another reason this project had me so giddy, is that since I already had spray paint on hand all that I needed besides the pots were a few plants and of course I chose perennials so that I could enjoy my little plastic wonder pots year round 🙂 This project can absolutely be done using any kind of planter, or better yet planters that are already black in color, I just chose to go with clearance items since the black ones were full price. You can even save yourself the trouble of using a store-bought stencil by checking out my hand painted sign tutorial and using the same technique for creating a stencil using painter’s tape. Hope this inspires you to do some fall landscaping while everything is going on sale! 🙂

My Pinterest inspiration!

My Pinterest inspiration!

My version :)

My version 🙂

DIY PAINTED PLASTIC PLANTERS

WHAT I USED:

  • 2 plastic planters – 1 medium, 1 large. I purchased mine on clearance at Lowes for less than $3.00 each!
  • Black matte finish spray paint – make sure it says that it is suitable for plastic and the outdoors, something like this would be good.
  • Clear matte finish spray paint/enamel – something like this would be fine.
  • White paint – I used white latex paint that I had left over from another project.
  • Stencils – I purchased mine at Staples. If you do not want to use stencils check out my Hand Painted Sign Tutorial for an alternative stenciling method using painter’s tape.
  • Painter’s tape
  • Small paint brush

WHAT I DID:

Step 1: I began with these two medium and large sized plastic planters, in grey and blue (because that’s what they had on clearance). Since I wanted them to be black I hit them both with an even coat of flat black outdoor/plastic grade spray paint. The recommended dry time was about 15 minutes so I waited about an hour before moving on to the next step due to humidity.

pot3

I didn't bother painting the insides since the dirt would cover the interior.

I didn’t bother painting the insides since the dirt would cover the interior.

Step 2: Once my pots had dried, I secured my store bought reusable stencils (the same ones I used for my DIY Rustic Burlap Pennant Banners) to the pots using painter’s tape and used a paint brush to paint the “NO. 3347” using white latex paint. White acrylic paint will do as well, since you will be sealing it against the elements using a clear enamel it doesn’t matter whether or not the white paint is suitable for the outdoors.  FYI, this is not an exact science, once I removed the stencils I returned and added another coat of paint and touched up any areas where the paint had leaked under the stencil. If you do not want to be troubled with this check out the above mentioned tutorial on hand painted signs for the painter’s tape method. You can also use white spray paint for the letters and stencils but I do not recommend it, it is super messy and will not be as tidy looking.

Step 3: Once your wording/numbers have dried, hit that area of your pot with a few coats of clear spray paint/enamel. This will keep your letters safe from the elements no matter what type of paint is underneath. That’s all folks! I waited until the next day to pot my plants to ensure that the enamel and spray paint had fully dried.

Finished product!

Finished product!

My goal in creating this little potted display was to cutsie up my stoop using a barely-existent outdoor decor budget. This would undoubtedly work better using ceramic pots since the paint would be less likely to peel or chip, however, the benefit to mine aside from the extremely low cost is that I don’t need to worry about these cracking come winter (which will be here before we know it, eek!). There are so many variations on this so go nuts! 🙂

For the plants I kept it simple with a small evergreen tree and three small lirope plants. The two mums alongside are potted in $1.98 Walmart pots.

For the plants I kept it simple with a small evergreen tree and three small lirope plants. The two mums alongside are potted in $1.98 Walmart pots.