
Ah good ‘ol laminate furniture. If you don’t own a piece yourself, surely you’ve heard of IKEA (hello particle board wonderland lol), the stuff is everywhere. It’s primarily loved because it is cheap. To put it into perspective, when we were stationed in Pensacola for a hot second before I discovered the wonder of re-doing furniture, we purchased a new wood bedroom set that cost us over $1,200.00 (I kick myself for this now, but whatever ya live, ya learn), meanwhile we were able to furnish an entire condo for less than that when we did so using particle board/laminate furniture. Problems is, the stuff tends not to last and when it does it starts to look even cheaper than it did when it was originally purchased (if that’s even possible lol). If you’re lucky enough to come across a piece that’s in relatively good shape, you MAY be able to save it with a quick re-do (unfortunately I cannot guarantee it will survive your next move, haha). Lucky for us thrifters out there, since particle board or laminate furniture retails cheap, it’s resale value is next to nothing, and for under $100.00 you can probably snatch up quite a few pieces in one shot. Another benefit to redoing super cheap pieces is that it’s a great opportunity to try out funky colors or unique designs, chances are if you mess up or totally hate the item, you’ll only be out a few bucks and a little time 🙂 Check out the before and after pictures of my laminate redos below to get some ideas. Again, I am sorry to say that I do not have step-by-step pictures for this tutorial but I will try my best to explain in detail.
YOU WILL NEED:
- Latex Paint (I use 8oz sample paints available at the paint counter of your local home improvement stores, I talk about them here)
- Bonding Primer (read my post on favorite products for brand recommendations)
- Black Foam Brushes
- Drop Cloth
- Clear Top Coat (polyacrylic or gel work great)
HOW I DO IT:
- First wipe your piece down with a damp cloth and a little dish soap (it is important that your piece is extremely clean, any residue with make it harder for paint to adhere to the piece), then wipe down again with just a damp cloth. Then remove any hardware, to include pulls or other metal pieces. Once piece is clean you are ready to prime.
- Bonding primer is some heavy stuff, make sure you open the windows because any oil based paint is going to be rough on the senses lol. Make sure you’re wearing a mask, just those little disposable doctor looking ones will do. Start by painting an even coat onto your piece, it is going to go on super thick and it will look awful, full of brush strokes and uneven, this is fine, this primer is just to help the paint adhere to the piece as well as cover any existing imperfections, you will not see it once the paint goes on. After the piece has been covered in a coat of bonding primer allow it to dry for several hours (generally my rule is to wait 12-24 but for the primer you need not wait so long).
- Now you are ready to begin painting. Use a foam brush to carefully apply a coat of paint to your piece. After the first coat is complete allow 12-24 hours before applying the next coat. Aside from a good top coat the key to keeping your piece from chipping is lots of dry time! The amount of coats you will need depends on the color paint you are using, for instance when using black you may only need two, but when using a light color you may need up to four. Since the paint you are using is not oil based, feel free to wash the brush in between coats and reuse it!
- After the last coat has dried, using a foam brush apply your first layer of top coat, making sure not to leave too many streaks or bubbles behind. To ensure a good protective coating on your piece, I would do three top coats, allowing 12-24 hours dry time in between. If you are using a water based top coat you can wash the brush in between coats and reuse it,, but the brushes are cheap enough that if you feel like using a different one for each coat the whole project will probably only cost you $3.00 in brushes anyway.
- Once your piece is finished replace all hardware, either with new pulls or use spray paint to update the old ones. I like to use Rustoleum brand spray paint in a satin finish.
- Bask in your cheap-furniture glory! You are finished and are a money-saving, crafty S.O.B :)!!!
BEFORE & AFTERS:

I sought out this piece because I was looking for a small table to act as a sort of entryway table for some dead space in my living room. The piece cost $40.00 and was pretty sturdy, but as you can see was missing some pulls so I purchased new ones from http://www.pullsdirect.com (a great resource for new pulls, just make sure they are the correct size). I used Valspar “Borough” and General Finishes Urethane top coat (also available on Amazon). The piece has held up well, we are constantly bumping into it and placing our keys and other items on it as we walk in the door and it has only gotten maybe a tiny scratch here or there that are not visible. TOTAL COST: ~$55.00

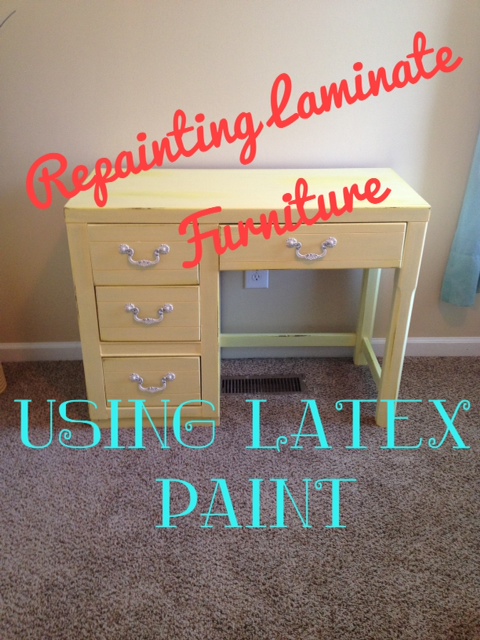
I had wanted a small desk to go in our “shabby chic” style guest room and this seemed like it would be perfect. I purchased it off of Craigslist for $25.00 (while I was there the guy also tried to sell me his house – weird lol). This piece was pretty strange as it is half real wood and half fiber board, so I did end up doing some sanding on this one. Since it was so cheap and wasn’t going in my main living space I decided to try my hand at distressing this one and it came out pretty good, after painting I simply sanded along the various edges and corners. Good thing I distressed this because this piece did not hold up so well, it has a few chips here and there mostly on the top but you would never notice that it wasn’t part of the distressed look. If you notice, I reused the pulls I removed from the project pictured above so that was a big money saver. The color is Valspar “Hazy Dawn” and the top coat is Minwax Polyacrylic. COST: ~$28.00

Our guest bathroom is a double dose of suck since it has no nearby linen closet and no storage lol. When I came across this weird Aladdin-looking thing for $15.00 at a local thrift store I knew it would be perfect for the bathroom. I simply removed the front piece and added baskets (purchased on sale at Michaels for $6.99 each). Since our bathroom is beach themed I went with “Sea Air” by Valspar for the color and gave it a Minwax Polyacrylic top coat. This piece has held up great, although being that it is in the guest bathroom it does not see too much action so this is not a very good measure of my painting methods, haha. COST: ~$29.00

After my girls threw me the best baby shower in the history of ever, I wound up with TONS of books for my tiny unborn P. I had actually bought this bookcase for $5.00 with the intentions of using it for a different project which didn’t work out, so it had been sitting in the garage for months despite my husbands weekly attempts to let him take it to the dump lol. This thing is flimsy as hell and was pretty gross, but I didn’t care because it was $5.00 lol. For the record, I don’t necessarily expect this to survive our next move, but for now it looks super cute in the nursery and you would never know it was such a piece of junk to begin with. I kind of rushed through this one since I was 8 months pregnant and SUPER excited to get it into the nursery lol, however, it has actually held up pretty well, maybe a scratch here or there but nothing on the exterior that can be seen. I matched the blue in P’s bedding using “Angel Eyes” by Olympic (available at Lowes) for the exterior and to switch it up I used my left over “Borough” by Valspar for the interior. COST: ~$8.00
