Quick and Easy Bar Sign Ideas – Made for around $8!


IMG_2951

Hello there! Little man P and I have just returned home from a nice long visit to family back home on the east coast. While I’m hesitant to call my trip a “vacation” because of all the running around we did pretty much the entire time, it was definitely a ton of fun and super productive – especially when it came to DIY-ing!

Since my Mom aka Nanny (Nanny is what P calls my Mom but for the purpose of this post it might as well be used in the vocational sense as well, haha) was more than willing to help out with my stinky frog I had a lot of time to devote to working on several projects, all of which I’m excited to share with you! I’ll start off by sharing these adorable bar signs that I whipped up using an $8.00 piece of wood. I actually ended up deviating from my original plan which was to attempt to create a DIY marquee bar sign but once I completed the painting part of the sign I chickened out on drilling the holes and inserting the lights because I thought it was super cute just the way it was (hopefully I can attempt the marquee sign soon though!) 🙂

phonto

As far as a tutorial goes I’ll share the fonts (usually I find fun fonts via dafont.com but these particular fonts are all available in current versions of Microsoft Word!) that I used for the signs but for an actual how-to hop over to my DIY Hand-Painted Sign post for a step-by-step tutorial on how to create a hand painted sign without a Silhouette or Cricut. These signs will also be available as a set in my Etsy shop if you’re looking to purchase something to spice up the look of your bar area or are in the market for a similar custom product (here is the link for this specific listing) 🙂


PRODUCTS/FONTS USED:

wood – 1 4’X1′ piece cut in half // paint – “Ultra White” and “Front Door Red” by Valspar // stain – “Jacobean” by Minwax // font for “bar” sign – “Bernard MT Condensed” // font for “eat, drink & be merry” sign – “Bernard MT Condensed”, “Script MT Bold”, “Algerian”


Simple Valentine’s Day Wreath

IMG_0039

Another holiday is right around the corner and depending on your personality (or relationship status, ha) you either love or hate this one – love everywhere, prepping for a fun night out (or in, in my case), flowers, the color PINK, tiny candy hearts … as you may have guessed I’m in the “love it” camp on this one … Valentine’s Day!!! I’m a sucker for really any holiday and no, we shouldn’t need a special day to shower the one we love with affection and goodies but isn’t it so fun nonetheless? Mine and J’s personal couple tradition since before we were even married has been to dress up and have a fancy dinner at home (this year’s meal includes a special shrimp appetizer that is a Schulze original and as long as it isn’t a total bust I plan on sharing it on the blog next week!). We prefer sharing a few cocktails in the relaxed environment of our own home, cooking a super fancy meal together  and really enjoying each other’s company as opposed to spending our Valentine’s Day in a crowded restaurant. It’s the simple things, right? Which brings me to this wreath – a super simple way to have an eye-catching door all month long!

182734_10150413236975486_818742_n

A few years (and a few pounds *sigh* lol) ago in our old place having our traditional “fancy” night in.

I was originally inspired by a wreath I came across on Pinterest (pictured below). Since the only necessary components seemed to be a grape vine wreath, a wooden letter and an assortment of ribbon, this seemed to be an easy fix for my Valentine’s Day door! I have been super into grapevine wreaths lately and have quite a few posts about them on the backburner (here is a fun springtime wreath using a grapevine frame) but for now I will say that I love them for a few reasons but mostly because they’re super cheap (you can get one for under $5.00, however, I  always use a coupon so it will come in around $2.50 or so) and they are super easy to work with; the tightly wound vines allow things to be stuck into them easily and pretty much any adhesive bonds well with them so it is easy to adhere embellishments as well. This wreath is very reminiscent of my St. Patty’s Day Rag Wreath which utilized mostly left over crafting supplies to create and I applied that same idea here as most of my ribbon I had on hand or was able to find half off at Hobby Lobby. This is a great beginner’s wreath as it doesn’t require any particular skill so if you can tie a knot you can do it, I promise, lol! Check out the tutorial below and if you’re feeling adventurous hop on over to my other Valentine’s Day posts (an Oversized Porch Sign and another Valentine’s Day Wreath) for some more crafting inspiration in this month of love xoxo.

12741884_10156521467810486_1622838805484619586_n

Happy Valentine’s Day from the Schulzes to you!!!


7d4e043a9926a96046b45fe84e816c05

My “pinspiration” – follow the link to find this particular wreath for sale here on Etsy – http://www.etsy.com/listing/175318886


IMG_0316

My version!

SUPPLIES

  • 12″ grapevine wreath – available at any craft store or where crafting supplies are sold.
  • assortment of wired ribbon of varying sizes – it isn’t 100% necessary to use wired ribbon but the ribbon will look more poofy and have a bit more structure and ability to stand up to the elements this way. The amount of ribbon is totally up to you, I think I used about six.
  • wooden letter – I chose to paint mine white and then add some hearts using this method. You can always just draw hearts or polka dots using an oil based Sharpie paint pen as well.
  • paint (for wooden letter, optional) –  latex, spray paint, acrylic really anything will do. I chose to spray paint mine because I already had some on hand and it’s probably the easiest method.

INSTRUCTIONS

  1. If you plan to paint your wooden letter, do this first. With any luck it will be dry by the time you finish the rest of the wreath.
  2. Begin by cutting your ribbon into about 3-4 inch strips. Some can be longer or shorter and in fact it’s more fun if they are not all the same size so that it creates a less uniform look.
  3. Next, begin tying your ribbons randomly onto different areas of the half of the wreath you’ve chosen to decorate. Simply loop the ribbon under one of the vines and then tie – that’s it! Repeat in this fashion until you’ve achieved a dense look with little to no wreath base showing through.
  4. To attach your wooden letter either tie it on using ribbon or if you have access to a staple gun (which is what I did) staple a pipe cleaner or other wire to the back of the letter and tie it onto the wreath in this manner.
  5. At this point feel free to add any additional embellishments (like my little glittery Styrofoam hearts) – the dollar store is a great resource for little things like this!

That’s it! If you’re like me and measure units of time in “naptimes” then this should only take you about 3/4 of a naptime lol. 

vdaywreath2

Last year’s Valentine’s Day porch!

10 Minute Burlap Wreath

10minwreat

Wow, it sure has been a while! I had high hopes for some more consistent blog updates over the past few months but apparently moving can really take a toll on one’s free time, lol. Good news is, we have arrived safely (and mostly sanely, ha) at our new home in Quantico and are so happy to be here! We just love our house and new community and I can’t wait to share all of the fun times and crafts that are sure to come at this new station :).

As usual, even though life has been completely crazy I have somehow still found time for lots of projects, one of which was this 10 minute burlap wreath! In trying to meet new people, one of my new neighbors was sweet enough to host a wreath making party and this is the simple design I chose to create for my August wreath. It’s a good thing this wreath only takes ten minutes because of the several hours we spent chatting and sipping wine, there was only a tiny portion of time actually spent making wreaths, haha. This particular design requires very few supplies and even less time, so it’s easy to throw together in a pinch and most importantly for my fellow mamas – you can create it during naptime and still have time for a nap yourself ;)!

10 MINUTE BURLAP WREATH

SUPPLIES

  • 12 inch wire frame wreath – available at your local craft store, I purchased mine at Michaels using a 40% off coupon.
  • 2 10-yard rolls of burlap – these usually run about $5-ish per roll at Michaels but if you hold out for a sale or coupon you can usually get them for 40% off. I purchased mine when they were on a 50% off sale so they only ran about $2 a piece!
  • Floral accents – the options for floral accents and greenery are endless so my suggestion would be to choose the ones that are on clearance, as mine were.
  • Plain wooden letter (optional) – while the letter is optional I think it adds a cute flair to the wreath. Mine was the only “S” left so it was on clearance for only $0.79!!! I hit it with a coat of white spray paint I had on hand and voila, done!

INSTRUCTIONS

Step 1: Begin by unrolling your burlap garlands and secure the end of your burlap to the frame (sometimes this is done using wire but I simply cut a small slit length-wise to create two small tails on the end an then simply tie it to the frame). For weaving your burlap in and out there are a few different methods, one of them is detailed here in this YouTube tutorial, but another would be to cut it into long strips and weave it in and out in an “under-over-under” manner, making sure to “poof” and bunch your loops along the way. As I mentioned in similar tutorial for my 4th of July Wreath it’s a little hard to describe this method and much easier to learn it visually, that being said YouTube is an excellent resource to actually see this method in action.

Step 2: Once you have created the burlap portion of your wreath simply cut the stems of your floral and greenery accents to a manageable length (about 5-10 inches is good, just long enough to be able to wedge them into the frame) and stick them into the frame at your desired location. You should not need any wire to secure them, mine were able to fit tightly into the frame atop the burlap without issue.

Step 3: If you are using an initial or monogram accent, secure it to the opposing side of the wreath by using a decorative ribbon, twine or clear fishing line to secure it to the wire frame. Once this is done you may go back and manipulate any of the burlap loops and floral accents to your liking!

There you have it! Not much to it at all, huh?! It really does take about ten minutes and if you mind your sales and coupons this can be created for less than $10! Mine cost about $12 total 🙂

Giant Reversible Holiday Sign – St. Patty’s Day Edition

stpattyboard

Eek! Time keeps on slippin’ and another month has came and went! I have been keeping busy with my not-so-tiny frogman (and of course a few projects in between!) and in some other exciting news we have been busy preparing for our next move which will be taking us to VA! We love the DC area and NOVA so we are super excited to see what this new assignment has in store for us.

Although most of my time recently has been spent trying to purge our useless items rather than take on new projects I did take a quick minute to spruce up our stoop for St. Patrick’s Day. Even though between my husband and myself there is zero Irish heritage that doesn’t mean we don’t love this fun holiday all the same, after all who doesn’t appreciate a little Irish cheer [insert infinite beer emojiis]? 😉 Additionally I appreciate any holiday that gives me the excuse to craft and ever since I created our giant “NOEL” porch sign for our outdoor Christmas display I’ve kind of done the idea to death in my head thinking of ways that I can transition the same idea into other holidays, first in the form of my “XOXO” board for Valentine’s Day and now a “LUCKY” one for St. Patty’s Day! I had mentioned in my Valentine’s Day board post that I had experienced a minor lapse in brain function when I didn’t simply paint the “XOXO” art onto the back of my “NOEL” board so that my holiday porch décor could double as Valentine’s décor by flipping it over once February arrived. With that being said I’m happy to report that I did remember to do that this month which is what makes this holiday sign “reversible” – my “LUCKY” board is actually the back of my Valentine’s Day board which makes this month’s porch sign FREE! I hope this inspires a little outdoor design creativity in you, with a little luck you might wind up with the most fun porch in the neighborhood! 😉

Our St. Patty's Day sign as it is displayed on our porch, with a little leprechaun photo-bombing of course <3

Our St. Patty’s Day sign as it is displayed on our porch, with a little leprechaun photo-bombing of course ❤

For a full length supply list and tutorial for this project check out my “XOXO” Valentine’s Day Sign, but if you would like to duplicate my “LUCKY” board exactly here are the details

vdaywreath2

Side #1 – Valentine’s Day

Side #2 - St. Patty's Day

Side #2 – St. Patty’s Day

FONT: “Christmas on Crack” available for free download via dafont.com. I used font size 970 just be sure to adjust your page margins so that it will fit.

COLOR: “Four Leaf Clover” by Valspar – funny thing, I didn’t actually pick this because of the name I just randomly grabbed a green color chip and that was the name, how fitting right!? lol I purchased a sample sized paint in this color for $2.98 – to learn more about my obsession with sample sized paints for projects check out this post.

CLIPART: For my four leaf clover silhouette I just copied a google-image four leave clover to a word document and enlarged it to my desired size before printing it out. Here is the link to the exact one that I used.

Flashback to St. Patty's Day last year - click on this picture to check out an adorable post about my little DIY St. Patty's Day photo with my little lucky charm <3

Flashback to St. Patty’s Day last year – click on this picture to check out an adorable post about my little DIY St. Patty’s Day photo with my little lucky charm ❤

Sweet Potato Curry Lentil Soup

sweetpotatocurry

When I first started this blog (a year ago this month! Wow, time flies!) I maintained a pretty good balance of posting both recipes and crafts. Lately I’m realizing that as my squishy baby becomes less squishy and more of little marathon runner/mountain climber in-training, I’ve defaulted to a lot of my go-to recipes – things that are tried and true and can be prepared either with one hand as Baby P “helps” or that I can prepare in the time it takes him to finish his own dinner while he is confined to his high chair, lol. The other night when I was meal planning for this week and scanning through my “tried and true” Pinterest board, I kept coming across my own original recipes and became determined to test out one of the many recipes that I’ve been cooking up in my head recently but haven’t had the time to actually try out. So that is how I came to whip up this delicious Indian-inspired soup, perfect for a chilly fall or winter day! Aside from the fact that I love a jazzed-up spin on an old classic like lentil soup, I also love that this could totally be a “pantry-meal” a.k.a. something you could make using items that you already have on hand which makes it SUPER easy and super cheap as well. Two final and super important benefits of this recipe is that it is both super healthy and freezable! I made a big batch so that I was able to freeze the half we didn’t eat and simply heat it up for a quick meal another night.

SWEET POTATO CURRY LENTIL SOUP

INGREDIENTS

  • 2 Tbsp. olive oil
  • 3 cloves garlic, minced
  • 1 medium onion, diced
  • 2 carrots, chopped
  • 2 stalks celery, chopped
  • 2 large sweet potatoes, peeled and diced into 1 inch cubes
  • 1 large tomato diced (or substitute 1/2 cup canned diced tomatoes)
  • 8-10 cups chicken or vegetable broth OR 8-10 cups water and 2 Tbsp. bullion or chicken/vegetable base
  • 1 1/2 cups lentils, rinsed
  • 2 Tbsp. curry powder
  • 1/2 tsp. coriander
  • 1/2 tsp. cumin
  • salt and pepper to taste

DIRECTIONS

Step 1: In a dutch oven or large pot heat the olive oil and add in garlic, onions, carrots and celery and cook until just soft.

Step 2: Add in diced tomatoes and spices, season with salt and pepper and allow to cook for about 2 minutes then stir in lentils and sweet potatoes. Bring to a boil then reduce to simmer for about 35-45 minutes until lentils are cooked and sweet potatoes are soft.

Step 3: If you like your soups really chunky you can omit this step but I use an immersion blender to blend the soup up a bit, leaving some chunks but so that the smoothness of the portion of blended potatoes and lentils give the illusion of a heavier soup even though this is a light recipe. NOTE: If you don’t have an immersion blender simply ladle about 2-4 cups of soup into a regular blender or food processor, blend and then return that to the pot with the rest of the soup.

“Where the Wild Things Are” Birthday Party Invitation

pinvite

So this post is going to be a little redundant if you’ve already checked out my DIY Invites & Greeting Cards without Photoshop post, but since Baby P’s invite was so stinkin’ cute and so special to me, I think it deserves it’s own post :). Additionally, this tutorial will highlight inserting a picture into your invite whereas my last post was text only. Perhaps most importantly (second only to Baby P’s cuteness, of course lol) is that these invitations cost about $8.00 for thirty (depending on where you choose to have them printed)! Talk about a steal, you can’t even get lame, fill-’em-in-yourself Target brand invites for $8.00 let alone an adorable, custom picture invitation. Please keep in mind, if you are interested in having a WTWTA themed birthday party and love this invitation design please contact me and I will sub in your child’s picture and send you the PDF for free 🙂

NOTE: I will reiterate what I said in my other DIY invitation post. It is legal for you to use copywrited images and characters for your own personal use as long as you are not profiting from that use, however, big corporate print stores like Staples and Office Max are weird about printing things with these types of images (like the WTWTA characters on my invite) and will not do it because technically it is trademark infringement on their part as they profit from your payment to them for printing. Some print stores, like my local Postal Anex are a lot more lax about this kind of thing so bear in mind that you will need to seek out one of these smaller establishments or print them yourself at home or at the library.

As mentioned above, the only difference between this invitation and the example in my DIY Invitations and Greeting Cards post is that this one contains a photograph (which is super easy to ad). For creating the text portion of the invite and adding the characters (which I found by doing a Google search for “Where the Wild Things Are characters”) I will refer you to the previously mentioned post. As for adding a picture simply select: INSERT>PICTURE and retrieve the picture from wherever you have it saved on your computer. Once you have added the photograph you may adjust the size and then select: FORMAT>PICTURE>OUTLINE if you wish to change the color or weight of the outline around the picture (I used a thick yellow outline to match the font). Like the font I used? It’s “Hello, Goodbye” available here via dafont.com, the same one I used when creating my DIY Hand-Painted Where the Wild Things Are Sign. Do you absolutely love my photo of Baby P in his wolf suit? Check out the my DIY Wolf Suit Costume tutorial!


DIY Baby Costume – “Where the Wild Things Are” Wolf Suit

wolfsuit

I know what you’re thinking “enough already with this WTWTA birthday party, I’m so sick of hearing about it I’m about to go burn the book!” lol, almost done, I promise! When I was drafting a post about Baby P’s adorable birthday invite I realized that I just had to share the pictures from my little backyard photo shoot when taking a picture to use for the invite. I was inspired when I found an invitation on Pinterest of a little boy dressed up as the character of “Max” in the most adorable wolf suit and just knew that I had to recreate it for P! The first step was to create a wolf suit. I knew that these were available for purchase but with my already meager party budget I had no business even entertaining the idea of buying a costume, especially to use for only one picture and especially because Pottery Barn Kids was selling them to the tune of $70.00 – say whaaaaat??!!! Anyhow, I figured that since it was just for the invitation it only had to look convincing enough for the recipients to get it when read along with the text so I knew that creating my own wouldn’t pose too much of a challenge, all I needed was a white sweatshirt, pants and a tail of some sort. Surprisingly these items were easy to come by and I say surprisingly because who on Earth would sell a white sweatshirt and pants for tiny humans that are always dirty? Maybe they’re meant to be worn ironically or something, haha anyway, I digress, back to creating the wolf suit. I found the sweatshirt and sweatpants on Amazon because I didn’t have time to run to every second hand store searching for these particular items in his size but if you do by all means find them at a thrift store or ask to borrow them from friends as you wont be altering them in any way. Please read on to see where I found the rest of my embellishments for the costume and of course to see the finished product – the picture of my squishy Baby P wearing it!

pinvite

I chose this particular photo to use for the invitation, if you’re interested in seeing how I made it myself check out this post and to find out how you can easily make other greeting cards and invitations without Photoshop, check out this post!

WOLF SUIT

1 pair of white sweatpants

  • 1 white hooded sweatshirt
  • 3 cardboard circles (to make the buttons)
  • 3 medium sized safety pins and 1 large safety pin
  • 1 small piece of faux fur fabric (less than 1/8 of a yard is fine)
  • 1 crown (I fashioned mine out of a left over box and yellow felt fabric but a gold plastic crown would be easy to come by, even a Burger King crown would work! haha)

To assemble the costume all I did was draw a black “X” on each one of the cardboard circles then used the three smaller safety pins to secure them to front of the sweatshirt right beside the zipper. I also cut a small tail out of the faux fur fabric and used the large safety pin to secure it to the inner back of the pants. That’s it! Clearly this is nothing fancy but the outcome was absolutely adorable and it served the purpose I needed. If you are planning to use this as a Halloween costume or want it to be worn for party you can jazz it up a little more with real buttons and by attaching some brown felt or fur feet to the top of their shoes.

Here are just a few of the pictures of P in his wolf suit!

IMG_0019 IMG_0022 IMG_0042

IMG_0037 IMG_0038  IMG_0031 IMG_0047

DIY Oversized Valentine’s Day Sign – A $9 Project!

xoxosign2

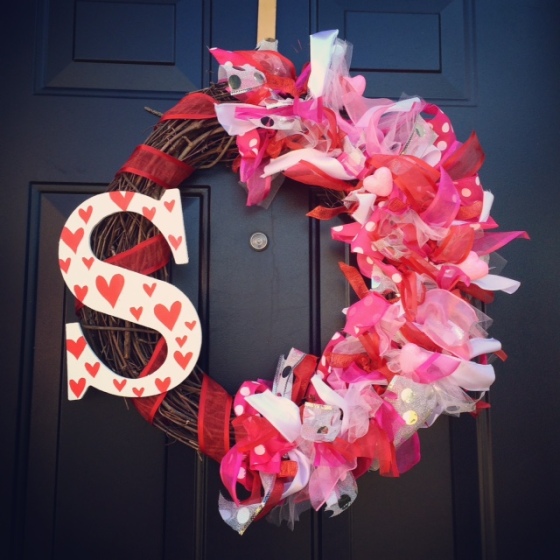
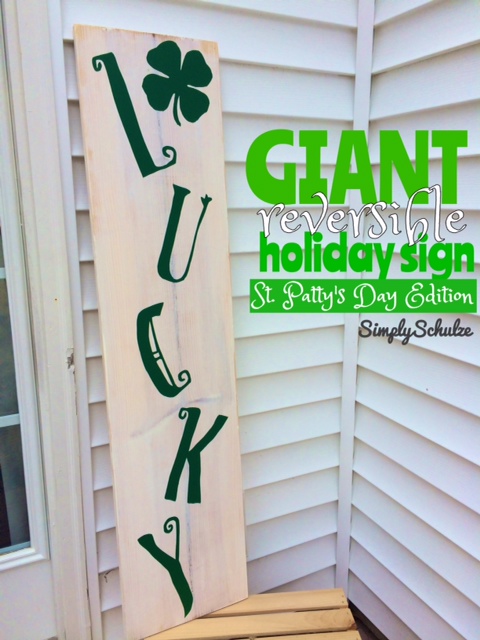
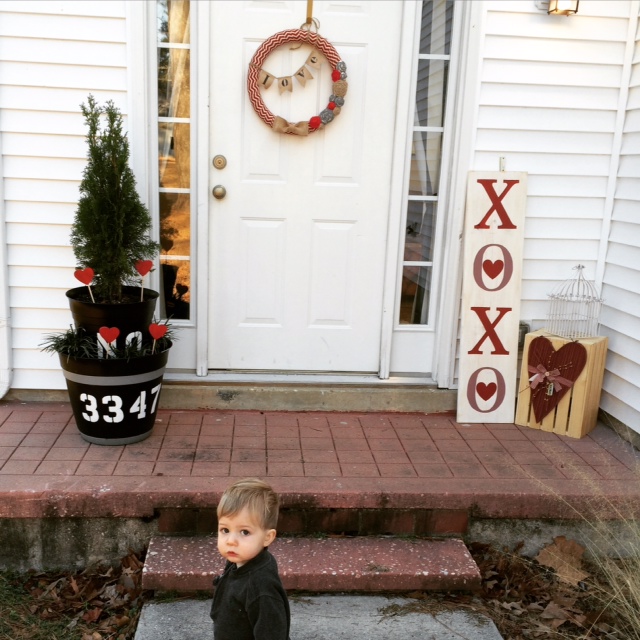
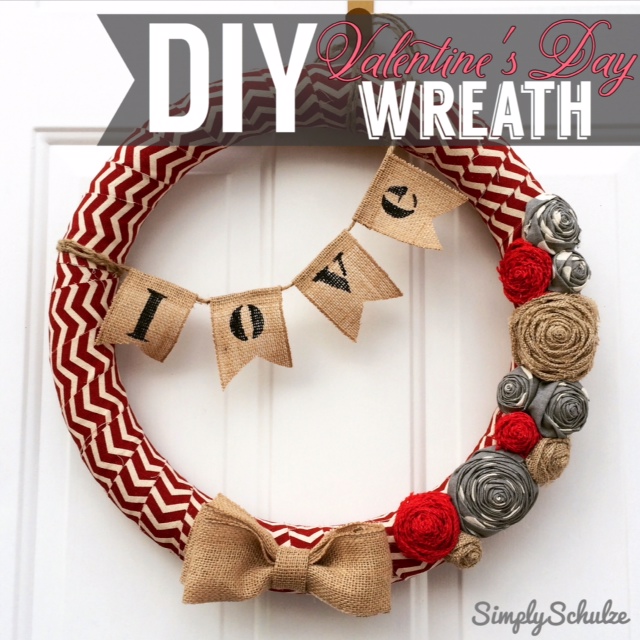
After posting about my DIY Valentine’s Day Wreath I felt super proud to have gotten a post up that actually preceded the holiday for which I created it, haha. So in keeping with that rhythm I’d like to share one more Valentine’s Day DIY project that I had made mention of in my wreath post – my DIY oversized Valentine’s Day “XOXO” sign, perfect to lean on your front porch and cause your neighbors to do a double take when driving by :). This project was actually inspired by DIY Oversized Holiday Sign that I displayed throughout the holidays (I will do a separate post about that soon along with the rest of my DIY Christmas décor). As I was reluctantly stripping my stoop of all of it’s holiday awesomeness I realized that since my “NOEL” sign was so easy to create (less than $9!) I could just create a similar one for Valentine’s Day! Before I get to the tutorial I am going to admit a serious “mom-brain” moment and let you know that you can actually make two of these signs for the price of one by simply making your sign reversible, something I myself didn’t realize until my friend commented on my picture and said “I would love to have one of those with something for Christmas on one side and Valentine’s Day on the other” – DUH, Natasha! So had my brain actually been functioning on the day I created this I would have simply turned my “NOEL” sign over and painted the “XOXO” on the back. However, no harm done as I can just do my St. Patty’s day sign on the back of my Valentine’s Day one, that’s right, I love this project so much that I’m pretty sure I’ll be making one for each and every holiday! Hope this inspires you to create a simple project that makes a BIG statement :).

val2

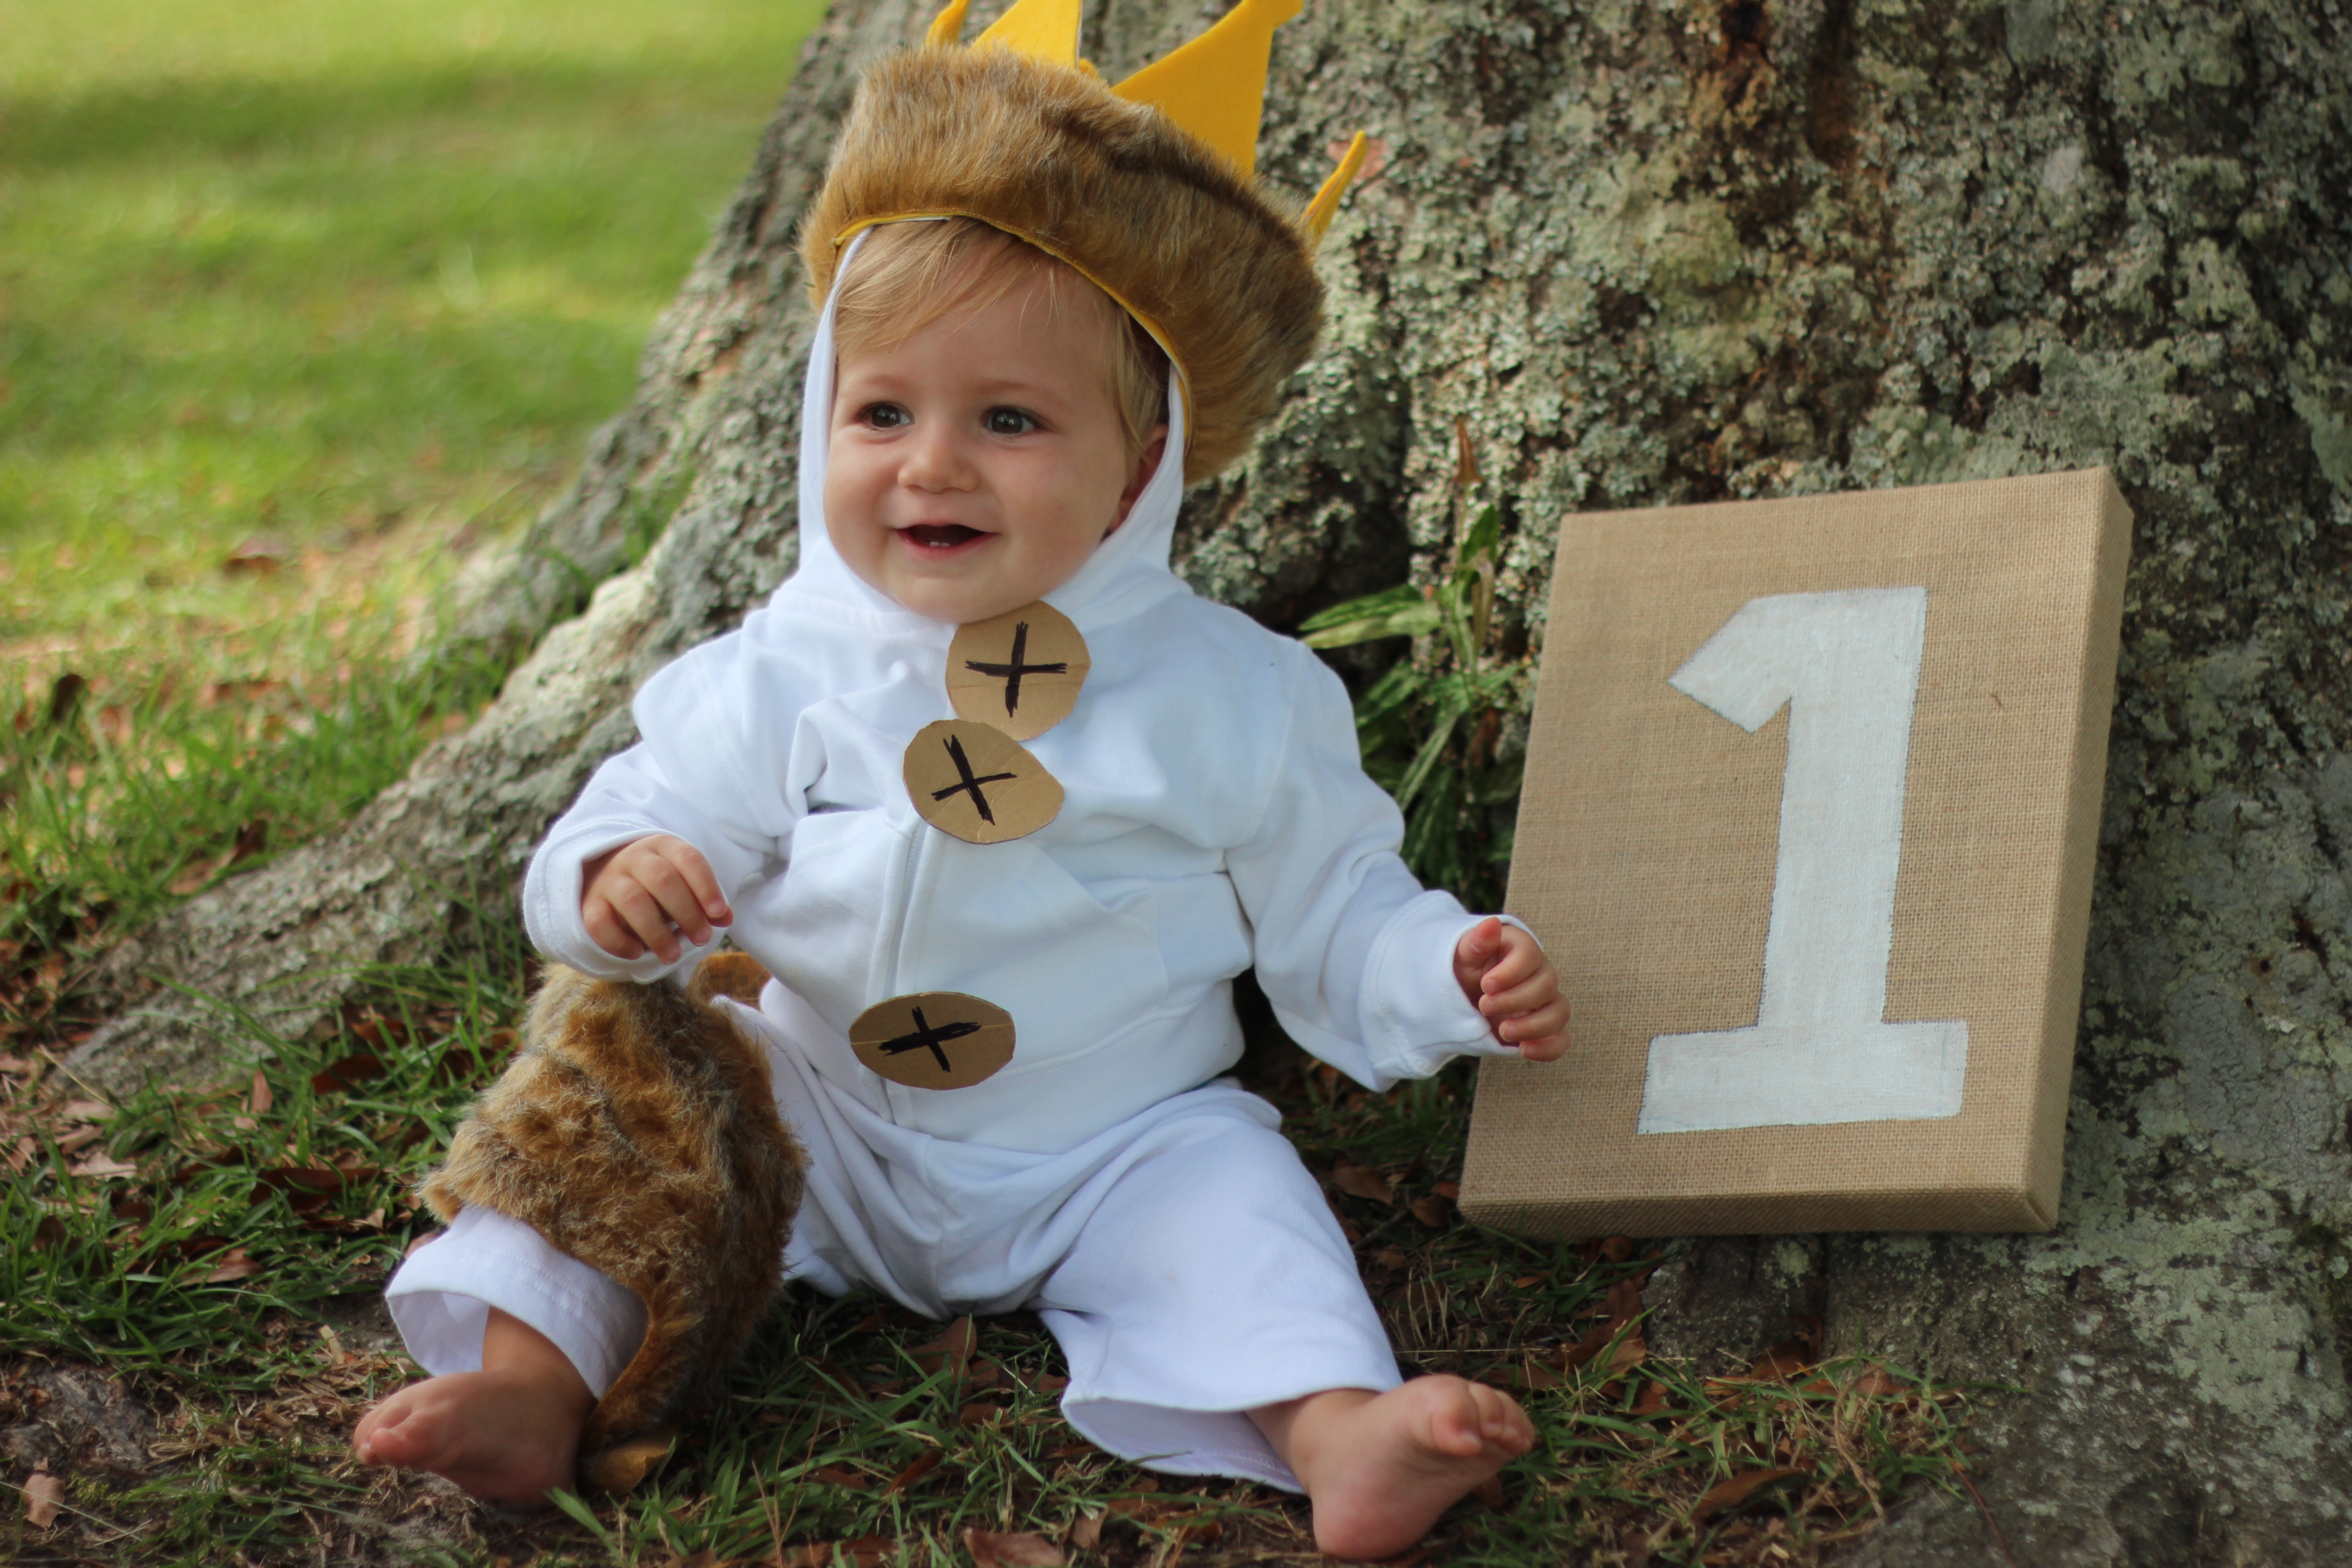
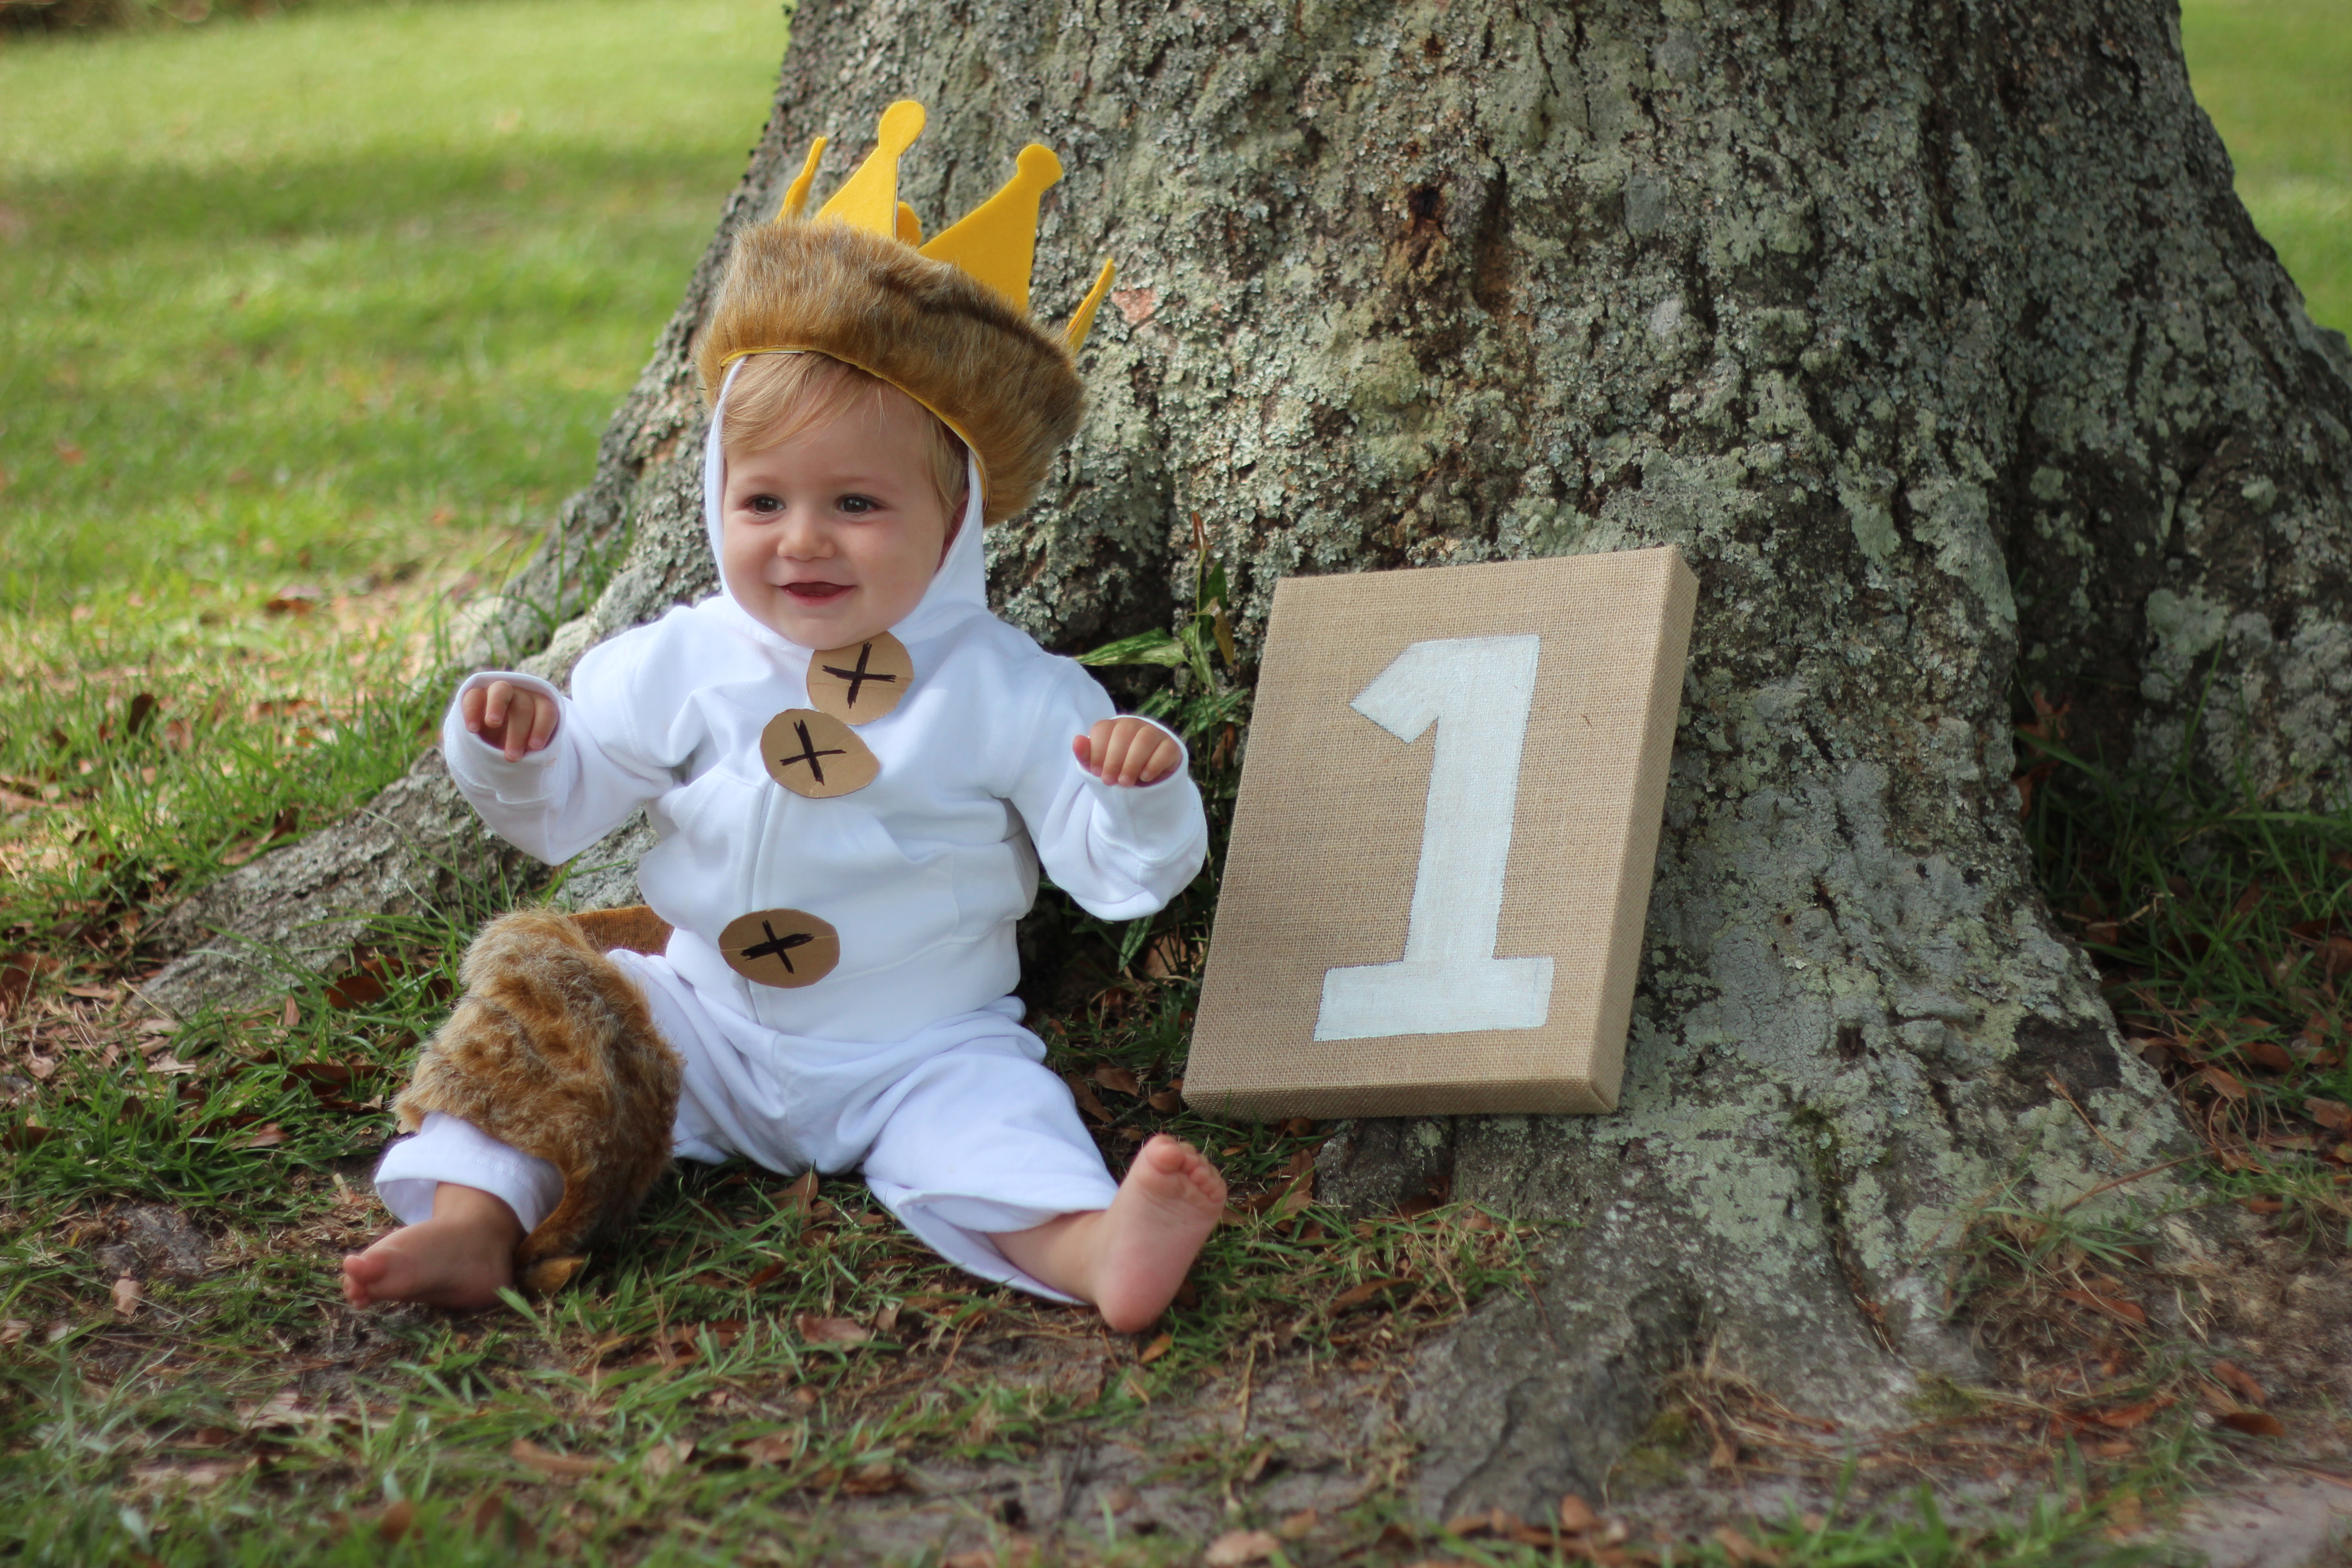
For my throwback-Thursday I’ll share this adorable Valentine’s Day picture of my little Baby P, at the time just four months old, my how time flies! Click on this picture for the link to my post about all of my little DIY Holiday Photos, if you love squishy babies you’re in for a treat! 🙂


SUPPLIES

  • 1 4ft X 1 ft board – the cheap “white board” stuff is fine, that’s how I got away with this being a $9 project, since these boards already come in this size there is no need to have it cut (although if you’d like it smaller go ahead and have them cut it down to size for you right there in the store). I purchased my board at Lowes for $8.97 less my military discount. Try to pick a piece that doesn’t have any large cracks as some of them do.
  • latex paint – any color you wish! For the background of my board I used “March Breeze” (aka white lol) and for the letters I used “Front Door Red” and “Dusty Garnet” all by Valspar. These colors I already had on hand since I tend to collect those little sample sized paints available at Lowes, please check out this post to read more about those.
  • black foam brushes
  • electric sander or sanding blocks – for distressing, if you do not plan to distress and your board is in pretty good shape you could probably do without these.
  • painter’s tape (preferably wide)
  • x-acto knife
  • printer
  • Minwax Finishing Paste – any topcoat will do, I used this paste wax because I already had it on hand and it doesn’t require extensive dry time. I used “special dark” to give the sign a more vintage/rustic look.

INSTRUCTIONS

Step 1: Begin by sanding down your board lightly just to soften up any rough or little jagged areas. Next paint your board whatever background color you have chosen. Since I was going for a distressed/white-washed look I only did one thin coat but you can do as many as you want. NOTE: Since my sign wasn’t reversible this time I did not bother to paint the back if you are planning to do a second holiday or saying on the back you can save time by painting the back now, once your front has dried.

Step 2: Next I distressed my board on the edges and a little along the front using my electric sander. This could also be done by hand using sanding blocks or regular sand paper.

Step 3: Using whatever word processor you have at your disposal, create your words. Sometimes I find it is easiest to get the biggest letters by Googling, for example, “letter X” and then copying and pasting the stock image onto your blank document, this way you can maximize your margins and adjust the picture of the letter to be as big as possible, whereas when simply typing the letter x you may not get it to be as big. Make sense? The hearts I just created using the “insert shape” function on your word toolbar, and inserting them right into the middle of the O. Once you are happy with the size of your letters just print out your document. NOTE: this probably goes without saying but if you’re anything like me your brain is occasionally scooped out and the obvious may be temporarily lost on you, but since “XOXO” contains two of each character you need only create one X and one O document and print each twice. This is great because you can be sure that they’re even!

Since I didn't take step-by-step photos of the "XOXO" board here is one from this step when creating my "NOEL" board at Christmas time.

Since I didn’t take step-by-step photos of the “XOXO” board here is one from this step when creating my “NOEL” board at Christmas time.

Step 4: Now cover your board with painter’s tape (this is where it helps to have the wide painter’s tape). Next, arrange your letters on your board, if you’re super OCD you can use a measuring tape or ruler (even a level if you’re super nutty) or you can just wing it and place the letters so that they look even to you and use a bit of tape to hold them in place. Then using your x-acto knife carefully (no craft-induced ER trips please lol) cut around your letters and hearts pressing firmly enough to cut through both the paper and tape, once you have finished (or as you go along, whatever works for you) peel off the letters and you will be left with a stencil of your letters and hearts (Os should be filled in with the exception of the heart portion). *For more on this method check out my post on my first DIY Hand-Painted Sign.

Step 5: Once your little makeshift stencil  is ready to go you can now paint! Using your foam brush apply an even coat of paint to each letter in the colors of your choosing. Allow about half an hour in between coats, juts enough for any wet areas to dry. Since your background is white you should not need more than 2-3 coats. NOTE: If you’re painting a light color over a dark background I would suggest hitting your letters with a coat of cover stain/bonding primer in either brush or spray form (see this link for a product recommendation) then applying your color on top, I will touch more on this when I post about my DIY Oversized Holiday Sign).

Step 6: Allow your piece to dry about 8 hours or overnight. Once it is dry peel off the rest of your painters tape to reveal your beautiful hand-painted letters! At this point you may want to give the letter a very light sanding just to remove any thick areas where the paint may have built up between the tape and the edge of the letters but if you’re happy with how it looks you can just move onto the final step – waxing your piece.

just before the waxing step!

just before the waxing step!

Step 7: Using a lint free cloth or rag apply a thin layer of your paste wax and allow to sit for the recommended amount of time (15 mins I think?) then return with a clean rag and buff your piece. If you are using a liquid or spray topcoat just follow the directions on the package and wait the appropriate amount of times between coats and be sure to allow enough dry-time before displaying your piece out doors. Personally I am partial to the wax (a) because I already had it on hand and (b) once you buff it, it is ready for display, no dry time!

Squishy baby photo-bombing my Valentine's Day stoop photo :)

Squishy baby photo-bombing my Valentine’s Day stoop photo 🙂

Like my wreath? Check out this post to find out how you can easily make one yourself!


DIY Valentine’s Day Wreath

vdaywreath1

Okay, so I know I’ve been skipping around a lot as far as my posts go and I’m doing my best to finish up those featuring Baby P’s First Birthday Bash so that I can finally share that with you. However,  in the meantime I want to share a cute little Valentine’s Day inspired wreath I whipped up last week because believe it or not, just because I don’t post my holiday décor in correct holiday order doesn’t mean that I am not actually decorating in a timely fashion, lol. This wreath is similar to my DIY Mini-Pennant Banner Wreath that I made last spring and is super easy to create! Since we were headed up to DC to visit friends for MLK weekend I wanted to go ahead and get my Valentine’s Day stoop all set up before we left and wanted to stick to what I knew when it came to my décor and keep it simple. Here is a quick little tutorial for my Valentine’s Day wreath just in time for Valentine’s Day, it’s so quick and easy that you’ll have plenty of time to enjoy it even though the 14th is just a few short weeks away 🙂

vdaywreath2

Valentine’s Day stoop with my sweet little frog photo-bombing! Like my GIANT “XOXO” sign? You can find the tutorial on how to make your own for $9 here!

SUPPLIES

  • 18″ Styrofoam wreath frame (available at local craft stores)
  • 2″ wide ribbon of your choice – I went with a red and beige chevron which I found at Hobby Lobby. This wreath required about 2 1/4 spools of ribbon but it may be more or less depending on the ribbon you choose.
  • 2-3″ wired burlap ribbon
  • twine
  • scrap fabric – the amount will depend on how many fabric roses you want on your wreath
  • glue gun & hot glue
  • small stencils
  • black acrylic paint
  • paint brush
  • scissors

INSTRUCTIONS

Step 1: Begin by wrapping your ribbon around your Styrofoam wreath, securing with little lines of hot glue along the way.

Step 2: Once your wreath is covered cut small pennants using your wired burlap ribbon. NOTE: you can also use regular burlap if you have that on hand, I have just found that the wired burlap holds up better to the elements for me as I do not have a storm door. Next, using your small stencils and acrylic paint, paint each letter of L-O-V-E individually onto each of your pieces and allow to dry.

Step 3: In the mean time, create your fabric flowers, for a detailed tutorial on these adorable flowers check out this post. Once you have the amount of flowers that you desire use hot glue to secure them to the bottom right quadrant of your wreath (or wherever you’d like, this is just how I placed them). NOTE: If you do not have the time or will to create your own flowers you can buy ready made fabric flowers from your local craft store but PLEASE try making them yourself, I promise it is super easy!

Step 4: Since your pennants should be dry by now, use hot glue to attach them carefully to your piece of twine then securing your mini pennant banner to the upper left area of your wreath by wrapping the ends of the twine around the body of the wreath then securing it with a tiny dot of hot glue on the back (or just knotting it in back).

Step 5: This is optional, but if you’re so inclined go ahead and fashion a bow out of any left over ribbon and attach it to the bottom center of your wreath using hot glue. Just adds a little extra somethin’ 🙂

THAT’S IT! There are so many ways to customize this by changing up the colors or saying. I look forward to coming back to this wreath for future holidays and simply changing up the theme!

A picture of our new doormat - just for funsies :)

A picture of our new doormat – just for funsies 🙂

DIY Favor Tags & Cupcake Toppers – Where the Wild Things Are

caketopper

So in wrapping up my posts on Baby P’s first birthday bash I figured I’d share one last cute little money saving party idea – DIY favor tags and cupcake toppers! My favor tags were as simple as using the same method I did to create P’s invitation and stapling it to a little baggy of cookies! Due to the wide age range of kids that were going to be in attendance I wasn’t sure what to do for favors but I knew I wanted to do something cost effective, so what’s more cost effective than sugar cookies? Plus I felt that giving something edible really lent itself to the “we’ll eat you up” part of the favor tag. While originally I had planned to make cookies in the shape of a “1” time ended up getting away from me and I just went with simple homemade (and by homemade I mean those ready-to-bake rolls of dough that you buy in Walmart, lol) sugar cookies with sprinkles. I was really happy with how they turned out and even happier that I was able to customize my favor tags to fit the party theme!

close-up of favor tag and cookie bag.

close-up of favor tag and cookie bag.

favors as we displayed them.

favors as we displayed them.

As for the cupcake toppers they were a last minute DIY idea for when I decided that I was going to forgo the idea of having a professional make the cupcakes and smash cake and make them myself. While I’ve gotten crafty with cupcake decorating in the past (check out my margarita and patriotic cupcakes!) I knew that since I needed about sixty cupcakes I didn’t want to commit to any type of elaborate design. In searching various online retailers I came across some pretty adorable cupcake toppers, even some that were already customized to my theme, but in an effort to save some addition money I decided to just create them myself by using Microsoft Word to create little circles with various WTWTA images inside (see my post on DIY Invites & Greeting Cards without Photoshop for more on making some simple designs without fancy computer programs). Once my little circles were printed all I had to do was cut them out and use a glue stick to glue them together around a standard toothpick. While the process was a little tedious it was a super easy and FREE way to jazz up my box cupcakes!

photo 2 (6)photo 5photo 4 (3)


TIP: Want an even easier option? Print the favor tags out on shipping labels and simply stick it to a little colored paper baggy. You can apply this same idea to your cupcake toppers by printing out the characters on circular labels and sticking them together around a toothpick so that you can skip the cutting step altogether.

If you’re interested in throwing your own budget-friendly “Where the Wild Things Are” party and would like to use my caketopper and favor tag designs please contact me and I would be happy to share the document with you free of charge!