“Where the Wild Things Are” Birthday Party Invitation

pinvite

So this post is going to be a little redundant if you’ve already checked out my DIY Invites & Greeting Cards without Photoshop post, but since Baby P’s invite was so stinkin’ cute and so special to me, I think it deserves it’s own post :). Additionally, this tutorial will highlight inserting a picture into your invite whereas my last post was text only. Perhaps most importantly (second only to Baby P’s cuteness, of course lol) is that these invitations cost about $8.00 for thirty (depending on where you choose to have them printed)! Talk about a steal, you can’t even get lame, fill-’em-in-yourself Target brand invites for $8.00 let alone an adorable, custom picture invitation. Please keep in mind, if you are interested in having a WTWTA themed birthday party and love this invitation design please contact me and I will sub in your child’s picture and send you the PDF for free 🙂

NOTE: I will reiterate what I said in my other DIY invitation post. It is legal for you to use copywrited images and characters for your own personal use as long as you are not profiting from that use, however, big corporate print stores like Staples and Office Max are weird about printing things with these types of images (like the WTWTA characters on my invite) and will not do it because technically it is trademark infringement on their part as they profit from your payment to them for printing. Some print stores, like my local Postal Anex are a lot more lax about this kind of thing so bear in mind that you will need to seek out one of these smaller establishments or print them yourself at home or at the library.

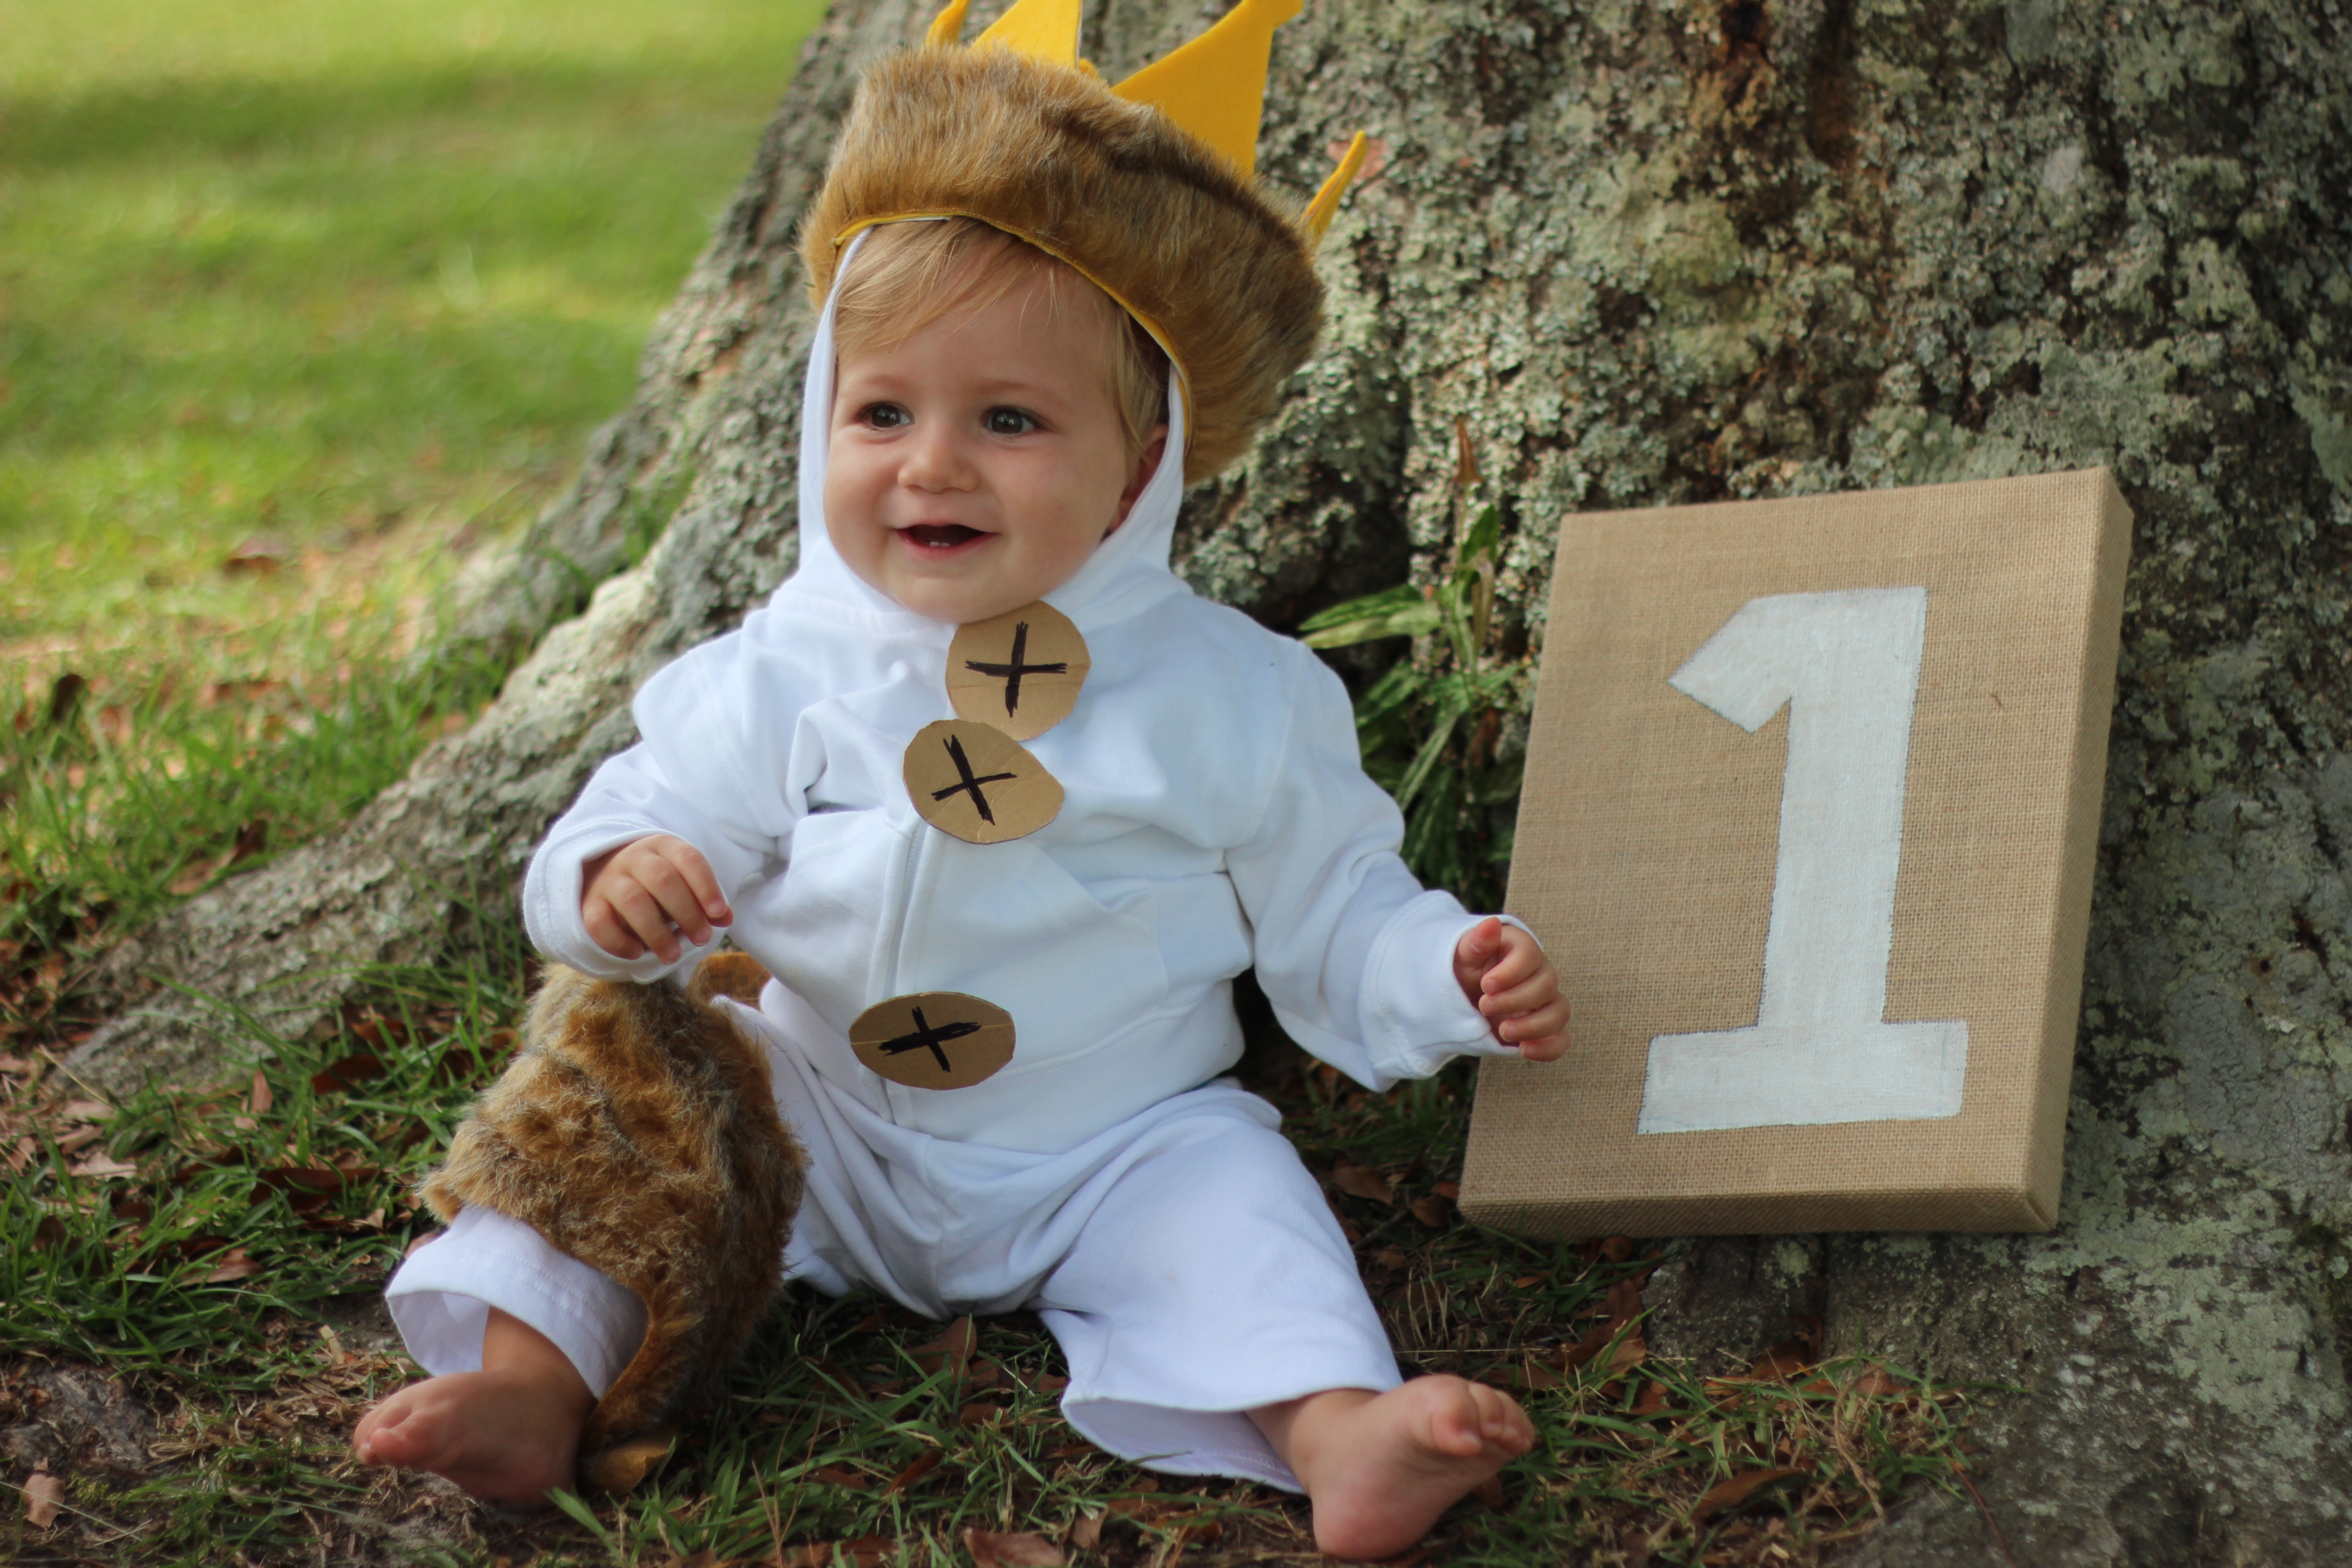
As mentioned above, the only difference between this invitation and the example in my DIY Invitations and Greeting Cards post is that this one contains a photograph (which is super easy to ad). For creating the text portion of the invite and adding the characters (which I found by doing a Google search for “Where the Wild Things Are characters”) I will refer you to the previously mentioned post. As for adding a picture simply select: INSERT>PICTURE and retrieve the picture from wherever you have it saved on your computer. Once you have added the photograph you may adjust the size and then select: FORMAT>PICTURE>OUTLINE if you wish to change the color or weight of the outline around the picture (I used a thick yellow outline to match the font). Like the font I used? It’s “Hello, Goodbye” available here via dafont.com, the same one I used when creating my DIY Hand-Painted Where the Wild Things Are Sign. Do you absolutely love my photo of Baby P in his wolf suit? Check out the my DIY Wolf Suit Costume tutorial!


DIY Baby Costume – “Where the Wild Things Are” Wolf Suit

wolfsuit

I know what you’re thinking “enough already with this WTWTA birthday party, I’m so sick of hearing about it I’m about to go burn the book!” lol, almost done, I promise! When I was drafting a post about Baby P’s adorable birthday invite I realized that I just had to share the pictures from my little backyard photo shoot when taking a picture to use for the invite. I was inspired when I found an invitation on Pinterest of a little boy dressed up as the character of “Max” in the most adorable wolf suit and just knew that I had to recreate it for P! The first step was to create a wolf suit. I knew that these were available for purchase but with my already meager party budget I had no business even entertaining the idea of buying a costume, especially to use for only one picture and especially because Pottery Barn Kids was selling them to the tune of $70.00 – say whaaaaat??!!! Anyhow, I figured that since it was just for the invitation it only had to look convincing enough for the recipients to get it when read along with the text so I knew that creating my own wouldn’t pose too much of a challenge, all I needed was a white sweatshirt, pants and a tail of some sort. Surprisingly these items were easy to come by and I say surprisingly because who on Earth would sell a white sweatshirt and pants for tiny humans that are always dirty? Maybe they’re meant to be worn ironically or something, haha anyway, I digress, back to creating the wolf suit. I found the sweatshirt and sweatpants on Amazon because I didn’t have time to run to every second hand store searching for these particular items in his size but if you do by all means find them at a thrift store or ask to borrow them from friends as you wont be altering them in any way. Please read on to see where I found the rest of my embellishments for the costume and of course to see the finished product – the picture of my squishy Baby P wearing it!

pinvite

I chose this particular photo to use for the invitation, if you’re interested in seeing how I made it myself check out this post and to find out how you can easily make other greeting cards and invitations without Photoshop, check out this post!

WOLF SUIT

1 pair of white sweatpants

  • 1 white hooded sweatshirt
  • 3 cardboard circles (to make the buttons)
  • 3 medium sized safety pins and 1 large safety pin
  • 1 small piece of faux fur fabric (less than 1/8 of a yard is fine)
  • 1 crown (I fashioned mine out of a left over box and yellow felt fabric but a gold plastic crown would be easy to come by, even a Burger King crown would work! haha)

To assemble the costume all I did was draw a black “X” on each one of the cardboard circles then used the three smaller safety pins to secure them to front of the sweatshirt right beside the zipper. I also cut a small tail out of the faux fur fabric and used the large safety pin to secure it to the inner back of the pants. That’s it! Clearly this is nothing fancy but the outcome was absolutely adorable and it served the purpose I needed. If you are planning to use this as a Halloween costume or want it to be worn for party you can jazz it up a little more with real buttons and by attaching some brown felt or fur feet to the top of their shoes.

Here are just a few of the pictures of P in his wolf suit!

IMG_0019 IMG_0022 IMG_0042

IMG_0037 IMG_0038  IMG_0031 IMG_0047