

Hi everyone! I know I have been just awful about updating the ‘ol blog these past few weeks but between moving and heading back up north for a mini family vaca I have been all over the place! Good news is that I am back on the grid lol, and prepared to pollute blogland with TONS of new posts including my hubby’s surprise 30th birthday bash (a whiskey and cigar themed party, a huge success btw) which I had to keep off the blog until now, as well as some new crafts and recipes I have been working on in between organizing the house and ripping my hair out in frustration over moving haha.
Okay, back to the wreath. Being that we were heading out of town just one short week before Independence Day, I knew I had to eek out my 4th of July wreath if I wanted it to be displayed leading up to holiday. This was not my first burlap wreath rodeo, I had tried my hand at it once before for my Easter wreath (a post that I am yet to get around to lol) and was super surprised at how easy it was to create given how impressed I was with the final product. So while J did his best to wrangle baby P (who is crawling lightening fast these days and getting into everything) I managed to get this wreath done in just about 20 minutes! I will give you a run down of the specific products I used but obviously it is not necessary that these items be used, as the thing I love most about burlap wreaths is that there are a variety of ways on which to elaborate on such a simple idea and that they can be adapted to fit any color scheme or holiday. If you’ve seen one on Pinterest and are hesitant to try it out, don’t be – it is almost impossible to mess up. I know a lot of the written explanations for weaving the burlap can be confusing but if you YouTube “burlap wreath tutorial” you will find a much more helpful guide to making one, I promise! Happy 4th of July everyone, please watch some fireworks for me, baby P goes to bed at six so chances are I will not be watching any aside from what I can see from my porch lol.

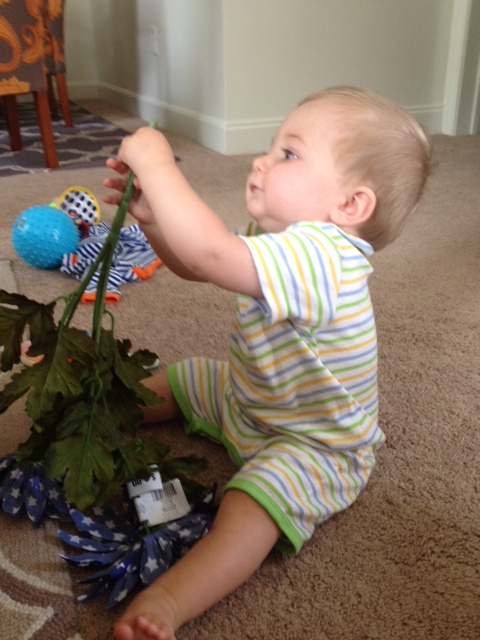
baby P looking adorable right before he started slamming the bouquet violently then trying to eat the petals lol.
4TH OF JULY BURLAP WREATH
WHAT I USED:
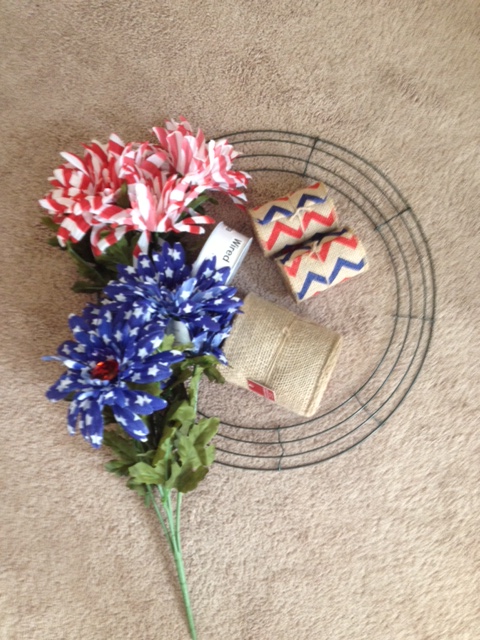
- 18″ wire wreath frame – I purchased mine for $2.50 at a local craft store specific to my area but you can get them on Amazon for around $5.00 or so.
- 2 rolls of red and blue chevron wired burlap ribbon (10 ft. each) – I purchased mine from Walmart for $3.47 per roll but a Google search revealed that it can be purchased just about anywhere, lol.
- 1 roll of plain burlap ribbon 5 1/2″ X 15 ft – available at any craft store.
- white satin 1″ wired ribbon
- Flag Print Faux Daisies – these just happened to work perfect and were available at Walmart, however, any red/white/blue flower combo would work or even a bow instead!
- 1 white wooden letter
HOW I DID IT:
Step 1: I began by weaving my burlap into my wreath, I will refer you to YouTube for the tutorial on how to actually weave the burlap in and out of the wire frame so as to not embarrass myself with an explanation that will make no sense, haha. I will say, however, that I did work by weaving the plain burlap for a few loops, then exchanging it with the chevron ribbon and I worked in “sections” of burlap instead of weaving the whole 15 feet through at once because that would have taken FOREVER. I would just work it through for a few feet then cut it and start over in the next section, since my chevron ribbon was wired it was easy to secure it even though I was not using the whole roll at once.

Step 2: Once I was done weaving my burlap and chevron interchangeably. I wove my 1″ white ribbon through the wreath in no particular pattern. This was simply to be the “white” in the red/white/blue holiday color scheme, the wreath looked perfectly fine without it.
Step 3: I cut three of each print of daisy from the bunch and stuck them through the wire frame, weaving the stem through the three metal bars so that the flower would remain secure. Then using a piece of twine I tied the wooden “S” to the wreath right atop the flowers.
inspecting the flowers again lol
Step 4: Once the wreath was complete, I took a few minutes to “poof” my loops and rearrange my flowers so they looked just right!
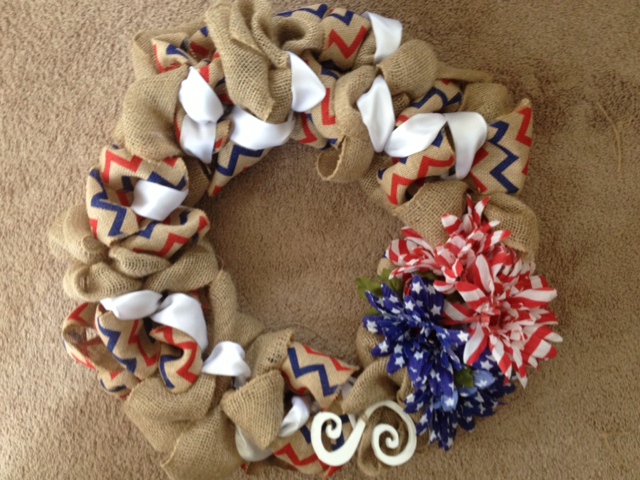
finished product!
This wreath cost me right around $15.00 to make and just out of curiosity I did a quick Etsy search for a “4th of July Burlap Wreath” and almost spit out my drink when I saw that the average wreath was going for an average of $50.00 plus shipping – WHAAAAAAAAT???!!! NO, NO, NO, people, you are getting ripped off, especially because you can buy almost all of the necessary components for one of these wreaths at Walmart. Furthermore, if you make a plain burlap wreath you can simply adjust it to each holiday or season by adding embellishments (a big benefit of the burlap wreath is that it is not permanent, if you mess it up or want to change it simply unweave and re-do) so potentially you can have the best wreath on the block time and time again for just around $10.00 for the year. So please, to keep me from having anxiety over thinking of people swipin’ that credit card for a $60.00 burlap wreath, at least attempt to make your own! Friends don’t let friends pay good money for cheap crafts lol.

Pingback: Football Themed Wreath – NY Giants | simplyschulze
Pingback: 10 Minute Burlap Wreath | simplyschulze