

So lately I have been super intrigued by diaper cakes. When making gifts for friends and family I love to get creative with the items I am gifting rather than simply sticking them in a gift bag with a card. Diaper cakes lend themselves perfectly to this idea of creative gifting, so while you may just be plucking items off the registry like everyone else, you can still present them in a way that is fun and unique and will most certainly be remembered by the mama-to-be! First let me say my original inspiration was of course, Pinterest but also my friend Courtney of Wildly Domestic who has made some absolutely fab diaper cakes, definitely check out her blog section on diaper cakes as that is the tutorial I used in creating mine. The idea for this particular diaper cake came about because my sweet friend K of about 15 years is expecting her third baby boy!!! Sweet new baby boy Brian is going to have a whale themed nursery, which I think is just the cutest. After creating this diaper cake I couldn’t wait to share it because after my trial run with a two-tier cake this past weekend this was my first real attempt at a diaper cake! I also decided that I love the whale idea for a baby boy, it’s kind of along the same line as owls (check out baby P’s nursery for some owl-inspiration), and if you’re like me and not into characters or sports themes whales could very well be the boy theme that you’re looking for! Again for some super involved diaper cakes see Courtney’s tutorial above, this one was thrown together in the midst of our big move so I didn’t have time to make it as snazzy as I wanted (actually J came home from making multiple trips to the new house with household items while I was supposed to be packing/patching wall holes and came home at 10pm and was like “ummm are you making a diaper cake?” .. umm yea, is that not what I’m supposed to be doing? lol). Another word to the wise, these are NOT cheap to ship lol which I learned the hard way, so make sure you leave enough time to ship it standard post, unlike me who shipped it out two days before I needed it to arrive haha.
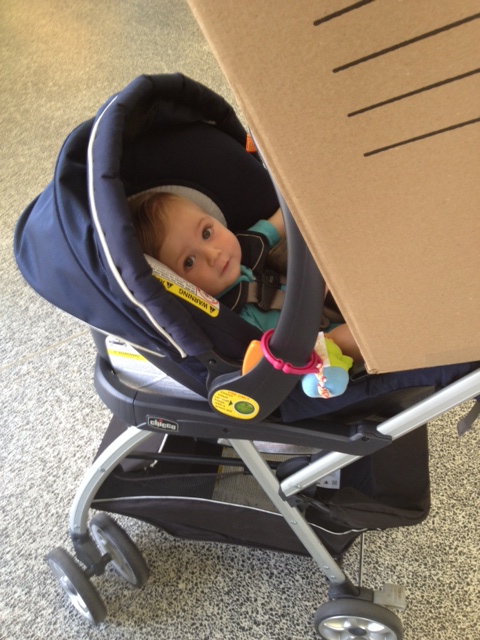
Baby P helping me ship the giant box at the post office!
WHAT I USED:
* I just kind of got some items together and made them work with the cake and you can do the same, there is no need to use exactly what I did. I would suggest using diapers though because uh .. diaper cake lol.
- About 80 Size 2 Diapers – I used Luvs because I was able to order a box of 216 for $32.99 via Amazon Prime (umm what?! I know, awesome! I’m not lying, see link here). I know Luvs are not everyone’s preferred brand but I do use them on baby P (during the day, when I use them at night I will ultimately end up doing a 3am outfit change, no fun!) when I’m feeling the money pinch so I feel like I can promote them here lol.
- Cake pans (6″, 8″, 12″, 16″) – If you don’t have cake pans they are not necessary, just a helpful guide. You can still form the “cake layers” without the use of a pan it may just require a little more balancing and manipulation but you will wind up with the same result, I promise.
- Wooden Dowel (Optional) – Because I was going to be mailing the diaper cake I wanted to use any extra reinforcement I could get, I just cut a dowel I had to the height of the cake. If you are going to be transporting the cake yourself, you can just thread something through it (as I did with the towel).
- Round Cardboard Cake Bottom or Cardboard cut to size – I opted for the latter option because all my Amazon purchases yield lots of leftover cardboard, lol. If you would like a prettier option Walmart and Michael’s sell cake bottoms for cheap. I wrapped my cardboard in blue wrapping paper.
- Ribbon – regular wrapping ribbon to hold the diapers in their cake form (my friend Courtney uses large rubber bands but I didn’t have any on hand) and to decorate the top, 2″ ribbon to wrap the edges, 1″ ribbon to wrap around the entire cake and feed through the cardboard bottom for further reinforcement (I reused the ribbon that the receiving blankets were wrapped in).
- 2 Receiving Blankets – Purchased via Amazon in a pack of 4. I split them up and used two for the diaper cake and included the other two in another gift (SO many babies happening lately!)
- 3 Bibs – Pack of 3 via Amazon. I purchased them because the one had a whale on it, they don’t lend to the functionality of the cake. I wrapped the other two around the top of the dowel on the top tier of the cake to help hold it in place and prop up the towel on top.
- Soft Sole Whale Shoes – Available via Amazon. They have other animal options as well, super cute and seem to be great quality!
- Whale Rattle – Purchased via Amazon. I purchased it on clearance but now the price has gone up to $10.00 (for a rattle!?? what?! lol) I would do an Amazon search for a whale toy to yield something more budget friendly.
- Whale Towel – By Carter’s. Purchased at Walmart for $5.99 but it is also available here on Amazon for about $7 more.
- Wooden Letter – I purchased my unfinished wooden letter at Walmart for $1.97 and my plan was to cover it in scrapbook paper (see my tutorial for an easy scrapbook wooden letter here), but didn’t have time to run to Michael’s. Instead I simply used my laser printer to print out the lyrics to “Baby Beluga” on a blue piece of cardstock and used that in lieu of scrapbook paper (please check my tutorial first if you plan to do this for instructions on use of laser printer vs. inkjet printer).
WHAT I DID:
*Since I was supposed to be packing not crafting, I didn’t take the time to take step-by-step pictures but thankfully Wildly Domestic’s blog will offer you a much more detailed and informative tutorial than I would have provided. I will describe to you as best I can what I did.
- I began by using my cake pans to fan out the diapers, fold facing out, arranging them as best I could. Once I had them arranged to my liking I used a piece of ribbon to tie the diapers together.
- After all of my tiers were complete, I fed the length of the hooded baby towel through the layers, leaving the whale hood visible at the top. I also stuck the dowel down the middle for further reinforcement.
- I then cut a piece of cardboard in a circular shape to fit the bottom of the cake and cut a small hole in the bottom of the cake and fed the end of the towel through the bottom, manipulating it so it would lay flat (not cause the cake to sit crooked) and used shipping tape to flatten the excess towel on the bottom of the cardboard.
- To prop the hood up on top, I wrapped the two non-whale bibs around the top of the dowel and draped the hood over them.
- Working with bottom and second layer, I wrapped the receiving blankets around the layers and tucked them under to secure them. I used a piece of clear shipping tape to hold them in place (I think my friend Courtney uses pins but I didn’t have any and knew the decorative ribbon would end up covering the tape anyway). See Wildly Domestic’s tutorial on “fondant style” diaper cakes for further instruction on how to fold and wrap the receiving blankets.
- I then took my 2″ ribbon and cut four pieces of the necessary length to wrap around each of the tiers. I would hold one end tight in place over the diapers and then use a dot of glue on the ribbon to attach it to itself at the back.
- Once you are done adorning the layers with ribbons you are ready to add your embellishments. I wrapped a piece of blue ribbon around the tail of my whale rattle and secured him around the middle of the top and second layer. Then I used a mini clothespin left over from another project to hold the shoes in place on the ribbon and a piece of twine to attach the letter “B” to the ribbon at the bottom layer. For the whale bib I simply used its velcro to attach it between two layers and folded it under so the whale image was showing at the front.
- After all of the embellishments were added I stuck gift basket shredded paper between the layers (I didn’t use any adhesive, just stuck them in there). I also cut a hole in the bottom of either side of the cardboard edges and fed a 1″ piece of ribbon through each hole underneath the cake and tied it at the top (this was not necessary but since I was going to be shipping the cake I wanted to make sure it held together).
- Finally I tied a bow around the bottom layer at the front and attached some gift ribbon to the top and used scissors to curl it!


This is absolutely fabulous! Love your
step by step directions.
Pingback: Nautical Mini-Diaper Cake | simplyschulze
Pingback: Easy Scrapbook Distressed Wooden Letter | simplyschulze
Pingback: DIY Invitations & Greeting Cards – Without Photoshop! | simplyschulze