DIY No-Sew Bow Tie

bow16

So the bow tie saga continues, haha. As promised, the other night I got down to it and created an adult sized bow-tie for J. You guys, IT CAME OUT AWESOME! I could not believe the side-by-side comparisons with his store-bought bow tie. Another reason I am so excited about this is because I was extremely skeptical about this project. A bow tie for baby P is one thing, he’s a baby and would look cute if you ripped up a paper bag and glued it to his pajamas (lol), J on the other hand, is a working professional who would need to be seen in public wearing this creation, and no man of mine is gonna walk around wearing the bow-tie equivalent of a first grader’s pasta necklace, haha. That being said, I did have a little hope, since before I had decided to take on this project I was sure to carefully inspect our store-bought bow tie to see if it was even worth attempting and if I could get away with a no-sew option of course. So the other night I put Nashville on Hulu (still not sold on this show, I don’t know why I keep watching it lol) and got to work! This bow-tie took me about 45 minutes to create, mostly because I was making it up as I went along, so don’t worry, if you decide to attempt this it will probably take you about a half hour, which I consider a super quick project, especially considering you’re getting an actual wearable accessory out of it!

Now let me talk a little about cost and being “fashionably frugal”, if you will. My original idea for this bow tie goes all the way back to last Father’s Day, when at six months pregnant and over the moon about our sweet little boy on the way (we had just found out we were expecting a boy), I purchased a matching father/son bow tie set via Etsy as a gift for J. Now, don’t get me wrong, I love the Etsy bow ties, the workmanship is perfection as is the quality of the fabric, however, I am embarrassed to admit what I paid ($53.00 .. gahhhhh, insert wahh face and money with wings emojii). I don’t mind that I splurged since I blame it mostly on pregnancy hormones lol, and since it was the kind of bow tie that you have to tie yourself that means it was sewn and we all know I’m no seamstress. Well, as luck would have it, a few months ago I found J a great pre-tied tie on Groupon for $4.99 (with free shipping, say whaaaaaat?!). The kicker is J actually prefers this cheap-o tie to the one that you have to tie yourself, and I can’t say I blame him since it always looks perfect, no need to scroll through YouTube videos trying to remember how to tie a bow tie, haha. This Groupon tie gave me the idea for a DIY version, the idea being, I had already made one for baby P, how hard could it be to recreate an adult version of the same thing? Back to the cost of the tie, if you think $4.99 was cheap, try $0.96!!! Yup, ninety-six cents people, now bare in mind that I was using fabric that I already had since I was matching it to baby P’s bow tie, so all that I needed to purchase was the tie clip, but if you’re frugal with your fabric choice the most this project will cost you is in the neighborhood of $3.00, sounds fab right?

bow1

Cheap-o inspirational Groupon bow tie, super cute! This is the one J wore in our family pics!

bow18

Side by side comparison in case you don’t believe me, lol.

Now for the tutorial, and pictures aka important proof that I’m not lying to you about this no-sew bow-tie that your man can actually wear in public and still be considered an acceptable part of society lol. I promise I will post pictures of J and P wearing their matching bow-ties, but since I’m going to include this as a gift in J’s Father’s Day package the pics will have to wait until then, I just had to post this pronto because I was so excited about it!

bow14

Father/Son Matching Bow Ties .. awwwww!

YOU WILL NEED: 

  • Fabric of your choice (you will not need much so like I always say, this is a great opportunity to hit up the remnants bin at your local fabric store or reuse some fabric that you already have).
  • Iron-on hem (heat ‘n’ bond, stitch witchery etc. Whatever brand you use is fine)
  • Bow Tie Set (this can be found by the buttons at your local fabric store, if you cannot find it as a set the employees should be able to direct you to each piece individually or you can purchase it online)
  • Glue Gun
  • Scissors
  • Iron

DIRECTIONS:

NOTE: Explaining the step-by-step directions is a little difficult as there are many small steps, but if you follow the pictures the wording will make a lot more sense, feel free to ask questions. 🙂

Step 1: Begin by measuring out and cutting your fabric. You will need the following:

  • 1 piece measuring 2.5X2.5 inches
  • 2 pieces measuring 9X5 inches
  • 1 piece measuring 24X1 inches
bow

2nd piece of large fabric not shown, oops.

Step 2: Use the following tutorial to begin to create your bow ties by following steps 1-5 only and repeating steps 1-4 twice as you will need to “bodies” for your bow ties (I will explain in the following steps). I used hot glue for all parts, no sewing.

Step 3: Take the two identical rectangles that will act as the body of the bow tie, and use a dot of hot glue in the center to glue them together, seam side down on both. Now, pinch the rectangles together at the center to form a “bow” once you have achieved a good bend to the fabric, use a few dots of glue to secure it at the center (as shown). Do not attach the middle piece yet, you will need to complete the strap first. bow5
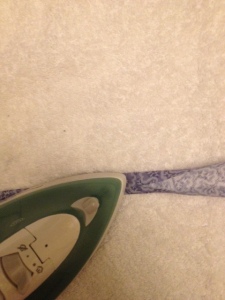
Step 4: Now, begin work on your neck strap by taking your 24X1 inch long piece of fabric and lay it out flat with your print side facing down. Carefully fold in each edge (longways) so that they meet in the middle (as you did with the other pieces), and iron over the folds (this will help to hold it in place evenly when you insert the iron in adhesive). Once you have ironed the length of the strap it should be about 1/2-3/4 of an inch in thickness, however, the thickness doesn’t really matter so long as it is straight/even as possible. Now, cut a piece of iron-on hem the same length and about the same thickness (a little thinner is fine, it just needs to fit within the strap), place it inside the strap, refold the sides so they are covering the adhesive and iron the fabric until the adhesive sets (just about 5-8 seconds per section). Once this is complete your strap is ready for clips! bow2 bow4
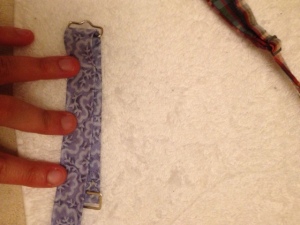
Step 5: Begin with the rectangular three bar clip (I don’t know the technical term for it lol), feed one end of the strap through about half an inch, upside down (hem side facing up) and loop it over securing it with a dot of glue. Now in the same direction feed the rectangular attachment (the one that the hook will attach to), over the long end. Then feed the length of the strap through the three bar weaving it under, over, under so it overs the part where you looped the first end. Now your strap is adjustable!

bow6

The girl at the counter loved my squishy baby so much that she gave me a 40% military discount instead of the usual 20% 🙂

bow10

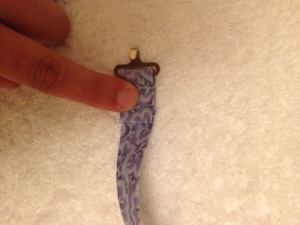
once you are finished adding the first two metal pieces, the end of your strap will look like this.

bow7

bow9

Step 6: Now, to the remaining end of the strap attach your hook by looping it through about a half inch and securing the end to the body of the strap with a dot of glue (make sure the hook is facing the hemmed side and test it out to make sure it will hook into the opposing piece).
bow11
Step 7: You are almost finished! Now return to your bow tie. Remember that 2.5X2.5 piece that you did a little work on and forgot about? Grab that. Take your bow tie, hem side facing up and glue one end of your little 2.5″ piece to it (be sure the piece is facing down so that when you wrap it around the body of the tie the correct side of the fabric will be showing). Now that you have one side attached, before wrapping it around take the hook-side of your strap (front side down, hook facing up) and use a dot of glue to attach it to the back of the bow tie so that just the hook will stick out once you wrap the rest of your fabric piece around. Once your strap is securely fastened, wrap the remaining piece of the fabric to create the center of the bow around and secure it using a dot of glue atop the strap. There you have it, all done!!! For kicks tell people it’s from H&M lol.    bow12 bow13
bow18
bow17

Disclaimer: This is something you are making yourself using just a glue gun and some fabrics, I can’t promise you name brand quality,  nor can I promise that it will turn out perfectly. If you are a brand snob sorry if I’ve offended you with my DIY clothing attempts, although I’m not sure what you’d be doing on the section of a blog entitled “Fashionably Frugal” lol.

Baby P’s DIY Father’s Day Photo Gifts

fath5fath

Father’s Day is just a few short weeks away and baby P and I both agree that J is just about the best daddy there is and deserves nothing but the best for his special day! Thing is, the gift that my frugal hubby would love the most is for me not to spend money, haha, lucky for him I had been planning two budget friendly, DIY, grand slam Father’s Day gifts for months now (well actually since baby P was born lol). Since J is up in NY for fleet week for two weeks, I knew this would be the perfect opportunity to get my Father’s Day pics out of the way, printed and wrapped before his return. Additionally, I like to share my holiday crafts with my Mommy friends, so I always like to test out my projects before hand, to ensure it comes out as planned and make it easier for me to host a craft play date without having to wrangle baby P at the same time.

Okay so back to the photos, can I tell you that I literally cried after I saw how amazing these pictures turned out? Baby P is just the squishiest, happiest little thing and I know J is going to DIE when he opens this gift on Father’s Day (if I can wait that long to give it to him lol jk I will)! Don’t worry I made him promise not to read the blog for a few weeks and since he loves surprises so much I know for a fact he won’t peek ;-). Since the pics are self explanatory I’ll just go into a bit more detail with each picture below. Hope this inspires you to have some fun with your little and give their Daddy something fun and meaningful for Father’s Day!

*For more examples of DIY holiday photos check out this post!

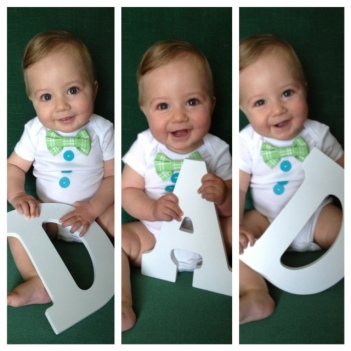
“DAD” PHOTO

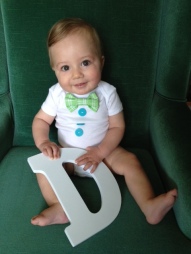
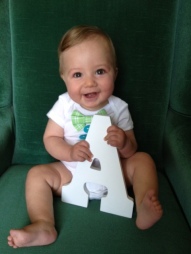
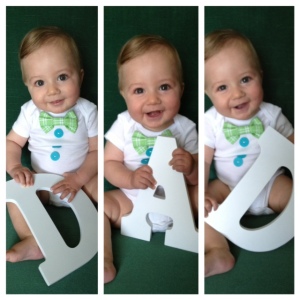
fath2fath4fath3

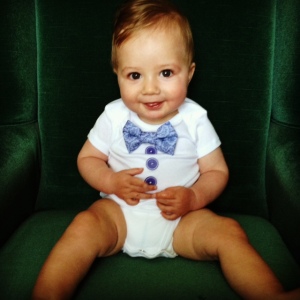
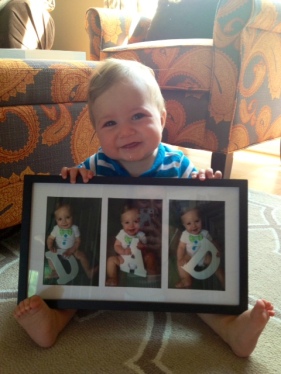
Okay, obviously you’ve seen this one all over Pinterest, so needless to say this isn’t an original idea but sooo stinkin cute nonetheless! I purchased a “D” and an “A” from Michael’s at $3.99 a piece and used a 30% off-entire-purchase coupon, I also returned the following day to purchase the frame (originally priced at $12.99) using a 40% off coupon. Confession: in my super stingy mind I did for a moment consider returning the letters after I was done (I know, terrible)  but I decided it would be best to keep them to repeat this Father’s Day craft  for my crafting play date and with any future children I may have. The onsie is another one of my DIY projects that I came up with specifically for this picture, check out the tutorial for DIY Little Man onsies here, they are super cheap and mostly no-sew! For the picture itself I just sat him on our vintage wing back chair (which actually made for the perfect backdrop!) and snapped his pictures with my smart phone. When I was done, I used the Walgreen’s photo app to upload my pics and picked them up the next time I was out, three 4X6 pictures cost me about $0.40 after coupons!!! Quick plug for the Walgreen’s photo app – I LOVE it, it’s so convenient since it’s all done from your phone, just make sure you Google “Walgreen’s photo coupons” before completing your order since there are always coupon codes for photo prints (this time it was 40% off!). Including all components this project cost me right around $14.00. TIP: If you want to save on framing costs simply purchase an 11X14 frame from a thrift store and arrange the photos side by side over a colored piece of paper or cardstock, as opposed to buying a three hole frame or simply use the app “picstitch” or another photo app/kiosk to turn your three images into a three frame single photo.

fath8

Baby P testing out the chair and modeling his onsie before the pics!

fath5

fath9

so proud of the finished product! lol Look at those curled little toes 🙂

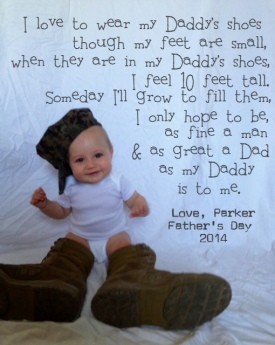
“DADDY’S SHOES” PHOTO

fath

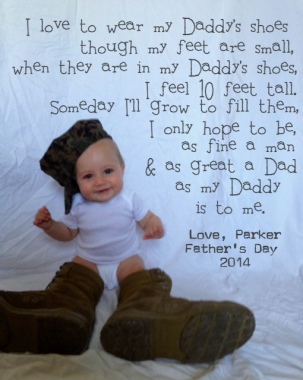
This photo was a copycat of a professional Father’s Day photo I found here on Pinterest, which I then adapted to include my hubby’s military gear. I figured since I was going to be recreating this idea with all of my Mommy friends, who are all military mamas as well, including the military boots and cover would be an extra special touch. To set up the picture I followed my usual steps for a DIY photo backdrop and then added the words using the free photo app “Phonto” (see this post for detailed instructions for use of the app) after taking the picture. This photo I printed in size 8X10 via Shutterfly for $1.79, the frame I will be using is one that we already have so that part will be free, which means … this gift cost me $1.79, say whaaaaaaat??! NOTE: When doing the picture with a little girl I plan to change the end of the poem to “… as great a person and as true a friend, as my Daddy is to me”, since the original poem is specifically for another male.

fd1

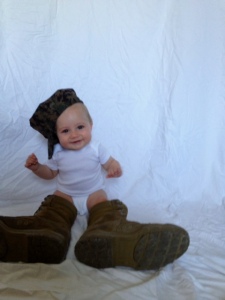
the original image before I added the text. I made sure to take the photo off center so that there would be a good amount of empty space for the poem.

There you have it – two ADORABLE Father’s Day gifts coming in right at around $15.00!!! My hubby will LOVE these gifts, and love their price tag as well!

fath1

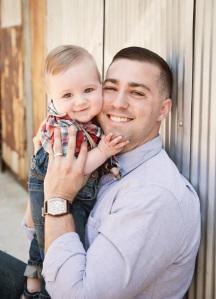
We’ll be celebrating this wonderful man come Father’s Day! He does it all and then some, we love him so much! I caption this photo “look, here’s my Dad!” lol