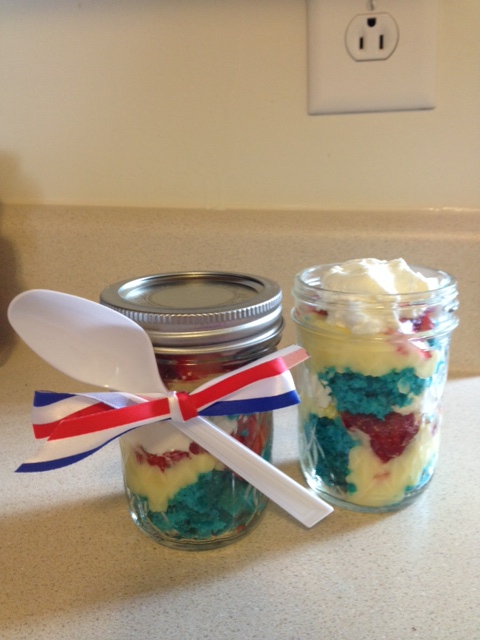
Since moving on base in June we have slowly been adjusting to living in significantly less square footage. We have been making the best of it by doing lots of organizing and rearranging to make our furniture and style fit this little cookie-cutter home. One room that I am having a very hard time getting used to is our new bathroom which is basically the size of the powder room in our old house, lol (to see our old master bathroom and how we transformed it on a budget check out this post). The lack of space is killing me, the vanity won’t even provide enough space to fit our toothbrushes and toothpaste and there are no drawers, just a small cabinet below the vanity that is already crammed with bathroom paraphernalia and extremely disorganized. So, in the spirit of organization and making the best of our tiny bathroom, I decided to try my hand at a Pinterest project that I had been eyeing for quite some time – a mason jar bathroom organizer. Since I already had mason jars all I was going to need to do was get a piece of wood (which I ended up getting out of my neighbor’s trash, score! lol) and some metal hose claps (I’ll explain below), for just a few dollars (literally a few, I think my total project cost was just under $4.00) I was able to create a beautiful and functional little addition to our not-so-master bathroom. This is SUCH a simple project and can be fashioned using scrap wood and any size jars since the little hose clamps come in several different sizes. Need more than three jars? No problem! Just a use a longer piece of wood and additional jars. There’s nothing I love more than a project that is simple with many options for variation so that I can duplicate it in other areas of the home (I plan to make a cute little addition to our laundry room soon so be on the lookout for that!) so I’m super excited to share this with you as a tried and true Pinterest trial!

SUPPLIES:

NOTE: if you are happy with the look of your wood as is you need not go through the trouble of painting and distressing it, this just happened to be the look I was going for. This supply list and step-by-step instructions apply to my specific variation of this project.
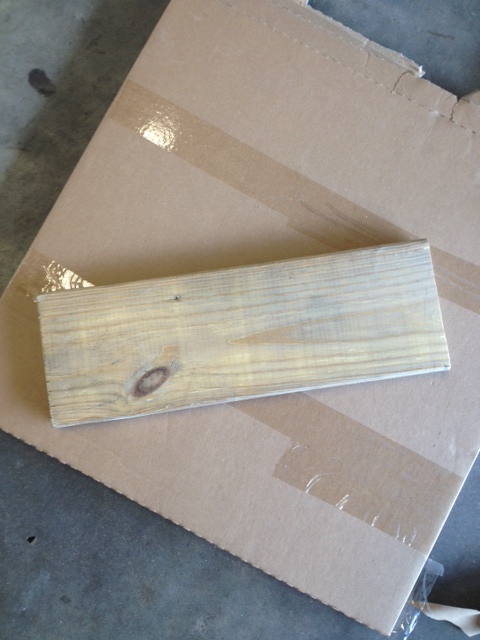
- 1 piece of scrap wood – mine was cut from a 12′ board we scored from a neighbor’s trash. I cut mine to be 16″ long, it was the perfect fit for the space and the three jars.
- grey chalk paint – I used left over paint from my hand-painted sign and shutter shelf, check out this post here to see how I made my own chalk paint using sample sized latex paints, this one is “Stone Mason Grey” by Valspar.
- white latex paint
- Minwax Paste Wax in “Special Dark”
- 2 keyhole fasteners
- black foam brush
- regular 2″ paint brush (for dry-brushing the wood)
- sanding blocks, sand paper or electric sander
- 3 mason jars (I used standard 16 oz. jars)
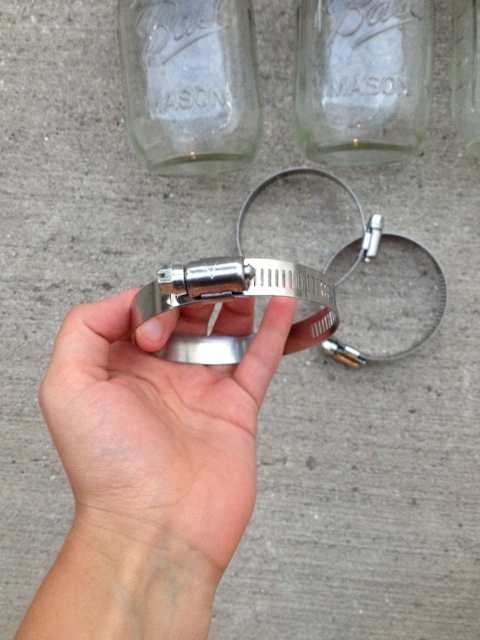
- 3 stainless steel metal hose clamps (available where the HVAC supplies are at your local home improvement store, if you can’t find them just show an employee a picture of the craft, they’ll know exactly what you’re talking about)
- 6 standard picture hanging hooks and the nails that come with them (see picture below, these are available at the dollar store, supermarket and countless other places, make sure they look like the ones that I have pictured or they will not work!) NOTE: if you have a good quality power drill and strong drill bit you can skip the picture hooks and drill a hole directly into the backs of the hose clamps and use a 1/2 inch screw to attach the hose clamps to the wood. I will tell you that takes some SERIOUS elbow grease and a very strong drill, when our drill bit wouldn’t even make a dent in the steel my hubby improvised the hook idea so I could finish my project that night – ain’t he sweet 😉
- Needle-nosed pliers (you only need these if you are planning on using the hook method)
INSTRUCTIONS:
Step 1: I began by prettying up my trash wood. Please refer to my post on creating my DIY Rustic Picture Display for a detailed description on how I go about painting and distressing most of my wood pieces. In short, what I did was apply a coat of chalk paint to my wood (or two, I can’t remember, lol) using a black foam brush, then once it had dried I used my regular paint brush to dry-brush the surface and once that had dried I used my electric sander to distress the edges and surface with 150-grit paper (this can also be done using a sanding block or regular sand paper). Finally I used a rag to apply a coat of paste wax and then buffed it once it had dried.
wood – before

painted wood

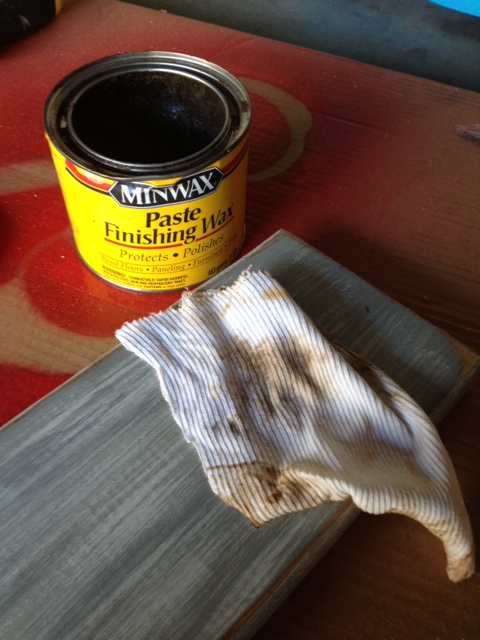

wood – finished
Step 2: Once my wood was ready I attached my keyhole fasteners to the backs of my wood piece, one in each corner. Don’t leave this until the end as it will be very hard to do once the jars and hardware are attached.
Step 3: I then marked where I wanted my mason jars to be placed on the board. NOTE: if you have a fancy drill and plan on drilling holes in the backs of the hose clamps and screwing them into the wood this is the point at which you would do that (then simply fasten the clamps around the necks of the mason jars), if you are planning on using my less conventional “hook” method read on! We (I say we because this is where J’s crafty brain stepped in, ha) then fashioned make shift little holders for the mason jars out the picture clips. I took my picture hangers and using pliers unfolded the top part of the hook so it sticks out (kind of like the bottom does to begin with) then flattened both ends over the back of the metal hose clips, two per (making sure to unscrew the hose clips first). The key was to ensure that when I folded over the the tops of the hooks (the part with the hole was always facing UP) the two holes at the top became pressed together to form one nail hole (this is how I nailed them to the wood).
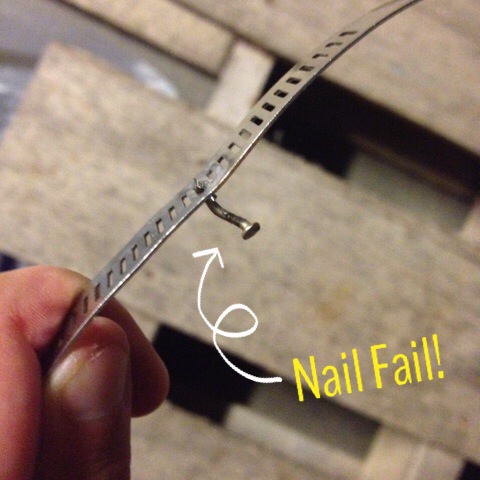
we tried a nail first, didn’t work out so well, lol.

The picture hooks I used. See how if you flatten the tops the two holes will come together to for a tab with a hole in it?
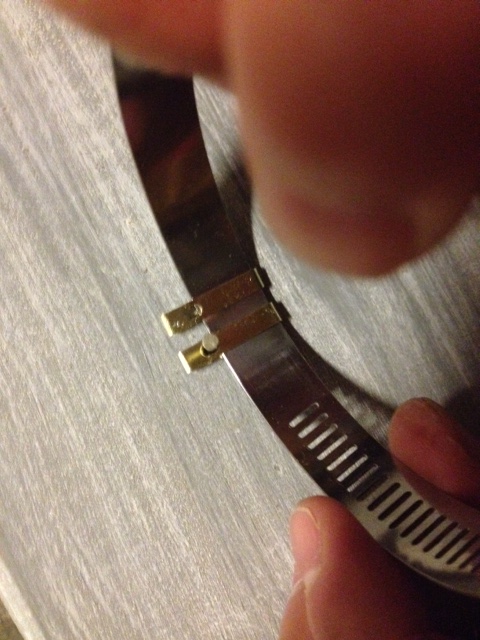
Hose clamp after attaching the “hooks”, two little tabs stick up with holes through which the nails can hammered.
Step 4: Once all of my hooks were fastened to the hose clamps I used the nails that came with my picture hanging hooks to nail the hooks into the board (using the little tabs at the top that were created by flattening out the hooks). After my three hose clamps were attached to the board I re-screwed the clamps around the necks of the jars. All done!


Although the “hook” method may seem a little wonky these jars have stayed put and since they hold our toothbrushes and toothpaste we are handling them multiple times a day. That being said, this is a GREAT project for a renter, not only does it free up space in smaller bathrooms but you only require two small screws in the wall to hold it up. Additionally this project can be made using items readily found at your local home improvement stores (which will cut the wood to size for you), Walmart and dollar stores, which is great for people who may not necessarily have many tools on hand (you can buy a hammer and pliers at the dollar store, I checked, haha).