Baby P is 11 months old! How did that happen?! I can’t believe I will have a one year old in less than a month, it’s so bitter sweet because while I am loving how he has become such a fun little boy I still miss him being a squishy baby. This past month alone he has become even more of a little person, he is even starting to form his first little words, in addition to “Mama” and “Dada” he now says “this” and “that” (words that are usually accompanied by a little finger pointing frantically at the object of interest, lol), he is even beginning to be able to mimic words we say, although he doesn’t know what he is saying, haha. He still loves the outdoors, animals (dogs especially!) and nature in general, we genuinely feel bad when we bring him back indoors after playing outside because he looks so sad, ha! We are also enjoying his love of food as he much prefers to share what J and I are eating than his own food (which is fine by me, less time spent making separate meals for him, lol). Here he is with his football themed chalkboard (since it’s still 90 degrees here almost everyday I thought doing a fall themed board would be a little premature, ha!), sporting one of my DIY tie onsies in support of his favorite team – the NY Giants, duh! If you love these chalkboard updates as much as I do check out his other boards for birth-six months, seven months, eight months, nine months and ten months as well as all of my pregnancy chalkboards. Next chalkboard update will be for baby P’s one year marks, somebody pinch me! 🙂
Tag Archives: baby boy
Documenting Baby P’s First Year – Month 10
I cannot believe I have a ten month old baby! Seriously where does the time go? This last month has been awesome, right after his nine month board he began to walk while holding onto objects and crawl consistently on all fours. He can also high-five and give kisses which are two of the sweetest things we’ve ever experienced 🙂 He finally has two teeth and is on the verge of getting a bunch more based on how this week has been going, lol. I feel like we hardly have a baby anymore since I’m sure by eleven months he’ll be walking on his own. Here he is sitting with his “Parker by Numbers” board, I had to bribe him with his favorite frog because he kept trying to jump off of the chair, haha. Fun fact about his outfit, I bought it at a second hand store before he was born, I can’t believe he is actually wearing it! Speaking of disbelief, I have definitely learned that it is one of the most common themes in parenting, for both good and bad reasons, haha. If you love seeing baby P (who wouldn’t!? lol) check out his birth to six, seven, eight and nine month boards and my pregnancy documentation.
Baby P’s Nursery
“Whoooooo” has the best nursery of all? Baby P!!! This week has been crazy to say the least, J returned from fleet week (yay!) and most importantly I was able to snag us a beautiful house on base, ya know, so we won’t be homeless when we close on this one in just a few short weeks! Since we will be moving very shortly and will need to rearrange it, I am excited to share baby P’s original nursery, as it is my favorite room in the house!
Before we found out if we were having a boy or a girl, I began brainstorming ideas for a nursery for our little babe. Since I had been hoping for a girl (sorry baby P, don’t worry I’ve changed my mind, haha), I hadn’t given much thought to a boy’s room at all but ironically, once I stared looking, I realized that I wasn’t really in love with any particular girl items but was quickly becoming obsessed with the idea of an owl themed nursery for a boy. After picking out a bunch of owl items I actually got a little sad thinking that I might not get to purchase any of them if the baby turned out to be a girl, haha! Once we found out that baby P was in fact a boy, I had SO much fun bringing his owl themed nursery to life, mostly thanks to my sweet family and friends who spoiled unborn baby P rotten. We kept the room pretty simple but I think it turned out so cute and although owls are getting super popular they are still more popular with girls than boys for some reason, so if you’re in search of a boy-themed nursery but are like me and don’t necessarily care for characters or typical sports themes, owls are a great option! Since I was too lazy to change the wall color of the upstairs bedrooms upon moving in, I was lucky enough to have the color work with nursery theme that I chose, so all that we needed to do was decorate (I will provide sources for all of the items below). I hope you love baby P’s nursery as much as he does 🙂
SOURCES
Crib // Catalina Fixed Gate 3-in-1 Crib in “Sun Valley Espresso” available via Pottery Barn Kids for $549 (mine was purchased as a gift using a 20% off coupon so it came in at around $495 after shipping costs).
Dresser // Craigslist find for $45.00. See my post here on how I refinished it using gel stain. The changing pad was a shower gift along with it’s light blue minky cover and the basket I purchased at Michael’s for about $5.99 using a 40% off coupon.
Bookcase // Thrift store find for $5.00. See my tutorial on refinishing laminate furniture which features this very bookcase! The “Parker” wooden letters were purchased at Michael’s for $3.99 a piece using a 30% off of purchase coupon, if you are looking for a cheaper option see my post on easy scrapbook wooden letters here!
Green Owl Lamp // Purchased at Hancock Fabrics for $11.99 (sale item, woo-hoo!) but it is also available here. The lampshade is part of the Sweet JoJo Designs owl collection which matches the bedding purchased here via Amazon for $25.99 plus shipping.
Owl Bedding // The owl bedding set I chose included the comforter, crib bumpers, throw pillow, toy bag, diaper holder, fitted sheet, two widow valences (that I ended up not using) and the crib skirt. The set is by Sweet JoJo Designs and available here via Amazon for $179.99.
Owl Mobile // Purchased via Amazon as part of the Sweet JoJo Designs “Night Owl” collection. Available here for $42.99.
Owl Curtains // The curtains are part of the Sweet JoJo Designs set purchased via Amazon but available at Target for $49.99 for a set of 2 panels. We ended up trading out the curtains for blackout curtains once daylight savings rolled around, but I plan to try my hand at lining the owl curtains myself once we move into our new place so be on the lookout for that post!
Brown Glider/Rocker // Purchased via Amazon for $160.00. I thought this was a great deal as it was a prime item so shipping was free and it included the ottoman which many didn’t. I’m so glad I decided to puchase it becuase
Floating Shelves // Purchased from Home Depot in espresso for about $24.00 a piece, but no longer available. The “BYOB” sign and feathered owls were all gifted to baby P from generous friends :).
Owl Tree Poster// This was an activity at my baby shower which doubled as a guest book, each guest was to sign a leaf for baby P. The poster was purchased via Etsy from Peachwik, it was originally a listing for a wedding guest book but the graphic artist was kind enough to add a baby owl so we could use it for the shower instead!
Three Owl Fabric Wall Hangings // Purchased via Amazon as an accessory to the bedding set for $22.99 for the set.
“Grow Wise Little Owl” Decal // Purchased from wallartsy via Etsy for $32.00.
Owl Tree Decal // Purchased from StickitDecalDesigns via Etsy for $69.00.
Crochet Owl Stuffed Animal // Purchased from YouHadMeAtCrochet via Etsy for $36.50.
Large Brown/Blue Owl Stuffed Animal // Purchased from OneCraftyKing via Etsy for $26.00.
For the nursery we obviously threw caution to the wind when it came to budget as baby P was our first and we were just so excited to create this nursery, thankfully we were so blessed to have many of the expensive items ($69 decal!! wth!? lol) gifted to us which helped a lot with the cost. Wait to see how we recreate baby P’s nursery in our base house coming soon!
DIY Little Man Onsie – Part II Tie Applique
With several new squishy babies coming into my life in the near future, courtesy of my sweet friends, I am in full baby shower planning/gifting mode. I recently posted my tutorial for DIY Little Man bow tie onsies and am delighted to report that I’ve successfully completed another version of a no-sew “little man” onsie, featuring a fabric neck tie in the form of a fabric applique. This onsie was even easier to create than the first and only requires four items (one of which is an iron, so it doesn’t count lol), no gluing, no sewing, just cut, iron and DONE. If I haven’t already captured your attention with the appeal of a three step process let me tell you this – I spent about $6.00 on supplies for this project (not including the onsies themselves, as I used a pack I already had) and that $6.00 investment has the potential to yield up to twenty onsies (if not more)!!! I will reiterate what I said in my bow tie post, and that is, for a few bucks you have a grand slam of a baby shower gift for any “little man” that may come in to your life, not to mention they make ADORABLE decorations in the form of a onsie clothesline that mama-to-be can keep after the shower (see below). If you are looking to give a meaningful gift that is easy and cost effective, look no further! Of course I adapted this tutorial from the hundreds on Pinterest, and will the include the link to one below in the event that you do want to do a bit of sewing.
DIY “LITTLE MAN” TIE APPLIQUE ONSIES
YOU WILL NEED:
- White onsie or t-shirt
- Fabric of any choice (this is a great opportunity to use up scrap fabric or hit up your local store’s remnants bin, as I do. The green gingham fabric featured below I purchased for $0.79 and it is a little less than a yard in length and 12 inches in width, enough for MANY onsies or bow-ties).
- Heat ‘n’ Bond Iron-On Fabric Adhesive (any brand will do, if it says it is suitable for patches or appliques you are good to go, I purchased mine at Walmart for about $3.00 and it is enough for tons of future projects so you are getting your money’s worth for sure!)
- Tie Pattern (the pattern is printable and available in two sizes, use the smaller for onsies and the larger for toddler boy t-shirts. If you don’t have access to a printer feel free to make your own pattern).
- Scissors
- Iron
INSTRUCTIONS:
Step 1: Take your fabric and cut a piece just large enough for your tie, then do the same with the Heat ‘n’ bond adhesive (this way you can maximize the amount of supplies remaining for future projects).
Step 2: Turn fabric upside down (so back is facing up) and place fabric adhesive side down on fabric so that the paper liner is facing up. Place your iron over the paper backing and hold down for about two seconds, repeating over entire area until adhesive is fused to fabric.
Step 3: Now, trace your tie pattern onto the paper backing and cut out. It is optional to cut the top of the tie pattern in a circular fashion to fit the neck of the onsie, I did so but it looks fine either way!
Step 4: Peel off the paper back from your tie and place it adhesive-side down on your onsie. Hold the iron over the fabric for about 8 seconds, working in sections until the entire tie is fused to the fabric. That’s it, little man onsie complete!
Step 5: A fifth, and optional step, would be to stitch around the onsie as shown in this tutorial (and in most tutorials). As I’ve mentioned before, while I am planning to learn how to use my sewing machine, I currently only sew by hand and to stitch the tie by hand would totally defeat the purpose of this being a quick project, haha. Don’t worry, it looks fab without the stitching as well!
NOTE: Turn inside out when washing, when possible hand wash and hang dry.
DIY Little Man Onsies with Interchangeable Bow Ties
Who doesn’t love a tiny little baby boy dressed up like a man, right? I for one, LOVE dressing baby P up like a man (he’s looked like a little mini man ever since birth, kind of weird and cute at the same time lol), and even before I had met my little guy my Etsy shopping cart was filled with cute little onsies with tie appliques and little bow ties. Only problem was, I quickly realized that at between $25 and $35 a pop (for a onsie, really? lol), my full blown little man wardrobe was going to have to wait until I hit the lotto, haha. Luckily, I was able to find a few little man onsies on clearance and be gifted a few others (a lot of them are featured in his monthly and holiday pictures) but I still was left wishing that there was a cheap way to get my hands on some more little man clothes!
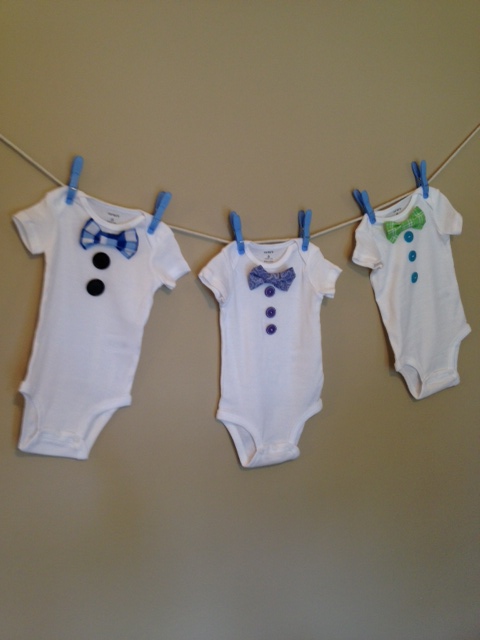
Flash foward a few months, some friends and I are planning a “little man” baby shower for one of our girlfriends who is expecting a little boy. I thought it would be so cute to recreate the adorable onsie clothesline that my girls had displayed at my shower, but with little man themed onsies. Obviously the same problem of these little man onsies being so damn expensive presented itself once again. So I began to wonder if there was a way I could actually make these myself, without them looking like crap, that is (haha) – it turns out there was! Since I don’t sew other than by hand (learning to use my sewing machine is on my long list of things to do lol), it never occurred to me to make these onsies myself, but after a little research on Pinterest and inspection of items I already had, I was able to come up with my own variation of a little man onsie using, cheap fabric, hot glue and my limited sewing skills. So with limited expectations I got to work and was absolutely thrilled with the result of my project and definitely had a few “holy-crap-I-made-this?” moments throughout lol. Not only will I be able to use these at my friend’s shower, but I now have a home-run of a gift for any of my family and friend’s future baby boys (or girl for that matter, these can be hairbows too, say whaaaaat?!). I also plan to make hundreds (okay, maybe not hundreds, but a lot lol) of these for baby P until he no longer wishes to wear bow ties (which hopefully is never since he is a little man, lol), starting with the one he will wear for his Father’s Day picture.
Give this craft a shot! If you have zero sewing skills you can still make it work, I promise! If you need more of a reason than how adorable a little man onsie is then here’s another – a onsie and six interchangeable bow ties cost me about $3.00 when you break it down (compared to an average of about $22.00 per onsie on Etsy, usually including only one bow tie), so cost-wise it’s a no-brainer!!! NOTE: I also plan to make a matching bow tie for J, I just have to mess around with the bow tie tutorial to figure out fabric measurements for an adult bow tie but once I do I will post my own tutorial!
LITTLE MAN ONSIE & BOW TIE
*The use of Velcro or Nylon snaps is totally up to you, if the child is over six months and you know how to sew by hand I would suggest the snaps, as they are less easily removed by the child, lol. Velcro is still fine though, I found that baby P was more interested in the buttons than the bow tie.
MONEY SAVING TIPS:
- Hit up your fabric store’s remnants bin, a 12X12 square of fabric that cost under $1.00 was enough for me to make about 6 bow ties!!!
- Since you don’t need anything fancy use the cheapest brand of white onsies you can find, I believe Walmart carries a Gerber brand 10-pack for around $8.00.
- Use cheap buttons, this works well anyway since cheaper buttons will be more plain and you want the color/style to work well with multiple bow ties.
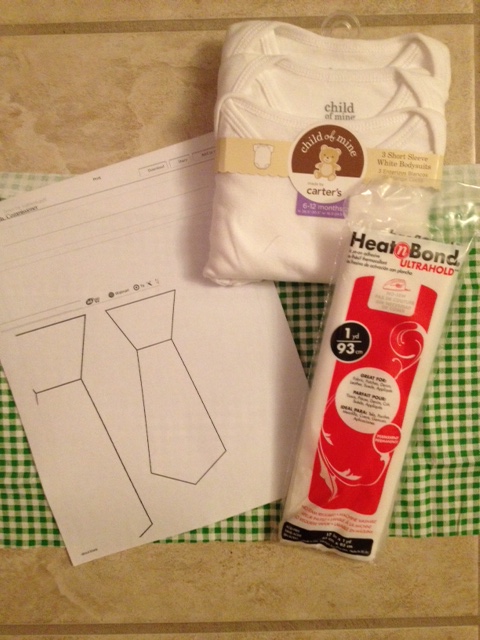
YOU WILL NEED:
- White Baby Onsie
- Hot Glue
- Fabric of your choice
- 2-4 buttons of your choice (amount depends on size of button)
- Needle & Thread
- Sew on Velcro or Sew on Nylon Snaps (if you are not planning on sewing at all, you will need to use Velcro)
- Fabric Adhesive (you only need this if you are not sewing at all, make sure the label says “washable” meaning the item can be run through the washing machine after the glue has been used)
- Ruler or Measuring Tape
INSTRUCTIONS:
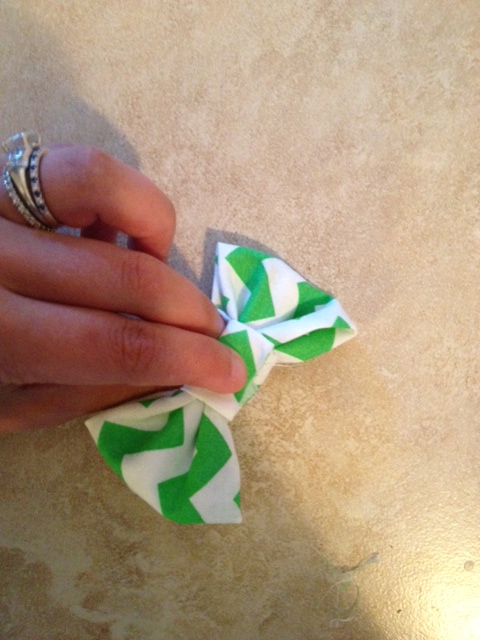
Step 1: Use this bow tie tutorial to create as many bow ties as you want. I used the hot glue method and wherever it said to iron I didn’t (I’m lazy, lol) and my project still came out great. Important Note For Nylon Snap: If you are planning on attaching a nylon button adapt the previously mentioned tutorial to include the following instruction for attachment of the nylon snap. When you are gluing the smaller 2.25X2.25 piece in half place a very small dot of glue on each end and the middle (as opposed to just putting a whole line of glue down the seam), you want a space near the end where glue will not obstruct your needle once hardened. When securing your small piece to bow part of the bow tie, use a dot of glue to secure the one end, then using a needle and thread, sew the half of your nylon snap to the opposite end, so that when you pull it around and secure it, it will be facing out on the back of the bow tie where you would snap it to the onsie (see blue gingham bow tie pictures). Important Note For Velcro: If you are attaching velcro simply follow the instructions for construction of the bow tie to the end, once the bow tie is complete, use a dot of hot glue or fabric glue to attach a piece of velcro to the back of the bow tie. Here are some pictures I took as I went about making my bow ties.

I used velcro dots but if it is cheaper to purchase velcro in a roll or larger piece you can just cut it yourself. The nylon snaps are shown as well, I chose these as opposed to metal snaps because they don’t require a special tool to attach them to fabric.
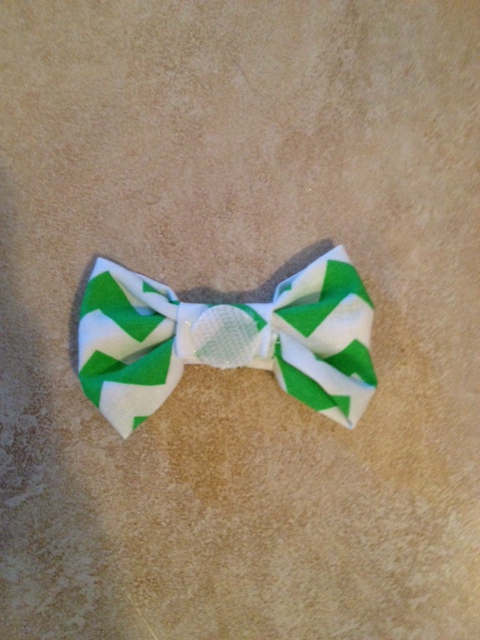
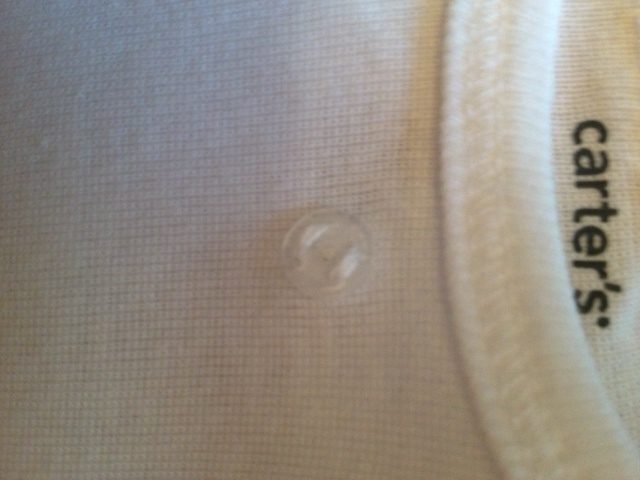
Step 2: Once you complete your bow ties, you are ready to work on the onsie. For Nylon Snap: Find the center of your onsie, I placed mine about 3/4 of an inch down from the top of the neck, but use your own judgement as to what you think looks best. Use a needle and thread to attach the connecting piece of your nylon snap to the onsie. For Velcro (No-Sew): Find the center of your onsie, I placed mine about 3/4 of an inch down from the top of the neck, but use your own judgement as to what you think looks best. Use your washable fabric glue to adhere the connecting piece of velcro to the center of the onsie, it will probably need to dry for about 24 hours. Do Not use hot glue for this part, if you do not use a machine washable glue your velcro will probably fall off in the washing machine. I used a few stitches to secure my velcro after I glued it for further security but if you are going with the no-sew method that is fine too.
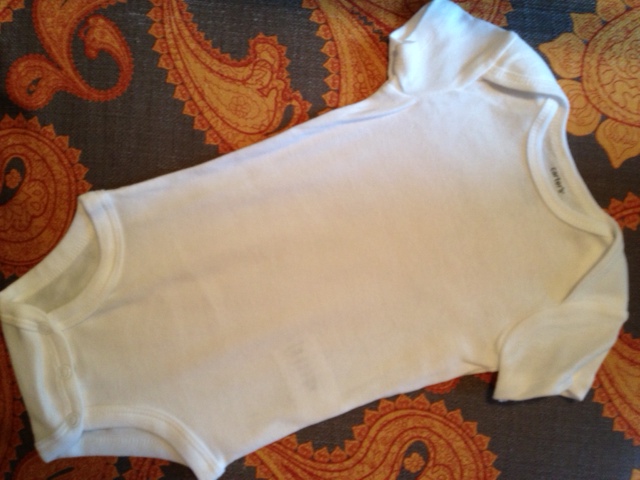
Step 3: After attaching your velcro or snaps, you can work on the buttons. Use a measuring tape or ruler to mark the areas on the onsie where you would like to attach the buttons. I used three buttons for medium sized buttons and two buttons for larger buttons and placed them about two inches apart (measuring from the button center). Use a needle and thread to attach your buttons. If you are not sewing you can absolutely skip this step, the onsie looks just as cute without buttons! I suppose if the onsie is for a newborn or very small infant (aka one that doesn’t have the capacity to pull the buttons off and eat them lol) you could glue the buttons using washable fabric glue, however I have not tried this myself, if you do attempt it let me know how it holds up!
Enjoy your onsie!!! For care turn inside out when running through the washing machine, and for best results hand wash and hang dry when possible.
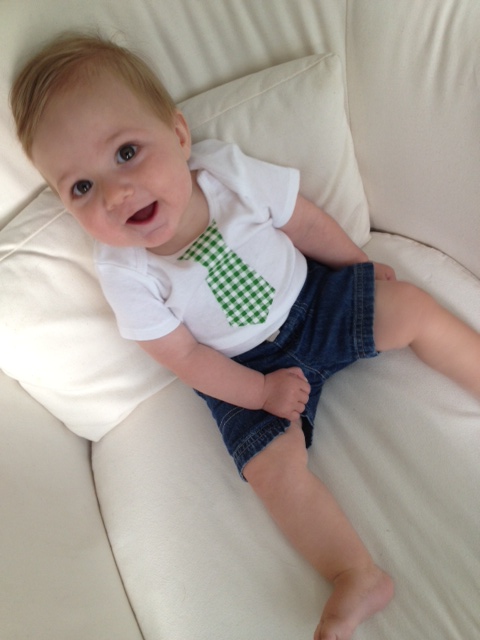
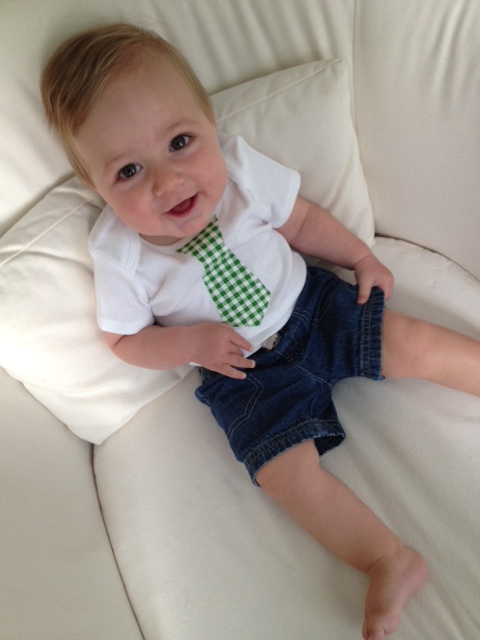
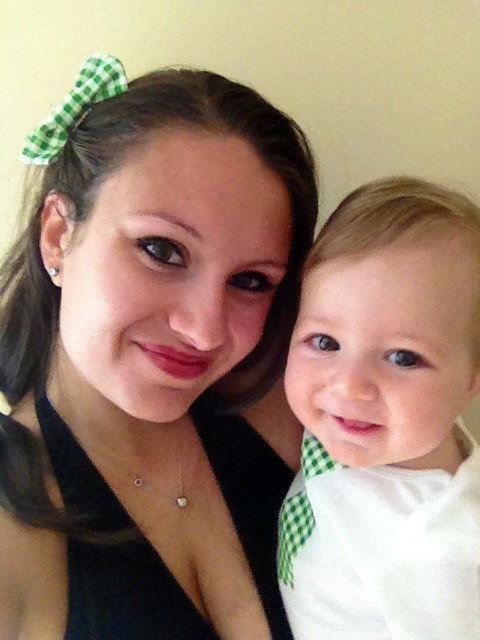
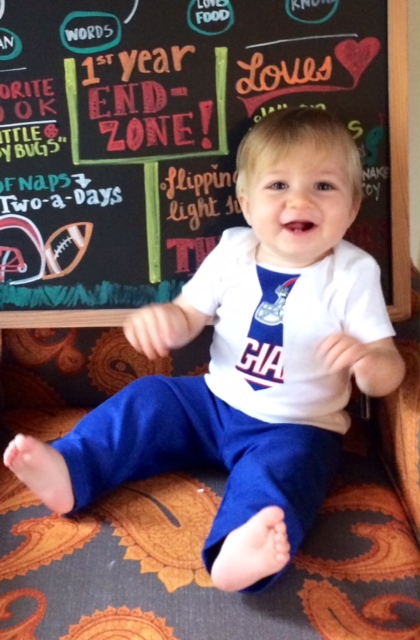