Nautical Mini-Diaper Cake

diapercakenau

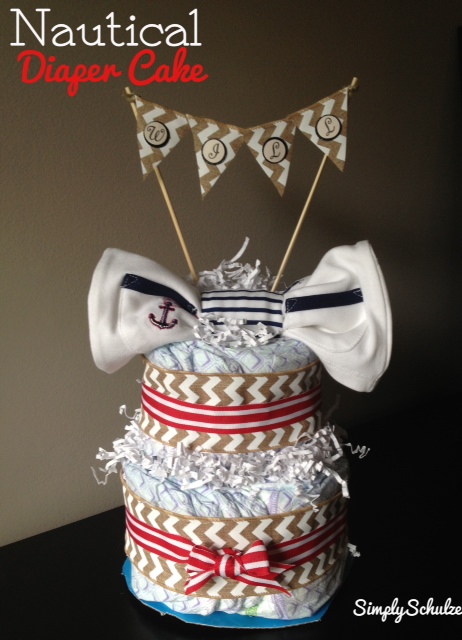
Eek, super late with this post, seeing as how this sweet little boy was actually born this week, but I will go ahead and post it anyway since it’s still so darn cute! So before attempting my four tier whale diaper cake I wanted to do a little trial run so that in case my diaper cake making abilities were a complete fail, I would still have time to scramble for a new gift idea. One of my NC friends Ashley is expecting a sweet little boy in August who is going to have the most adorable nautical themed nursery. This gift was very simple, just diapers and a little nautical outfit, so I wanted to present it in a fun way that would give it a little flare. Aside from the ribbon, outfit and diapers I already had all of the other components in my craft stock, so it was extremely easy to put together. I will go ahead and give you a description of what I did and how I assembled the cake as a guide, but be sure to check out my whale diaper cake post above for a more detailed description (and links to my friend Courtney’s amazing diaper cakes) on how to assemble an awesome little cake!

diapercakenau1

WHAT I USED:

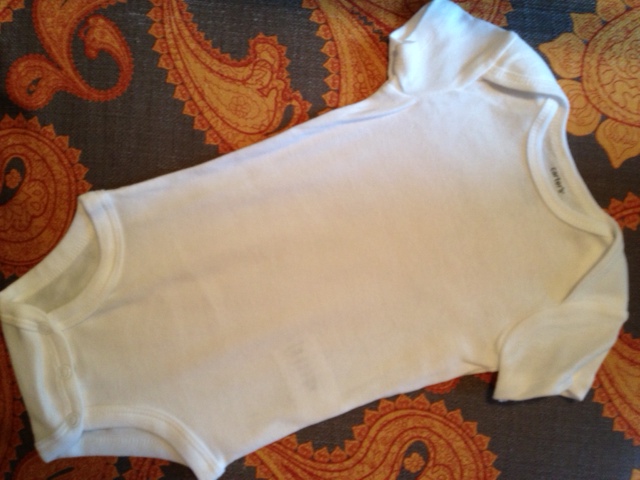
  • 1 nautical baby boy outfit  – purchased via Amazon (currently unavailable, but a link to the image is available here).
  • 25-30 Size 2 Diapers
  • Chevron/Burlap 2.5″ Wire Ribbon
  • Red Striped 1″ Ribbon
  • White Basket/Gift Shred
  • 2 wooden skewers – small wooden dowels, popsicle sticks or straws would also work!
  • Twine
  • Stick-on craft letters
  • Glue Gun & Hot Glue
  • 6″ & 8″ cake pans

WHAT I DID:

Step 1: For this particular cake I began by fanning the diapers (fold side out) into the two cake pans. The pans are not necessary but they are a good guide and make it much easier to arrange the diapers. Once I had filled the pans and created the two “tiers” for the cakes, I secured them by tying a piece of string around each to hold them in place (this can also be done with large rubber bands).

Step 2: I then cut a piece of cardboard (part of the diaper box, lol) in a circle that was a little bit larger than the bottom layer of the “cake” and covered it with blue wrapping paper. For a more finished look you can purchase cardboard cake bottoms but for this one I just improvised. After covering the cardboard with wrapping paper I cut a small 2X2″ “X” in the middle of the cardboard round and set it aside.

Step 3: Take your 2.5″ ribbon and cut a piece just large enough to wrap around each tier of the cake. Repeat using the 1″ ribbon. Take your larger ribbon and wrap it around the middle of each cake “layer” and secure it tightly using a dot of hot glue. For the top tier I repeated the same process using the 1″ ribbon, but for the bottom I simply wrapped it around the tier and tied a bow in the front.

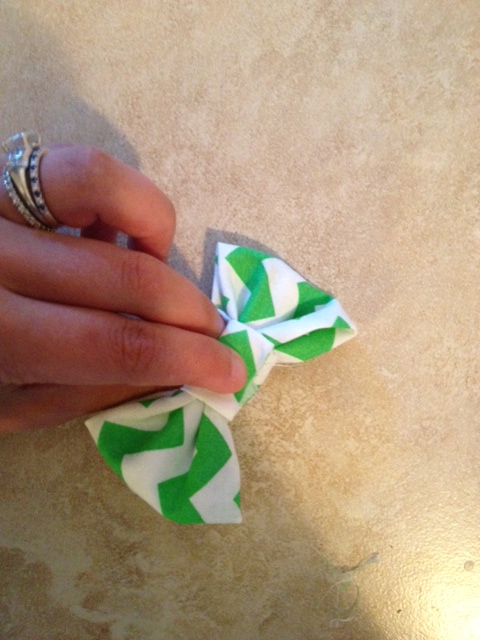
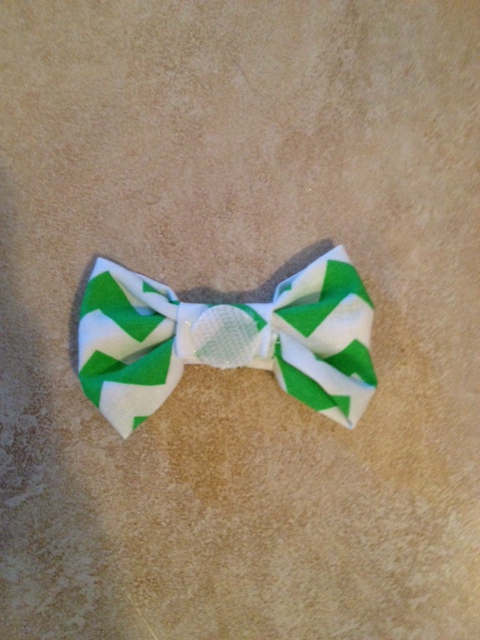
Step 4: Next I used the pants and top of the outfit to create a “bow” for the top by folding the shirt into a rectangle, then folding the pants in half and then laying them across the shirt rectangle to create a bow (this will make more sense when I explain the next part).

Step 5: Take your cardboard round and set your bottom layer of “cake” atop it, then your top layer on top of that. Now you will use your little outfit “bow” to do double duty: both hold the cake together and be the cake topper. I fed the legs of the pants through both cake layers and secured the tips of the toes at the bottom using the cardboard “X”. The top of the cake where the pants were folded over the shirt to create the bow will be held tight (the waist of the pants should just reach over to be tucked into the top of the diaper cake where as the legs will extend all the way down through the cake). NOTE: This just so happened to work out this way with the outfit I had chosen, you can always just top the cake with a pair of baby shoes or a stuffed animal to make it easy, simply secure it with pins!

Step 6: Lastly, I created the name banner by cutting triangles out of the wire ribbon and hot gluing them to a piece of twine before adding the stick-on craft letters and gluing each end of the twine to the wooden skewers so as to suspend the banner in between. I made sure the sharp ends of the skewers would be pointing down so that they could simply be stuck into the top of the cake layers without needing any sort of adhesive.

That’s it! This was my first attempt at a diaper cake so I kept it small and just worked with what I had. Sorry if the description of my process is a bit confusing, I was kind of just making it up as I went along! Don’t forget to check out my Whale Diaper Cake as well as Wildly Domestic’s tutorials on diaper cakes, she has a whole section of her blog dedicated to them! 

DIY “Little Lady” Hair Bows

hairbow

I feel like with all of the “little man” projects I’m churning out I need to give a nod to my girls, don’t worry ladies I didn’t forget about you! Here is a quick tutorial for my “little lady” hair bows, which are so easy to make and are just the cutest little gifts for that special baby girl in your life. Also, this would make a great baby shower activity, I will explain below. Anyone who knows me will attest to the fact that I am obsessed with bows, and even on the 30 side of 20, I still think wearing hair bows is acceptable. Since I couldn’t let J steal all the glory with the matching bow tie set I made for him and baby P, when I tested out this little hair bow, I made mine to match one of P’s little man onsies as well – so cute. As for the tutorial itself, it is basically identical to the “little man” bow ties with slight variation depending on what size hair bow you would like, but lucky for you, the hair bow making process is much easier than bow tie as all you will be doing is gluing it to a clip, barrette or hair band. That being said, if you are planning on making these as a gift an adorable idea would be to make a bunch and display them on a personalized hair bow holder (yes, this actually exists, lol, check one out here.I will definitely be DIYing my own version of one of these if my friends ever stop having boys, so be on the lookout for that!). Hope you have as much fun making these as I have wearing them, you’re only as old as you feel (eight, I feel eight lol)!!! 🙂

YOU WILL NEED:

  • Fabric  (this is a good way to use up fabric scraps or hit up your fabric store’s remnants bin since you need so little.)
  • Glue Gun
  • Scissors
  • Small Plain Hair Clip, Barrette or Headband (all of which are available at the dollar store, Walmart for right around $1.00, so if you’re going the clip route, your cost will be a few cents per clip!)
hairbow1

I chose to use these clips since I was making them for myself. If you are making them for a “little” lady, purchase the fabric covered version.


DIRECTIONS:

Step 1:   Use this bow tie tutorial to create as many bows as you want. I used the hot glue method and wherever it said to iron I didn’t (I’m lazy, lol) and my project still came out great. Quick note about sizing, the bow in the tutorial will be about 3.5″ across (give or take), so for an infant this would be fine on a headband but way too big on a clip. If you are looking to make a smaller bow I would change the measurements to 5X3 and 1.5X1.5 for the two fabric squares. Once I play around with this a little more I will give exact measurements and pictures but as I’ve mentioned, all my friends are having boys!

Step 2: Once your bow is complete use hot glue to secure it to your clip or hairband and there you have it! It took me under 5 minutes to complete a bow so you could definitely churn out about ten in a half hour’s time and have a great gift! NOTE: If you want to attach the bow to a hair tie just stop at the step before you glue the smaller piece of fabric (center) or the bow and instead, glue it so that the underneath of the bow wraps around the hair tie (hair tie is inside of the bow).

hairbow2

Fun Idea: Remember when I said this would make a great baby shower activity? Precut the squares of fabric for your guests and set them up along with a glue gun and several different options for barrettes, clips, hair bands and hair ties and embellishments. Give a quick tutorial to your guests and then allow them to make their own hair bow creations at their leisure throughout the course of the party. SO much fun and super cute, you could even present them to the mama-to-be on a hair bow holder.  


check out my post on DIY hair bows to see how I made my matching bow!

check out my post on DIY “Little Man” Tie Applique Onsies to see how I made baby P’s matching onsie!

DIY Little Man Onsie – Part II Tie Applique

tie5

With several new squishy babies coming into my life in the near future, courtesy of my sweet friends, I am in full baby shower planning/gifting mode. I recently posted my tutorial for DIY Little Man bow tie onsies and am delighted to report that I’ve successfully completed another version of a no-sew “little man” onsie, featuring a fabric neck tie in the form of a fabric applique. This onsie was even easier to create than the first and only requires four items (one of which is an iron, so it doesn’t count lol), no gluing, no sewing, just cut, iron and DONE. If I haven’t already captured your attention with the appeal of a three step process let me tell you this – I spent about $6.00 on supplies for this project (not including the onsies themselves, as I used a pack I already had) and that $6.00 investment has the potential to yield up to twenty onsies (if not more)!!! I will reiterate what I said in my bow tie post, and that is, for a few bucks you have a grand slam of a baby shower gift for any “little man” that may come in to your life, not to mention they make ADORABLE decorations in the form of a onsie clothesline that mama-to-be can keep after the shower (see below). If you are looking to give a meaningful gift that is easy and cost effective, look no further! Of course I adapted this tutorial from the hundreds on Pinterest, and will the include the link to one below in the event that you do want to do a bit of sewing.

tie8

here is squishy baby P sporting the onsie!


DIY “LITTLE MAN” TIE APPLIQUE ONSIES

YOU WILL NEED: 

tie

  • White onsie or t-shirt
  • Fabric of any choice (this is a great opportunity to use up scrap fabric or hit up your local store’s remnants bin, as I do. The green gingham fabric featured below I purchased for $0.79 and it is a little less than a yard in length and 12 inches in width, enough for MANY onsies or bow-ties).
  • Heat ‘n’ Bond Iron-On Fabric Adhesive (any brand will do, if it says it is suitable for patches or appliques you are good to go, I purchased mine at Walmart for about $3.00 and it is enough for tons of future projects so you are getting your money’s worth for sure!)
  • Tie Pattern (the pattern is printable and available in two sizes, use the smaller for onsies and the larger for toddler boy t-shirts. If you don’t have access to a printer feel free to make your own pattern).
  • Scissors
  • Iron

INSTRUCTIONS:

Step 1: Take your fabric and cut a piece just large enough for your tie, then do the same with the Heat ‘n’ bond adhesive (this way you can maximize the amount of supplies remaining for future projects).

Step 2: Turn fabric upside down (so back is facing up) and place fabric adhesive side down on fabric so that the paper liner is facing up. Place your iron over the paper backing and hold down for about two seconds, repeating over entire area until adhesive is fused to fabric.

tie1

Step 3: Now, trace your tie pattern onto the paper backing and cut out. It is optional to cut the top of the tie pattern in a circular fashion to fit the neck of the onsie, I did so but it looks fine either way!

tie2

Step 4: Peel off the paper back from your tie and place it adhesive-side down on your onsie. Hold the iron over the fabric for about 8 seconds, working in sections until the entire tie is fused to the fabric. That’s it, little man onsie complete!

tie3

Step 5: A fifth, and optional step, would be to stitch around the onsie as shown in this tutorial (and in most tutorials). As I’ve mentioned before, while I am planning to learn how to use my sewing  machine, I currently only sew by hand and to stitch the tie by hand would totally defeat the purpose of this being a quick project, haha. Don’t worry, it looks fab without the stitching as well!

NOTE: Turn inside out when washing, when possible hand wash and hang dry. 

tie6

Completed onsies!

tie4

they had some NY Giants fabric on clearance! Little P will be look fab come football season! Go Giants!

tie9 tie7

check out my post on DIY hair bows to see how I made my matching bow!

check out my post on DIY hair bows to see how I made my matching bow!

DIY Little Man Onsies with Interchangeable Bow Ties

littleman

Who doesn’t love a tiny little baby boy dressed up like a man, right? I for one, LOVE dressing baby P up like a man (he’s looked like a little mini man ever since birth, kind of weird and cute at the same time lol), and even before I had met my little guy my Etsy shopping cart was filled with cute little onsies with tie appliques and little bow ties. Only problem was, I quickly realized that at between $25 and $35 a pop (for a onsie, really? lol), my full blown little man wardrobe was going to have to wait until I hit the lotto, haha. Luckily, I was able to find a few little man onsies on clearance and be gifted a few others (a lot of them are featured in his monthly and holiday pictures) but I still was left wishing that there was a cheap way to get my hands on some more little man clothes!

Flash foward a few months, some friends and I are planning a “little man” baby shower for one of our girlfriends who is expecting a little boy. I thought it would be so cute to recreate the adorable onsie clothesline that my girls had displayed at my shower, but with little man themed onsies. Obviously the same problem of these little man onsies being so damn expensive presented itself once again. So I began to wonder if there was a way I could actually make these myself, without them looking like crap, that is (haha) – it turns out there was! Since I don’t sew other than by hand (learning to use my sewing machine is on my long list of things to do lol), it never occurred to me to make these onsies myself, but after a little research on Pinterest and inspection of items I already had, I was able to come up with my own variation of a little man onsie using, cheap fabric, hot glue and my limited sewing skills. So with limited expectations I got to work and was absolutely thrilled with the result of my project and definitely had a few “holy-crap-I-made-this?” moments throughout lol. Not only will I be able to use these at my friend’s shower, but I now have a home-run of a gift for any of my family and friend’s future baby boys (or girl for that matter, these can be hairbows too, say whaaaaat?!). I also plan to make hundreds (okay, maybe not hundreds, but a lot lol) of these for baby P until he no longer wishes to wear bow ties (which hopefully is never since he is a little man, lol), starting with the one he will wear for his Father’s Day picture.

Give this craft a shot! If you have zero sewing skills you can still make it work, I promise! If you need more of a reason than how adorable a little man onsie is then here’s another – a onsie and six interchangeable bow ties cost me about $3.00 when you break it down (compared to an average of about $22.00 per onsie on Etsy, usually including only one bow tie), so cost-wise it’s a no-brainer!!! NOTE: I also plan to make a matching bow tie for J, I just have to mess around with the bow tie tutorial to figure out fabric measurements for an adult bow tie but once I do I will post my own tutorial!

LITTLE MAN ONSIE & BOW TIE

*The use of Velcro or Nylon snaps is totally up to you, if the child is over six months and you know how to sew by hand I would suggest the snaps, as they are less easily removed by the child, lol. Velcro is still fine though, I found that baby P was more interested in the buttons than the bow tie.

MONEY SAVING TIPS:

  • Hit up your fabric store’s remnants bin, a 12X12 square of fabric that cost under $1.00 was enough for me to make about 6 bow ties!!!
  • Since you don’t need anything fancy use the cheapest brand of white onsies you can find, I believe Walmart carries a Gerber brand 10-pack for around $8.00.
  • Use cheap buttons, this works well anyway since cheaper buttons will be more plain and you want the color/style to work well with multiple bow ties.

YOU WILL NEED: 

  • White Baby Onsie
  • Hot Glue
  • Fabric of your choice
  • 2-4 buttons of your choice (amount depends on size of button)
  • Needle & Thread
  • Sew on Velcro or Sew on Nylon Snaps (if you are not planning on sewing at all, you will need to use Velcro)
  • Fabric Adhesive (you only need this if you are not sewing at all, make sure the label says “washable” meaning the item can be run through the washing machine after the glue has been used)
  • Ruler or Measuring Tape

INSTRUCTIONS:

Step 1: Use this bow tie tutorial to create as many bow ties as you want. I used the hot glue method and wherever it said to iron I didn’t (I’m lazy, lol) and my project still came out great. Important Note For Nylon Snap: If you are planning on attaching a nylon button adapt the previously mentioned tutorial to include the following instruction for attachment of the nylon snap. When you are gluing the smaller 2.25X2.25 piece in half place a very small dot of glue on each end and the middle (as opposed to just putting a whole line of glue down the seam), you want a space near the end where glue will not obstruct your needle once hardened. When securing your small piece to bow part of the bow tie, use a dot of glue to secure the one end, then using a needle and thread, sew the half of your nylon snap to the opposite end, so that when you pull it around and secure it, it will be facing out on the back of the bow tie where you would snap it to the onsie (see blue gingham bow tie pictures). Important Note For Velcro: If you are attaching velcro simply follow the instructions for construction of the bow tie to the end, once the bow tie is complete, use a dot of hot glue or fabric glue to attach a piece of velcro to the back of the bow tie. Here are some pictures I took as I went about making my bow ties.

ones4

this is the washable fabric glue that I used to apply the velcro

lm7

I used velcro dots but if it is cheaper to purchase velcro in a roll or larger piece you can just cut it yourself. The nylon snaps are shown as well, I chose these as opposed to metal snaps because they don’t require a special tool to attach them to fabric.

ones ones1 ones2 ones3

Velcro placement

Velcro placement

ones6

nylon snap method

nylon snap placement

nylon snap placement

Other bow ties not shown on onsies.

Other bow ties not shown on onsies.

Step 2: Once you complete your bow ties, you are ready to work on the onsie. For Nylon Snap: Find the center of your onsie, I placed mine about 3/4 of an inch down from the top of the neck, but use your own judgement as to what you think looks best. Use a needle and thread to attach the connecting piece of your nylon snap to the onsie. For Velcro (No-Sew): Find the center of your onsie, I placed mine about 3/4 of an inch down from the top of the neck, but use your own judgement as to what you think looks best. Use your washable fabric glue to adhere the connecting piece of velcro to the center of the onsie, it will probably need to dry for about 24 hours. Do Not use hot glue for this part, if you do not use a machine washable glue your velcro will probably fall off in the washing machine. I used a few stitches to secure my velcro after I glued it for further security but if you are going with the no-sew method that is fine too.

ones8

Plain white onsie

ones9

nylon snap placement.

Step 3: After attaching your velcro or snaps, you can work on the buttons. Use a measuring tape or ruler to mark the areas on the onsie where you would like to attach the buttons. I used three buttons for medium sized buttons and two buttons for larger buttons and placed them about two inches apart (measuring from the button center). Use a needle and thread to attach your buttons. If you are not sewing you can absolutely skip this step, the onsie looks just as cute without buttons! I suppose if the onsie is for a newborn or very small infant (aka one that doesn’t have the capacity to pull the buttons off and eat them lol) you could glue the buttons using washable fabric glue, however I have not tried this myself, if you do attempt it let me know how it holds up!

ones10

Ta-da!!!!

Ta-da!!!!

Enjoy your onsie!!! For care turn inside out when running through the washing machine, and for best results hand wash and hang dry when possible.

My squishy baby rockin the onsie!

My squishy baby rockin the onsie!

He seems to be happy with it :-P

He seems to be happy with it 😛

lm2