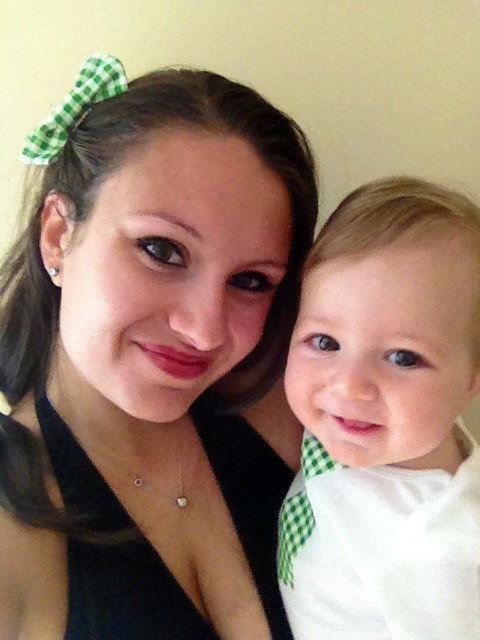
I feel like with all of the “little man” projects I’m churning out I need to give a nod to my girls, don’t worry ladies I didn’t forget about you! Here is a quick tutorial for my “little lady” hair bows, which are so easy to make and are just the cutest little gifts for that special baby girl in your life. Also, this would make a great baby shower activity, I will explain below. Anyone who knows me will attest to the fact that I am obsessed with bows, and even on the 30 side of 20, I still think wearing hair bows is acceptable. Since I couldn’t let J steal all the glory with the matching bow tie set I made for him and baby P, when I tested out this little hair bow, I made mine to match one of P’s little man onsies as well – so cute. As for the tutorial itself, it is basically identical to the “little man” bow ties with slight variation depending on what size hair bow you would like, but lucky for you, the hair bow making process is much easier than bow tie as all you will be doing is gluing it to a clip, barrette or hair band. That being said, if you are planning on making these as a gift an adorable idea would be to make a bunch and display them on a personalized hair bow holder (yes, this actually exists, lol, check one out here.I will definitely be DIYing my own version of one of these if my friends ever stop having boys, so be on the lookout for that!). Hope you have as much fun making these as I have wearing them, you’re only as old as you feel (eight, I feel eight lol)!!! 🙂
YOU WILL NEED:
- Fabric (this is a good way to use up fabric scraps or hit up your fabric store’s remnants bin since you need so little.)
- Glue Gun
- Scissors
- Small Plain Hair Clip, Barrette or Headband (all of which are available at the dollar store, Walmart for right around $1.00, so if you’re going the clip route, your cost will be a few cents per clip!)

I chose to use these clips since I was making them for myself. If you are making them for a “little” lady, purchase the fabric covered version.
DIRECTIONS:
Step 1: Use this bow tie tutorial to create as many bows as you want. I used the hot glue method and wherever it said to iron I didn’t (I’m lazy, lol) and my project still came out great. Quick note about sizing, the bow in the tutorial will be about 3.5″ across (give or take), so for an infant this would be fine on a headband but way too big on a clip. If you are looking to make a smaller bow I would change the measurements to 5X3 and 1.5X1.5 for the two fabric squares. Once I play around with this a little more I will give exact measurements and pictures but as I’ve mentioned, all my friends are having boys!
Step 2: Once your bow is complete use hot glue to secure it to your clip or hairband and there you have it! It took me under 5 minutes to complete a bow so you could definitely churn out about ten in a half hour’s time and have a great gift! NOTE: If you want to attach the bow to a hair tie just stop at the step before you glue the smaller piece of fabric (center) or the bow and instead, glue it so that the underneath of the bow wraps around the hair tie (hair tie is inside of the bow).

Fun Idea: Remember when I said this would make a great baby shower activity? Precut the squares of fabric for your guests and set them up along with a glue gun and several different options for barrettes, clips, hair bands and hair ties and embellishments. Give a quick tutorial to your guests and then allow them to make their own hair bow creations at their leisure throughout the course of the party. SO much fun and super cute, you could even present them to the mama-to-be on a hair bow holder.