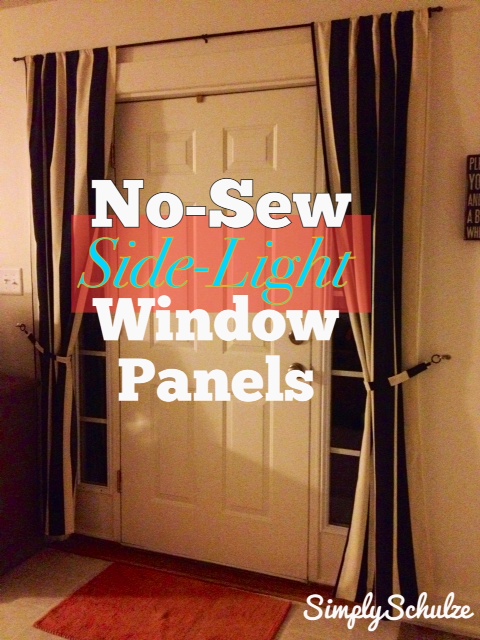
As I mentioned, we’ve been brainstorming ways to brighten up these hospital-white walls in our new home. Since we’re only going to be here for under a year we decided that painting the walls would just be silly. However, as you can imagine and entire house painted in flat white paint (that was clearly just slapped on by maintenance after the previous occupants vacated the home) is not ideal. The obvious solution would be to hang LOTS of decor items and pictures, but given our tendency to move every two minutes (lol) picking up expensive wall decor when we don’t have the slightest idea about the layout of our next home just won’t work for us. So our plan is to keep it simple and as budget friendly as possible by refinishing old frames to hang our pictures (more on that later!) and using our DIY skills to copycat some expensive decor.
The first place I picked up some inspiration for “operation DIY-decor” I was in Michael’s craft store and saw this gorgeous distressed picture display (shown below) that was way out of my budget at $69.99, I knew immediately that I could probably recreate it so I snapped a photo and moved on. A few months later when our new home on base was finally beginning to take shape and I was brainstorming a few finishing decor touches, I came back to the photo I had taken at Michael’s a few months back and knew it would be prefect for the small space between the doorway and the window in our dining area. The project took me only two naptimes (or two hours lol) and once I had completed it I was SO glad that my DIY-eye caught this one, because not only is the finished product beautiful but it only cost me $10.25 to create! Since I was adapting my version of this picture display to work into the color scheme of my dining and living room I was able to use paint that I already had on hand from some of my previous refinishing projects which meant I only needed to purchase an unfinished board from Lowes (which didn’t even need to be cut, woo-hoo!) and a few thrift store frames (which cost a total of $3.25 for all 4!).
In coming up with exactly how I wanted to go about creating this picture display the project took on many different forms in my head in terms of what kinds of frames I would use, what color, how many and how they would be fastened to the board. My first idea was to mod podge the pictures onto the wood then remove the glass from the frames and fasten it to the board around the picture, then my next thought was to saw holes into the back of the wood as an access to the frame so that the pictures would not have to be permanent (decided that option was too much work, lol). Finally I decided to make it super easy by simply fastening the frames permanently to the wood using hot glue (for the time being it has held good, I may decide to pop them off and reglue them using gorilla glue so that I can be certain that the frames will stay fastened to the wood). While I may at some point in time want to change the pictures out, for the time being I am absolutely obsessed with baby P’s six month photos and couldn’t dream of putting anything else in there, that being said I’m sure it won’t be difficult to pop the frames off, change the pics out and reattach them should I change my mind down the road.
If you’re looking for an inexpensive way to jazz up your decor without hanging individual photos or artwork this could be a great DIY project to try! This would be an especially good decor option for a renter, since the board can be hung using a hook that requires only one small nail which is much easier than hanging multiple pictures and means that you won’t have to patch multiple holes on your way out. That being said you could even use a larger board and attach a bunch of frames kind of like a removable gallery wall, the options with this project are endless so have fun with it!

TUTORIAL
*This is simply what I did step by step as a guide, there are so many variations on this project check out my tutorial on painting wooden furniture or painting with homemade chalk paint to get some inspiration for finishes and colors!
WHAT I USED:

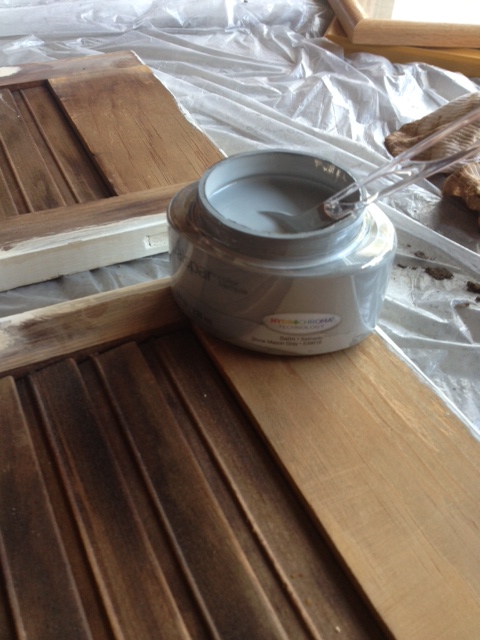
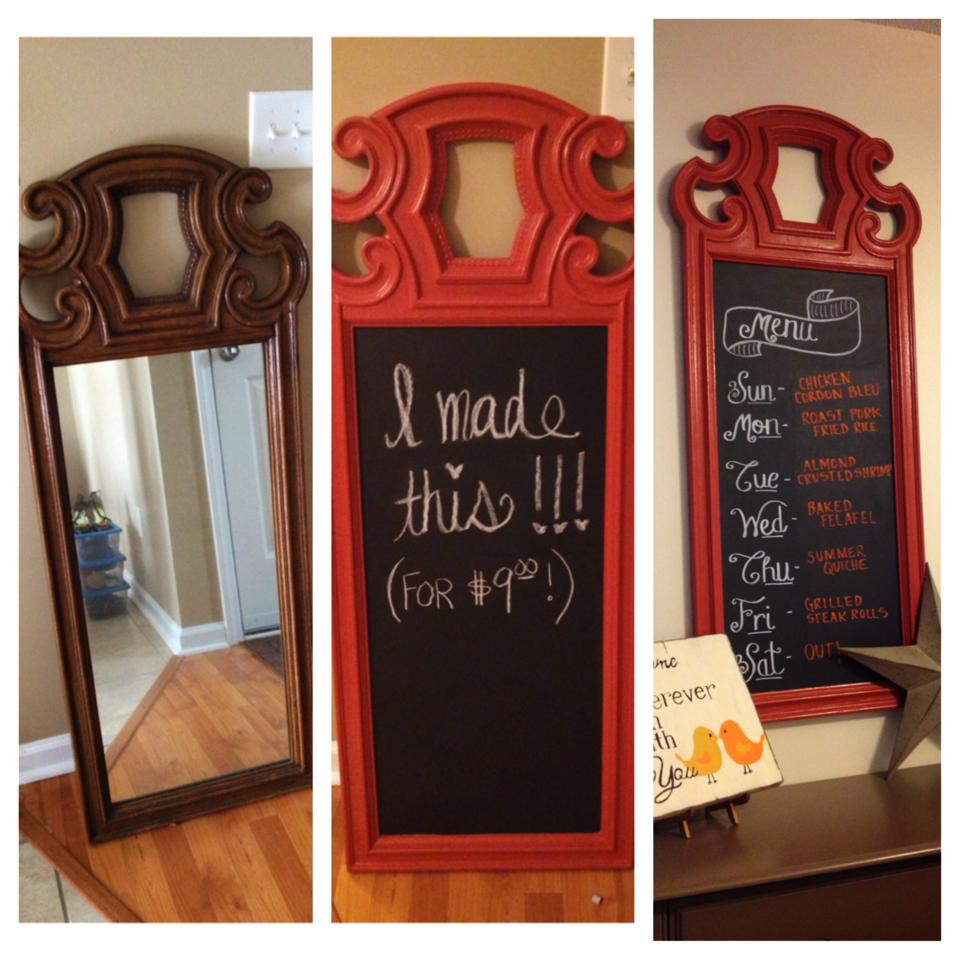
Before!
- 1 unfinished board (mine was 1″ thick X 4 ft. long X 10″ wide .. I think lol)
- 2 8X10 wooden frames
- 2 5X7 wooden frames
- 4 pictures
- chalk paint (for frames and board) – see link to see how I made my own chalk paint, for a great tip on saving money by purchasing sample size paints see this post.
- white latex paint
- regular 2″ paint brush
- black foam brushes
- Electric sander or sanding blocks
- Minwax Paste Finishing Wax in “Special Dark” (available here via Amazon)
- glue gun and hot glue or gorilla glue/wood glue
- 1 sawtooth picture hanger
- measuring tape
- level
- hammer
- mounting hook (I used something like this)
WHAT I DID:
Step 1: I began by giving my board a quick sand down with the electric sander with a 150-grit (fine) sand paper just to remove any jagged pieces on the edges and to smooth out any scratches, this took me less than a minute. It doesn’t need to be perfect, the knots in the wood will add to the “rustic” character of your finished product, also keep in mind that your frames will end up covering most of the board’s surface area.
Step 2: Next I painted the front and sides of the board with a coat of chalk paint (mine only required one coat, depending on your color you may need two or three) in “Borough” by Valspar using a 2″” black foam brush.
Step 3: While my board was drying I got to work on my frames. I removed the glass and gave the wood a quick sand by hand just to remove any varnish or dirt then wiped them clean with a damp cloth. I then used a black foam brush to apply two coats of chalk paint in “Farmer’s Market” by Valspar (this color has become my accent” color for most of my projects for the living/dining rooms), waiting about 30 minutes in between coats. NOTE: For a larger piece I would allow more dry time but since they were only frames that wouldn’t be handled much I figured I could rush a bit.

frames after first coat
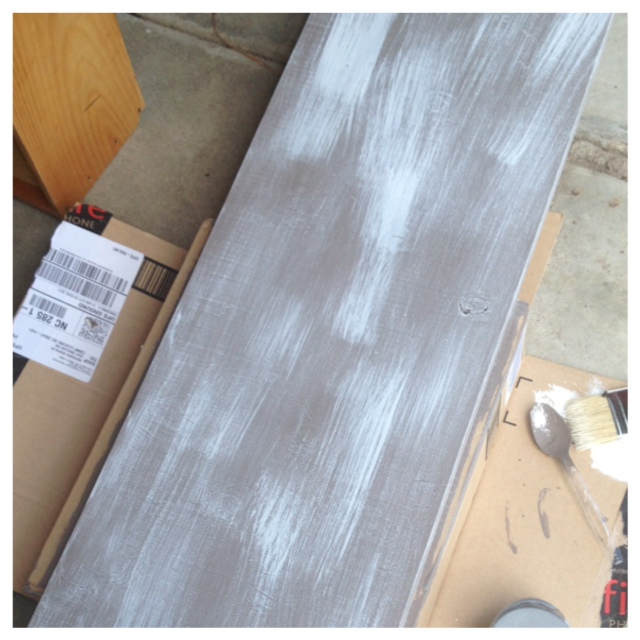
Step 4: Once my board had dried I used a regular 2″ paint brush to “dry brush” the top and sides of the board with regular white latex paint (I had some trim paint left over from our old house). For a more detailed explanation of the technique of dry brushing just do a Pinterest search for “dry brush painting”, but very simply all you need to do is take your dry brush, dip it into the paint so that there is just a very small amount of paint on the tip of your brush, then dab your brush on a piece of paper towel/cardboard/scrap paper (whatever) to remove any excess paint then begin to brush your wood very lightly and randomly, in the same direction. I started out with very light strokes, barely swiping the board and increased my pressure of stroke as the brush became dryer. Repeat this process until you have achieved the desired “rustic” look to your board. Allow about 30 minutes of dry time.

The dry brushing will look something like this before distressing.
Step 5: Once my white paint dried I returned to my board and used my electric sander and 150-grit sand paper to distress the board (if you do not have an electric sander you can do this by hand using sanding blocks or regular sand paper, it will just take you a bit longer), focusing on the edges and randomly along the surface, I applied various pressures along the edges to give it a more authentic distressed look. The amount of distressing you do is up to you and if you are going for a modern look you need not dry brush or distress the piece at all!

Step 6: After distressing my board I wiped it clean of any sanding dust since it was now time apply my paste finishing wax. Using a rag, I applied a thin coat of the wax to the front and sides of the board, then did the same to my frames. After the recommended amount of time had passed, I buffed them all out using a clean rag. I just recently started using the finishing paste and I love it because it doesn’t require any dry time other than the 15 minutes you have to wait in between applying the wax and buffing it, once you buff your piece it is ready to use!

frames with wax applied before buffing
Step 7: Next I used a level mark a line at the top center of the board (about 5 inches down) where I wanted to attach my sawtooth hook (make sure you use a level or else your board will hang crooked!), and used a hammer to nail the hook into the board.
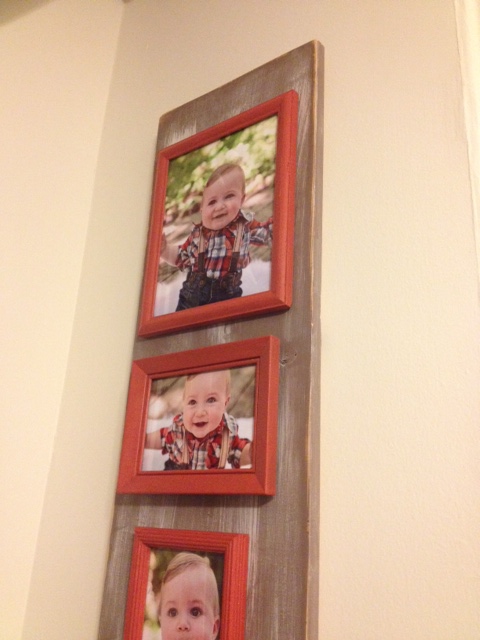
Step 8: Next I put my pictures into the frames and made sure that any existing hooks on the back of the frames were removed so that they would lay flat once attached to the board. I then laid the frames out on my board and measured out equal distances for placement (you may use a level for this part too if you would like), making small pencil marks for where each would go. Once I had marked my board for the placement of each frame I began attaching them by applying a generous amount of hot glue or wood glue to the back of each frame (if using hot glue work quickly so that the glue doesn’t harden!) and then pressing it firmly onto the board. NOTE: As I mentioned above this display is on a sort of probationary period to see if the hot glue will in fact hold, lol. If I feel that the frames are starting to come loose I will return and re-glue them using gorilla glue or wood glue to ensure a permanent hold. Once your glue is dry and your pictures are securely fastened your board is ready to hang!


The project as it’s displayed in our home! Baby P is obsessed with it haha