DIY Hostess Gift – Fresh Lemonade

lem

When life gives you lemons … make an adorable hostess gift!!! Since I’ve been cooking up a storm and my last two posts have been recipes, I wanted to make sure I threw a craft up on the ol’ blog since I have SO many that I’ve yet to post! This particular DIY gift I put together as a baby shower prize for a shower that we threw to honor one of our dear friends who was expecting a sweet baby boy (I say “was” because the sweet little baby has since arrived and is just perfect). This gift is adorable, cheap and so simple to put together. If you are heading to a party or BBQ and are not the cooking type or simply don’t have the time or the will to whip something up, this is the perfect substitute – your host will love it! There are so many ways to personalize this, adapt it to different drinks and add your own special touch. The etching was my way of jazzing up the plain old Walmart pitcher (see my glass etching tutorial to see how simple it is to do!) but is by no means necessary to create this adorable gift! You can make this on the cheap (using Walmart/Dollar Store components) for around $15.00 or so (if your dollar store carries glass pitchers then the cost would go down significantly, mine didn’t so I went the Walmart route). Personally I am always looking for new ideas for hostess gifts and have had many “crap! What do I bring!?” moments, so hopefully this helps you out should you ever have one 🙂 

HOW I DID IT:

  • Glass Pitcher – I purchased mine at Walmart because I happened to be there already, it cost around $8 or so. If you have a cheaper option go for it! 
  • Hand/Tea Towel – Dollar Tree
  • Spoon – Dollar Tree, the plan was to include a wooden one but they didn’t have any at that particular Dollar Tree, so I got a 5 pack of these white plastic spoons of varying sizes and used the longest one.
  • Lemons – Just use however many will fit in your pitcher, I bought a value pack of lemons from Walmart which came with about 10.
  • Lemonade Recipe – I Googled a lemonade recipe and printed it out on a recipe card to stick in the pitcher and titled it “The Perfect Lemonade”.
  • Etching Supplies – Optional, but it’s a great personal touch. See my etching tutorial for supplies needed. Since I did not know who my pitcher was going to I simply etched “Drink.” on the pitcher, but since your recipient will be known, you could always do the first letter of their family name.

lem1

The assembly is self explanatory if you take a look at the picture. You could also do a DIY pitcher of sangria or orange juice, the options are endless especially once alcohol is added to the mix, haha. Check back for other variations on this DIY hostess gift as I’m sure this will become my go-to when I don’t have time to cook!


Faux Sangria

sang3

As if my Mom wasn’t already amazing enough, she is also the creator of this amazing drink that I am about to share with you! Whether or not she will actually read this post is debatable, as it took her about three years to finally master Facebook and a whole seven years to finally hop on the iPhone bandwagon (although she did just learn how to post pictures from her iPhone to Facebook, so there may be hope for her after all lol). Whenever I tell her about my blog she seems confused so either she doesn’t know how to navigate it or she is just too busy being awesome to find the time to read my nonsensical babble, so to give her the benefit of the doubt I’ll say it’s the latter lol.

Anyway, on my recent trip home my Mom offered me “faux sangria” and while all I heard was “diluted alcohol”  (yuck lol) when I tasted it I was pleasantly surprised to find that it actually tasted exactly like the sangria at one of our favorite mexican joints back home, day = made! I was even more excited when she told me that you could make it using only two or three ingredients, whaaaaaaaat?! Needless to say when we got back to NC the ingredients for “faux sangria” were at the top of my shopping list (and here I sit enjoying a glass as I write this post and pray that hurricane Arthur doesn’t knock out my power lol). I love a good summer cocktail and I especially love one that is easy to whip up and doesn’t cost a fortune in ingredients you will only use an ounce of (a problem I encountered when making  my whiskey punch for J’s 30th, I will post about this soon). While I know this isn’t the most creative recipe and is I’m sure, by no means an original, I still think it’s worth posting because I for one am always looking for new budget friendly cocktails, especially those that lend themselves to social gatherings a.k.a. ones that are cheap lol. I hope you whip up a batch for your next fiesta, even if you’re like me and your “fiesta” involves working on your blog while hubby and baby snooze haha.

sang4

I let baby P have at one of the apples while I was making the sangria, only 20 years and three months until he can give it a taste lol


FAUX SANGRIA

NOTE: This recipe can be doubled, tripled etc. It is GREAT for a party and you can use any combination of fruit, I actually plan to come up with a variety of “faux sangrias” using different wine, fruit and oj combos. If you’re on the “skinny” train lighten it up by using Trop50 or if you like a sweeter cocktail add some simple syrup.

INGREDIENTS

  • 1 750 mL bottle red wine (I like dry wines and think that the OJ gives the cocktail enough sweetness but if you’d like it sweeter use a sweet red)
  • 3 cups orange juice
  • Juice of half a lemon (this just brightens up the flavors, feel free to omit it if you don’t like/have lemons)
  • 1 Apple, cubed
  • 1 Orange, quartered and sliced thin

Combine all ingredients in a pitcher and refrigerate for at least an hour before serving – enjoy!

sang2  sang

DIY 4th of July Burlap Wreath


4th

Hi everyone! I know I have been just awful about updating the ‘ol blog these past few weeks but between moving and heading back up north for a mini family vaca I have been all over the place! Good news is that I am back on the grid lol, and prepared to pollute blogland with TONS of new posts including my hubby’s surprise 30th birthday bash (a whiskey and cigar themed party, a huge success btw) which I had to keep off the blog until now, as well as some new crafts and recipes I have been working on in between organizing the house and ripping my hair out in frustration over moving haha.

Okay, back to the wreath. Being that we were heading out of town just one short week before Independence Day, I knew I had to eek out my 4th of July wreath if I wanted it to be displayed leading up to holiday. This was not my first burlap wreath rodeo, I had tried my hand at it once before for my Easter wreath (a post that I am yet to get around to lol) and was super surprised at how easy it was to create given how impressed I was with the final product. So while J did his best to wrangle baby P (who is crawling lightening fast these days and getting into everything) I managed to get this wreath done in just about 20 minutes! I will give you a run down of the specific products I used but obviously it is not necessary that these items be used, as the thing I love most about burlap wreaths is that there are a variety of ways on which to elaborate on such a simple idea and that they can be adapted to fit any color scheme or holiday. If you’ve seen one on Pinterest and are hesitant to try it out, don’t be – it is almost impossible to mess up. I know a lot of the written explanations for weaving the burlap can be confusing but if you YouTube “burlap wreath tutorial” you will find a much more helpful guide to making one, I promise! Happy 4th of July everyone, please watch some fireworks for me, baby P goes to bed at six so chances are I will not be watching any aside from what I can see from my porch lol.

4th3

baby P looking adorable right before he started slamming the bouquet violently then trying to eat the petals lol.


4TH OF JULY BURLAP WREATH 

WHAT I USED:

4th1

  • 18″ wire wreath frame – I purchased mine for $2.50 at a local craft store specific to my area but you can get them on Amazon for around $5.00 or so.
  • 2 rolls of red and blue chevron wired burlap ribbon (10 ft. each) – I purchased mine from Walmart for $3.47 per roll but a Google search revealed that it can be purchased just about anywhere, lol.
  • 1 roll of plain burlap ribbon 5 1/2″ X 15 ft – available at any craft store.
  • white satin 1″ wired ribbon
  • Flag Print Faux Daisies – these just happened to work perfect and were available at Walmart, however, any red/white/blue flower combo would work or even a bow instead!  
  • 1 white wooden letter

HOW I DID IT:

Step 1: I began by weaving my burlap into my wreath, I will refer you to YouTube for the tutorial on how to actually weave the burlap in and out of the wire frame so as to not embarrass myself with an explanation that will make no sense, haha. I will say, however, that I did work by weaving the plain burlap for a few loops, then exchanging it with the chevron ribbon and I worked in “sections” of burlap instead of weaving the whole 15 feet through at once because that would have taken FOREVER. I would just work it through for a few feet then cut it and start over in the next section, since my chevron ribbon was wired it was easy to secure it even though I was not using the whole roll at once.

4th2

Step 2: Once I was done weaving my burlap and chevron interchangeably. I wove my 1″ white ribbon through the wreath in no particular pattern. This was simply to be the “white” in the red/white/blue holiday color scheme, the wreath looked perfectly fine without it.

Step 3: I cut three of each print of daisy from the bunch and stuck them through the wire frame, weaving the stem through the three metal bars so that the flower would remain secure. Then using a piece of twine I tied the wooden “S” to the wreath right atop the flowers.

inspecting the flowers again lol

inspecting the flowers again lol

Step 4: Once the wreath was complete, I took a few minutes to “poof” my loops and rearrange my flowers so they looked just right!

4th6

finished product!

This wreath cost me right around $15.00 to make and just out of curiosity I did a quick Etsy search for a “4th of July Burlap Wreath” and almost spit out my drink when I saw that the average wreath was going for an average of $50.00 plus shipping – WHAAAAAAAAT???!!! NO, NO, NO, people, you are getting ripped off, especially because you can buy almost all of the necessary components for one of these wreaths at Walmart. Furthermore, if you make a plain burlap wreath you can simply adjust it to each holiday or season by adding embellishments (a big benefit of the burlap wreath is that it is not permanent, if you mess it up or want to change it simply unweave and re-do) so potentially you can have the best wreath on the block time and time again for just around $10.00 for the year. So please, to keep me from having anxiety over thinking of people swipin’ that credit card for a $60.00 burlap wreath, at least attempt to make your own! Friends don’t let friends pay good money for cheap crafts lol. 

“Whale-of-a-Time” Diaper Cake

diapercake5

So lately I have been super intrigued by diaper cakes. When making gifts for friends and family I love to get creative with the items I am gifting rather than simply sticking them in a gift bag with a card. Diaper cakes lend themselves perfectly to this idea of creative gifting, so while you may just be plucking items off the registry like everyone else, you can still present them in a way that is fun and unique and will most  certainly be remembered by the mama-to-be! First let me say my original inspiration was of course, Pinterest but also my friend Courtney of Wildly Domestic who has made some absolutely fab diaper cakes, definitely check out her blog section on diaper cakes as that is the tutorial I used in creating mine. The idea for this particular diaper cake came about because my sweet friend K of about 15 years is expecting her third baby boy!!! Sweet new baby boy Brian is going to have a whale themed nursery, which I think is just the cutest. After creating this diaper cake I couldn’t wait to share it because after my trial run with a two-tier cake this past weekend this was my first real attempt at a diaper cake! I also decided that I love the whale idea for a baby boy, it’s kind of along the same line as owls (check out baby P’s nursery for some owl-inspiration), and if you’re like me and not into characters or sports themes whales could very well be the boy theme that you’re looking for! Again for some super involved diaper cakes see Courtney’s tutorial above, this one was thrown together in the midst of our big move so I didn’t have time to make it as snazzy as I wanted (actually J came home from making multiple trips to the new house with household items while I was supposed to be packing/patching wall holes and came home at 10pm and was like “ummm are you making a diaper cake?” .. umm yea, is that not what I’m supposed to be doing? lol). Another word to the wise, these are NOT cheap to ship lol which I learned the hard way, so make sure you leave enough time to ship it standard post, unlike me who shipped it out two days before I needed it to arrive haha.

diapercake4

Baby P helping me ship the giant box at the post office!

WHAT I USED:

* I just kind of got some items together and made them work with the cake and you can do the same, there is no need to use exactly what I did. I would suggest using diapers though because uh .. diaper cake lol.

  • About 80 Size 2 Diapers – I used Luvs because I was able to order a box of 216 for $32.99 via Amazon Prime (umm what?! I know, awesome! I’m not lying, see link here). I know Luvs are not everyone’s preferred brand but I do use them on baby P (during the day, when I use them at night I will ultimately end up doing a 3am outfit change, no fun!) when I’m feeling the money pinch so I feel like I can promote them here lol.
  • Cake pans (6″, 8″, 12″, 16″) – If you don’t have cake pans they are not necessary, just a helpful guide. You can still form the “cake layers” without the use of a pan it may just require a little more balancing and manipulation but you will wind up with the same result, I promise.
  • Wooden Dowel (Optional) – Because I was going to be mailing the diaper cake I wanted to use any extra reinforcement I could get, I just cut a dowel I had to the height of the cake. If you are going to be transporting the cake yourself, you can just thread something through it (as I did with the towel).
  •  Round Cardboard Cake Bottom or Cardboard cut to size – I opted for the latter option because all my Amazon purchases yield lots of leftover cardboard, lol. If you would like a prettier option Walmart and Michael’s sell cake bottoms for cheap. I wrapped my cardboard in blue wrapping paper.
  • Ribbon – regular wrapping ribbon to hold the diapers in their cake form (my friend Courtney uses large rubber bands but I didn’t have any on hand) and to decorate the top, 2″ ribbon to wrap the edges, 1″ ribbon to wrap around the entire cake and feed through the cardboard bottom for further reinforcement (I reused the ribbon that the receiving blankets were wrapped in).
  • 2 Receiving Blankets – Purchased via Amazon in a pack of 4. I split them up and used two for the diaper cake and included the other two in another gift (SO many babies happening lately!)
  •  3 Bibs – Pack of 3 via Amazon. I purchased them because the one had a whale on it, they don’t lend to the functionality of the cake. I wrapped the other two around the top of the dowel on the top tier of the cake to help hold it in place and prop up the towel on top.
  •  Soft Sole Whale Shoes – Available via Amazon. They have other animal options as well, super cute and seem to be great quality!
  • Whale Rattle – Purchased via Amazon. I purchased it on clearance but now the price has gone up to $10.00 (for a rattle!?? what?! lol) I would do an Amazon search for a whale toy to yield something more budget friendly.
  • Whale Towel – By Carter’s. Purchased at Walmart for $5.99 but it is also available here on Amazon for about $7 more.
  • Wooden Letter – I purchased my unfinished wooden letter at Walmart for $1.97 and my plan was to cover it in scrapbook paper (see my tutorial for an easy scrapbook wooden letter here), but didn’t have time to run to Michael’s. Instead I simply used my laser printer to print out the lyrics to “Baby Beluga” on a blue piece of cardstock and used that in lieu of scrapbook paper (please check my tutorial first if you plan to do this for instructions on use of laser printer vs. inkjet printer).


WHAT I DID: 

*Since I was supposed to be packing not crafting, I didn’t take the time to take step-by-step pictures but thankfully Wildly Domestic’s blog will offer you a much more detailed and informative tutorial than I would have provided. I will describe to you as best I can what I did.

  1. I began by using my cake pans to fan out the diapers, fold facing out, arranging them as best I could. Once I had them arranged to my liking I used a piece of ribbon to tie the diapers together.
  2. After all of my tiers were complete, I fed the length of the hooded baby towel through the layers, leaving the whale hood visible at the top. I also stuck the dowel down the middle for further reinforcement.
  3. I then cut a piece of cardboard in a circular shape to fit the bottom of the cake and cut a small hole in the bottom of the cake and fed the end of the towel through the bottom, manipulating it so it would lay flat (not cause the cake to sit crooked) and used shipping tape to flatten the excess towel on the bottom of the cardboard.
  4. To  prop the hood up on top, I wrapped the two non-whale bibs around the top of the dowel and draped the hood over them.
  5. Working with bottom and second layer, I wrapped the receiving blankets around the layers and tucked them under to secure them. I used a piece of clear shipping tape to hold them in place (I think my friend Courtney uses pins but I didn’t have any and knew the decorative ribbon would end up covering the tape anyway). See Wildly Domestic’s tutorial on “fondant style” diaper cakes for further instruction on how to fold and wrap the receiving blankets.
  6. I then took my 2″ ribbon and cut four pieces of the necessary length to wrap around each of the tiers. I would hold one end tight in place over the diapers and then use a dot of glue on the ribbon to attach it to itself at the back.
  7. Once you are done adorning the layers with ribbons you are ready to add your embellishments. I wrapped a piece of blue ribbon around the tail of my whale rattle and secured him around the middle of the top and second layer. Then I used a mini clothespin left over from another project to hold the shoes in place on the ribbon and a piece of twine to attach the letter “B” to the ribbon at the bottom layer. For the whale bib I simply used its velcro to attach it between two layers and folded it under so the whale image was showing at the front.
  8. After all of the embellishments were added I stuck gift basket shredded paper between the layers (I didn’t use any adhesive, just stuck them in there). I also cut a hole in the bottom of either side of the cardboard edges and fed a 1″ piece of ribbon through each hole underneath the cake and tied it at the top (this was not necessary but since I was going to be shipping the cake I wanted to make sure it held together).
  9. Finally I tied a bow around the bottom layer at the front and attached some gift ribbon to the top and used scissors to curl it!

diapercake3 diapercake2 diapercake1diapercake


DIY “Little Lady” Hair Bows

hairbow

I feel like with all of the “little man” projects I’m churning out I need to give a nod to my girls, don’t worry ladies I didn’t forget about you! Here is a quick tutorial for my “little lady” hair bows, which are so easy to make and are just the cutest little gifts for that special baby girl in your life. Also, this would make a great baby shower activity, I will explain below. Anyone who knows me will attest to the fact that I am obsessed with bows, and even on the 30 side of 20, I still think wearing hair bows is acceptable. Since I couldn’t let J steal all the glory with the matching bow tie set I made for him and baby P, when I tested out this little hair bow, I made mine to match one of P’s little man onsies as well – so cute. As for the tutorial itself, it is basically identical to the “little man” bow ties with slight variation depending on what size hair bow you would like, but lucky for you, the hair bow making process is much easier than bow tie as all you will be doing is gluing it to a clip, barrette or hair band. That being said, if you are planning on making these as a gift an adorable idea would be to make a bunch and display them on a personalized hair bow holder (yes, this actually exists, lol, check one out here.I will definitely be DIYing my own version of one of these if my friends ever stop having boys, so be on the lookout for that!). Hope you have as much fun making these as I have wearing them, you’re only as old as you feel (eight, I feel eight lol)!!! 🙂

YOU WILL NEED:

  • Fabric  (this is a good way to use up fabric scraps or hit up your fabric store’s remnants bin since you need so little.)
  • Glue Gun
  • Scissors
  • Small Plain Hair Clip, Barrette or Headband (all of which are available at the dollar store, Walmart for right around $1.00, so if you’re going the clip route, your cost will be a few cents per clip!)
hairbow1

I chose to use these clips since I was making them for myself. If you are making them for a “little” lady, purchase the fabric covered version.


DIRECTIONS:

Step 1:   Use this bow tie tutorial to create as many bows as you want. I used the hot glue method and wherever it said to iron I didn’t (I’m lazy, lol) and my project still came out great. Quick note about sizing, the bow in the tutorial will be about 3.5″ across (give or take), so for an infant this would be fine on a headband but way too big on a clip. If you are looking to make a smaller bow I would change the measurements to 5X3 and 1.5X1.5 for the two fabric squares. Once I play around with this a little more I will give exact measurements and pictures but as I’ve mentioned, all my friends are having boys!

Step 2: Once your bow is complete use hot glue to secure it to your clip or hairband and there you have it! It took me under 5 minutes to complete a bow so you could definitely churn out about ten in a half hour’s time and have a great gift! NOTE: If you want to attach the bow to a hair tie just stop at the step before you glue the smaller piece of fabric (center) or the bow and instead, glue it so that the underneath of the bow wraps around the hair tie (hair tie is inside of the bow).

hairbow2

Fun Idea: Remember when I said this would make a great baby shower activity? Precut the squares of fabric for your guests and set them up along with a glue gun and several different options for barrettes, clips, hair bands and hair ties and embellishments. Give a quick tutorial to your guests and then allow them to make their own hair bow creations at their leisure throughout the course of the party. SO much fun and super cute, you could even present them to the mama-to-be on a hair bow holder.  


check out my post on DIY hair bows to see how I made my matching bow!

check out my post on DIY “Little Man” Tie Applique Onsies to see how I made baby P’s matching onsie!

DIY Little Man Onsie – Part II Tie Applique

tie5

With several new squishy babies coming into my life in the near future, courtesy of my sweet friends, I am in full baby shower planning/gifting mode. I recently posted my tutorial for DIY Little Man bow tie onsies and am delighted to report that I’ve successfully completed another version of a no-sew “little man” onsie, featuring a fabric neck tie in the form of a fabric applique. This onsie was even easier to create than the first and only requires four items (one of which is an iron, so it doesn’t count lol), no gluing, no sewing, just cut, iron and DONE. If I haven’t already captured your attention with the appeal of a three step process let me tell you this – I spent about $6.00 on supplies for this project (not including the onsies themselves, as I used a pack I already had) and that $6.00 investment has the potential to yield up to twenty onsies (if not more)!!! I will reiterate what I said in my bow tie post, and that is, for a few bucks you have a grand slam of a baby shower gift for any “little man” that may come in to your life, not to mention they make ADORABLE decorations in the form of a onsie clothesline that mama-to-be can keep after the shower (see below). If you are looking to give a meaningful gift that is easy and cost effective, look no further! Of course I adapted this tutorial from the hundreds on Pinterest, and will the include the link to one below in the event that you do want to do a bit of sewing.

tie8

here is squishy baby P sporting the onsie!


DIY “LITTLE MAN” TIE APPLIQUE ONSIES

YOU WILL NEED: 

tie

  • White onsie or t-shirt
  • Fabric of any choice (this is a great opportunity to use up scrap fabric or hit up your local store’s remnants bin, as I do. The green gingham fabric featured below I purchased for $0.79 and it is a little less than a yard in length and 12 inches in width, enough for MANY onsies or bow-ties).
  • Heat ‘n’ Bond Iron-On Fabric Adhesive (any brand will do, if it says it is suitable for patches or appliques you are good to go, I purchased mine at Walmart for about $3.00 and it is enough for tons of future projects so you are getting your money’s worth for sure!)
  • Tie Pattern (the pattern is printable and available in two sizes, use the smaller for onsies and the larger for toddler boy t-shirts. If you don’t have access to a printer feel free to make your own pattern).
  • Scissors
  • Iron

INSTRUCTIONS:

Step 1: Take your fabric and cut a piece just large enough for your tie, then do the same with the Heat ‘n’ bond adhesive (this way you can maximize the amount of supplies remaining for future projects).

Step 2: Turn fabric upside down (so back is facing up) and place fabric adhesive side down on fabric so that the paper liner is facing up. Place your iron over the paper backing and hold down for about two seconds, repeating over entire area until adhesive is fused to fabric.

tie1

Step 3: Now, trace your tie pattern onto the paper backing and cut out. It is optional to cut the top of the tie pattern in a circular fashion to fit the neck of the onsie, I did so but it looks fine either way!

tie2

Step 4: Peel off the paper back from your tie and place it adhesive-side down on your onsie. Hold the iron over the fabric for about 8 seconds, working in sections until the entire tie is fused to the fabric. That’s it, little man onsie complete!

tie3

Step 5: A fifth, and optional step, would be to stitch around the onsie as shown in this tutorial (and in most tutorials). As I’ve mentioned before, while I am planning to learn how to use my sewing  machine, I currently only sew by hand and to stitch the tie by hand would totally defeat the purpose of this being a quick project, haha. Don’t worry, it looks fab without the stitching as well!

NOTE: Turn inside out when washing, when possible hand wash and hang dry. 

tie6

Completed onsies!

tie4

they had some NY Giants fabric on clearance! Little P will be look fab come football season! Go Giants!

tie9 tie7

check out my post on DIY hair bows to see how I made my matching bow!

check out my post on DIY hair bows to see how I made my matching bow!

Updating Our Master Bathroom

mastbath13

Crazy thing happened this week … we accepted an offer on the house!!! So exciting and sad at the same time, because although putting the house on the market was a good decision and I’m excited to move on base, I’m getting graduation goggles about selling it given all of the memories our little family has made here so far. That being said as long as nothing falls through on the buyer’s end we will be peacin’ out of this bad boy by the end of June, so I better get all of my house transformation posts up before I’m categorized as creepy if I’m technically posting pictures of somebody else’s home, haha.

In my post on refinishing cabinets I spoke a little about my our master bathroom update but would now like share the whole project in detail! Again, most of our updates were cosmetic as we wanted to create the most change for the least cash. This was our final major house project and we were in a race to get it finished given our very important deadline – the arrival of baby P! Now, I’ve spoken before about how I’m a true believer that with a little paint and the right decor you can create a transformation that is budget friendly but will still rival that which would be made by an actual renovation. We applied that idea here as well as in the guest bathroom where a few small changes resulted in a complete revival of an old dingy space. Since this was our last major project, our vision for the space changed many times between the date we purchased the house and the time that we actually got to the project. Originally we came in guns blazing prepared to paint, rip out the vanity, install a new tub surround, basically change everything until we realized that with limited knowledge on how to do the aforementioned and seriously limited cash preventing us from hiring professionals to do it for us, our vision was going to have to change drastically. We decided to ax the idea of installing a tub surround and simply give the old tiles a real good scrub down instead. Still stuck on the idea of replacing the vanity, we held off because that was going to cost us a pretty penny and with paying as we went along (no credit cards) and other house projects in the works, the master bath remained on the back burner. As P’s due date drew closer, we wrapped up a few  other projects and finally decided to tackle the bathroom, going with plan c if you will, our third and final game plan – replace the toilet, repaint the vanity, replace the vanity top, paint the walls, decorate, DONE. We were super motivated to get this done, especially since we had been showering in the guest bathroom for months given the sorry state of our on-suite bath, my big pregnant self even did all of the painting and decorating while J was at a job school in Norfolk because I was too antsy to wait to get it done, haha. Hope this inspires some DIY in your life, remember say no to renos and difficult transformations, chances are you can fake it with some paint and great decor!

master

master1

it is purely coincidental that I am wearing the same shirt in the two pictures taken over 6 months apart haha


WHAT WE DID:

  • Replaced the vanity top.
  • Repainted the vanity cabinets. We decided to repaint the vanity given our frustration over having replaced the other two and wishing we had just gone this route in the first place.
  • Removed old mirror and replaced it with a new beveled edge mirror.
  • Replaced the toilet.
  • Painted the walls.
  • Hung a wine rack that we repurposed as a towel rack.
  • Hung a 5-hook rack for hanging towels.
  • Hung a shabby-chic towel ring.
  • Hung two DIY “paintings”.
mastbath12

me picking up the 5 foot vanity in my Kia Soul haha

SOURCES:

  • Vanity Top // Purchased at Lowes, available through special order (since we were replacing a custom size we needed to order a custom sized top). It cost us in the neighborhood of $500.00, which was a little less than it would have cost us to replace the whole vanity and floor tiling (but a WHOLE LOT less work).
  • Beveled Edge Mirror // Purchased at Lowes, available here for $41.97.
  • Toilet // Purchased at Lowes, available here, for $139.00. Since it is a dual-flush it is supposed to conserve water.
  • Paint // Color is “Montpelier Ashlar Gray” by Valspar.
  • Wine/Towel Rack // Purchased via Amazon for $34.50, available here.
  • Five-Hook Rack // Purchased at Target, available here for $23.79.
  • Towel Ring // Purchased via Etsy from “midwesterntreasures” for $26.50.
  • Shower Curtain // Purchased from Overstock, available here for $24.49.
  • Square Grey/Yellow “Paintings” // DIY project, I simply inserted a piece of fabric into a $4.99 frame from Michael’s (I will write a post about this soon!).


Since the bathroom is attached to the master bedroom which has a grey and yellow color scheme we carried that into the bathroom as well. Sorry I only have one set of before pictures but you’ll still get an idea of how awful it was, don’t worry haha.

 BEFORE

mastbath6mastermastbath10

AFTER

master1mastbath11mastbath1mastbath2mastbath3mastbath4mastbath5mastbath

We estimated this project to have cost us around $850.00 when all was said and done. Although it seems pricey it sure beats a remodel and since we did everything over the course of several months and only purchased items as we had the money to do so, this helped a lot. 

DIY No-Sew Bow Tie

bow16

So the bow tie saga continues, haha. As promised, the other night I got down to it and created an adult sized bow-tie for J. You guys, IT CAME OUT AWESOME! I could not believe the side-by-side comparisons with his store-bought bow tie. Another reason I am so excited about this is because I was extremely skeptical about this project. A bow tie for baby P is one thing, he’s a baby and would look cute if you ripped up a paper bag and glued it to his pajamas (lol), J on the other hand, is a working professional who would need to be seen in public wearing this creation, and no man of mine is gonna walk around wearing the bow-tie equivalent of a first grader’s pasta necklace, haha. That being said, I did have a little hope, since before I had decided to take on this project I was sure to carefully inspect our store-bought bow tie to see if it was even worth attempting and if I could get away with a no-sew option of course. So the other night I put Nashville on Hulu (still not sold on this show, I don’t know why I keep watching it lol) and got to work! This bow-tie took me about 45 minutes to create, mostly because I was making it up as I went along, so don’t worry, if you decide to attempt this it will probably take you about a half hour, which I consider a super quick project, especially considering you’re getting an actual wearable accessory out of it!

Now let me talk a little about cost and being “fashionably frugal”, if you will. My original idea for this bow tie goes all the way back to last Father’s Day, when at six months pregnant and over the moon about our sweet little boy on the way (we had just found out we were expecting a boy), I purchased a matching father/son bow tie set via Etsy as a gift for J. Now, don’t get me wrong, I love the Etsy bow ties, the workmanship is perfection as is the quality of the fabric, however, I am embarrassed to admit what I paid ($53.00 .. gahhhhh, insert wahh face and money with wings emojii). I don’t mind that I splurged since I blame it mostly on pregnancy hormones lol, and since it was the kind of bow tie that you have to tie yourself that means it was sewn and we all know I’m no seamstress. Well, as luck would have it, a few months ago I found J a great pre-tied tie on Groupon for $4.99 (with free shipping, say whaaaaaat?!). The kicker is J actually prefers this cheap-o tie to the one that you have to tie yourself, and I can’t say I blame him since it always looks perfect, no need to scroll through YouTube videos trying to remember how to tie a bow tie, haha. This Groupon tie gave me the idea for a DIY version, the idea being, I had already made one for baby P, how hard could it be to recreate an adult version of the same thing? Back to the cost of the tie, if you think $4.99 was cheap, try $0.96!!! Yup, ninety-six cents people, now bare in mind that I was using fabric that I already had since I was matching it to baby P’s bow tie, so all that I needed to purchase was the tie clip, but if you’re frugal with your fabric choice the most this project will cost you is in the neighborhood of $3.00, sounds fab right?

bow1

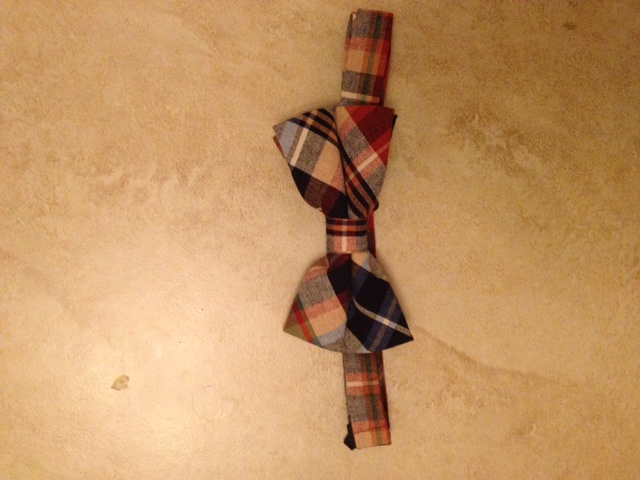
Cheap-o inspirational Groupon bow tie, super cute! This is the one J wore in our family pics!

bow18

Side by side comparison in case you don’t believe me, lol.

Now for the tutorial, and pictures aka important proof that I’m not lying to you about this no-sew bow-tie that your man can actually wear in public and still be considered an acceptable part of society lol. I promise I will post pictures of J and P wearing their matching bow-ties, but since I’m going to include this as a gift in J’s Father’s Day package the pics will have to wait until then, I just had to post this pronto because I was so excited about it!

bow14

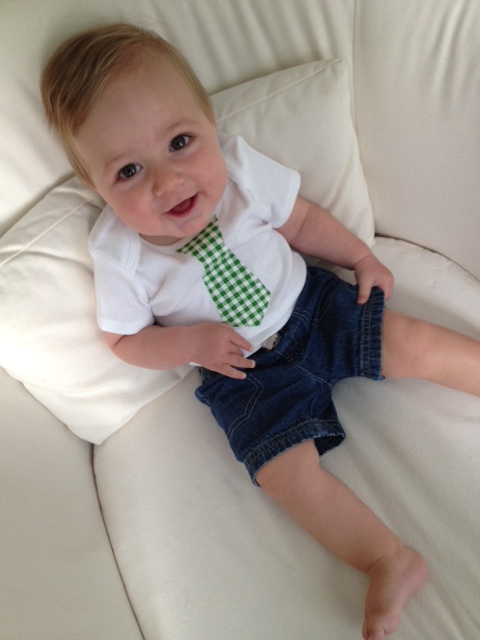
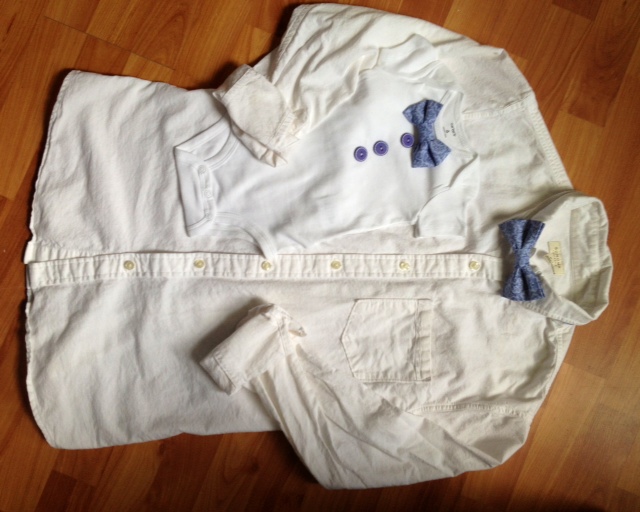
Father/Son Matching Bow Ties .. awwwww!
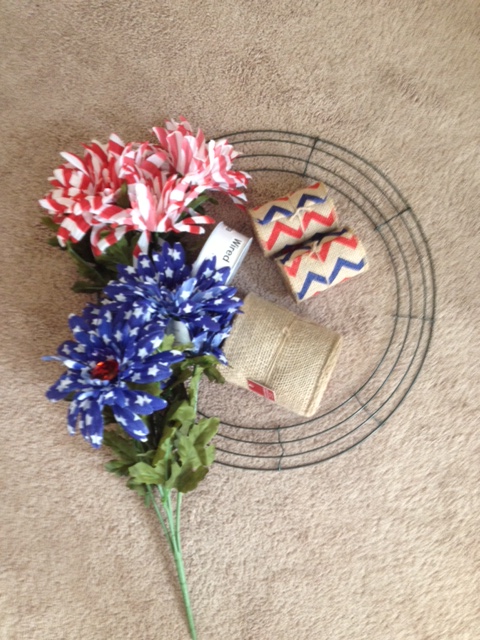
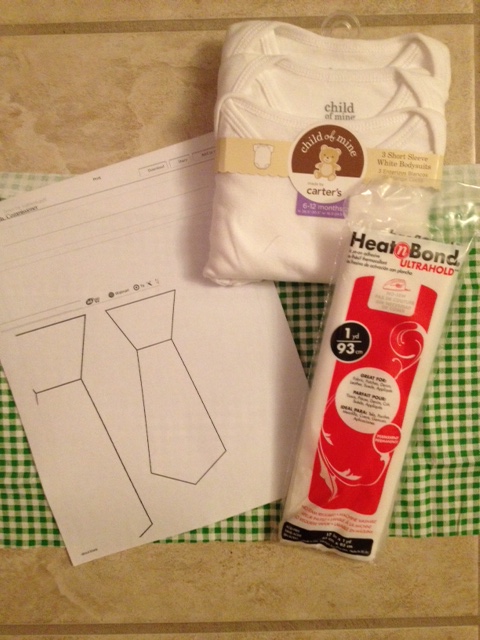
YOU WILL NEED: 

  • Fabric of your choice (you will not need much so like I always say, this is a great opportunity to hit up the remnants bin at your local fabric store or reuse some fabric that you already have).
  • Iron-on hem (heat ‘n’ bond, stitch witchery etc. Whatever brand you use is fine)
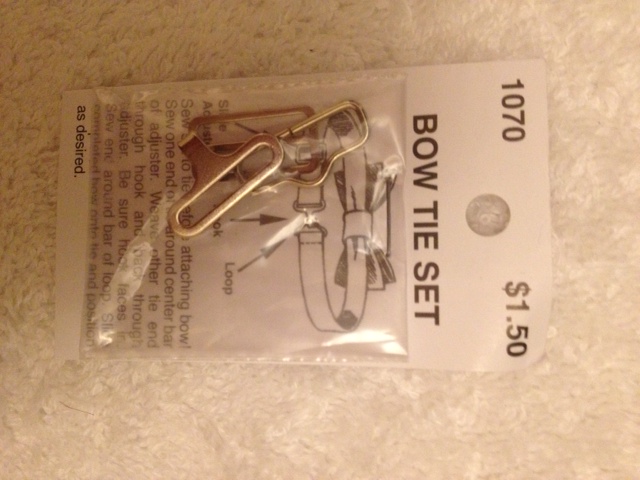
  • Bow Tie Set (this can be found by the buttons at your local fabric store, if you cannot find it as a set the employees should be able to direct you to each piece individually or you can purchase it online)
  • Glue Gun
  • Scissors
  • Iron

DIRECTIONS:

NOTE: Explaining the step-by-step directions is a little difficult as there are many small steps, but if you follow the pictures the wording will make a lot more sense, feel free to ask questions. 🙂

Step 1: Begin by measuring out and cutting your fabric. You will need the following:

  • 1 piece measuring 2.5X2.5 inches
  • 2 pieces measuring 9X5 inches
  • 1 piece measuring 24X1 inches
bow

2nd piece of large fabric not shown, oops.

Step 2: Use the following tutorial to begin to create your bow ties by following steps 1-5 only and repeating steps 1-4 twice as you will need to “bodies” for your bow ties (I will explain in the following steps). I used hot glue for all parts, no sewing.

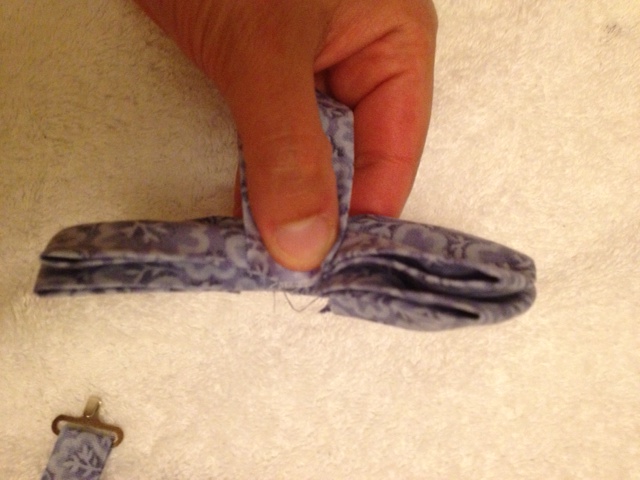
Step 3: Take the two identical rectangles that will act as the body of the bow tie, and use a dot of hot glue in the center to glue them together, seam side down on both. Now, pinch the rectangles together at the center to form a “bow” once you have achieved a good bend to the fabric, use a few dots of glue to secure it at the center (as shown). Do not attach the middle piece yet, you will need to complete the strap first. bow5
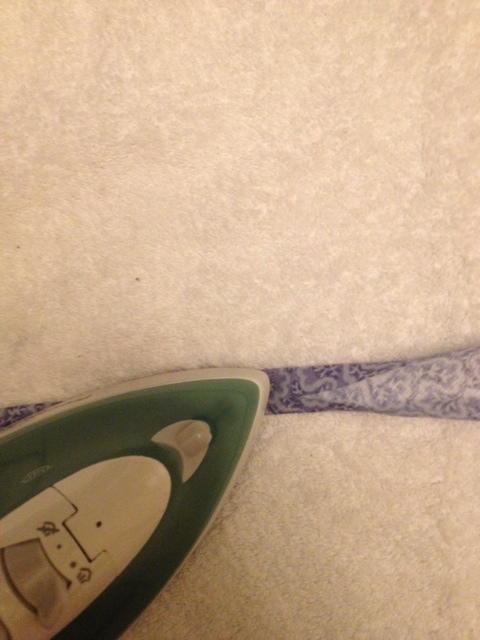
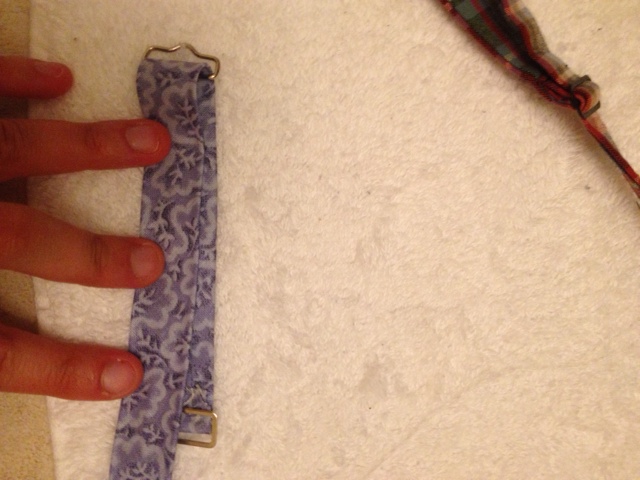
Step 4: Now, begin work on your neck strap by taking your 24X1 inch long piece of fabric and lay it out flat with your print side facing down. Carefully fold in each edge (longways) so that they meet in the middle (as you did with the other pieces), and iron over the folds (this will help to hold it in place evenly when you insert the iron in adhesive). Once you have ironed the length of the strap it should be about 1/2-3/4 of an inch in thickness, however, the thickness doesn’t really matter so long as it is straight/even as possible. Now, cut a piece of iron-on hem the same length and about the same thickness (a little thinner is fine, it just needs to fit within the strap), place it inside the strap, refold the sides so they are covering the adhesive and iron the fabric until the adhesive sets (just about 5-8 seconds per section). Once this is complete your strap is ready for clips! bow2 bow4
Step 5: Begin with the rectangular three bar clip (I don’t know the technical term for it lol), feed one end of the strap through about half an inch, upside down (hem side facing up) and loop it over securing it with a dot of glue. Now in the same direction feed the rectangular attachment (the one that the hook will attach to), over the long end. Then feed the length of the strap through the three bar weaving it under, over, under so it overs the part where you looped the first end. Now your strap is adjustable!

bow6

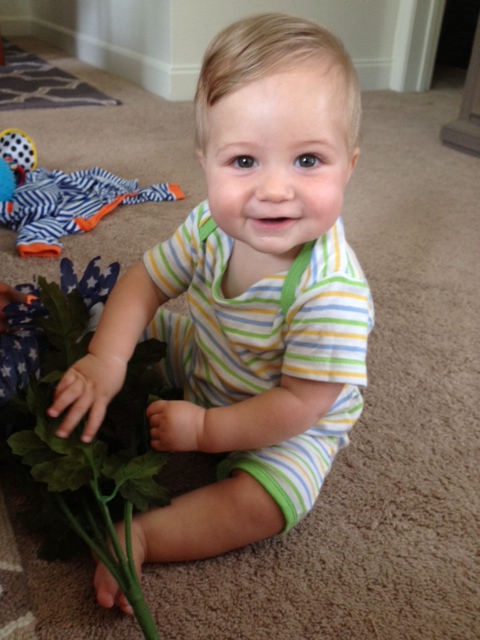
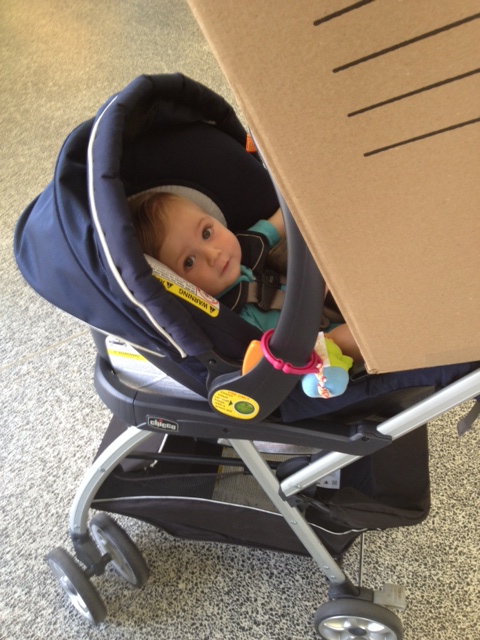
The girl at the counter loved my squishy baby so much that she gave me a 40% military discount instead of the usual 20% 🙂

bow10

once you are finished adding the first two metal pieces, the end of your strap will look like this.

bow7

bow9

Step 6: Now, to the remaining end of the strap attach your hook by looping it through about a half inch and securing the end to the body of the strap with a dot of glue (make sure the hook is facing the hemmed side and test it out to make sure it will hook into the opposing piece).
bow11
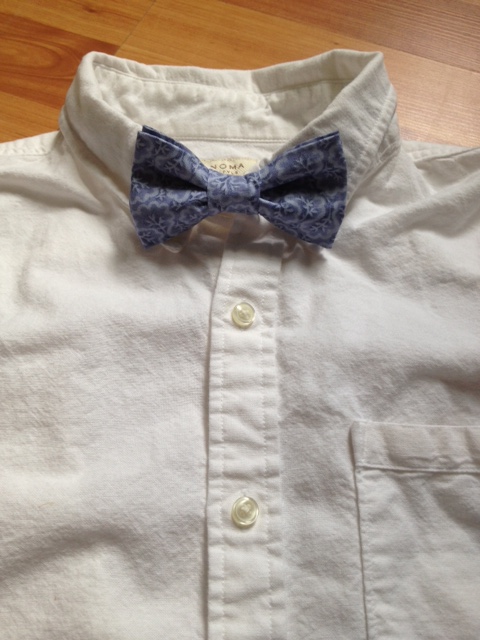
Step 7: You are almost finished! Now return to your bow tie. Remember that 2.5X2.5 piece that you did a little work on and forgot about? Grab that. Take your bow tie, hem side facing up and glue one end of your little 2.5″ piece to it (be sure the piece is facing down so that when you wrap it around the body of the tie the correct side of the fabric will be showing). Now that you have one side attached, before wrapping it around take the hook-side of your strap (front side down, hook facing up) and use a dot of glue to attach it to the back of the bow tie so that just the hook will stick out once you wrap the rest of your fabric piece around. Once your strap is securely fastened, wrap the remaining piece of the fabric to create the center of the bow around and secure it using a dot of glue atop the strap. There you have it, all done!!! For kicks tell people it’s from H&M lol.    bow12 bow13
bow18
bow17

Disclaimer: This is something you are making yourself using just a glue gun and some fabrics, I can’t promise you name brand quality,  nor can I promise that it will turn out perfectly. If you are a brand snob sorry if I’ve offended you with my DIY clothing attempts, although I’m not sure what you’d be doing on the section of a blog entitled “Fashionably Frugal” lol.

Patriotic Tie-Dye Cupcakes

pat

Since J has been gone (wow, I’m really acting like he has been gone for years, it’s two weeks Natasha, grow up! lol) I have been crafting so much I haven’t really taken the time to cook much of anything. Tonight baby P and I attended a BBQ at our friend’s house and in keeping with the Memorial Day holiday I wanted to whip up something cute and patriotic. Now I have previously written about my love affair with boxed cake mix but I will tell you again – I don’t bake. Meaning, if the words “baking soda”, “baking powder”, “yeast”, “stand mixer”, “rise” or any other baking lingo appear in a recipe I’m likely to pass, lol. That being said, when I do decide to bake something (usually cupcakes) I generally take the semi-homemade route by allowing my girl Betty Crocker or my homie Duncan Hines do the heavy lifting, while I take care of the decorating. This recipe was no different, so while P went down for a three hour nap (LOVE when that happens) I got down to it and ended up with the cutest little patriotic cupcakes! Keep this one in mind for the 4th, it’s as simple as making some chocolate covered strawberries and adding some food coloring to your cake mix, it only looks fancy, which is the best part! If you’re reading this while those patriotic holidays are still far out, go ahead and adapt this to any holiday – green, white and red for Christmas, orange, black and white for Halloween etc. Tie-dye cupcakes are so fun and you need not buy the special “tie-dye cupcake” boxed mix, you can easily make your own. Wishing everyone a happy and safe Memorial Day weekend, thank you to all who have served and are currently serving (especially my very own US Marine, J!).

PATRIOTIC TIE-DYE CUPCAKES (makes 24)

INGREDIENTS

pat14

the frosting and red sprinkles are not pictured, oops!

  • 1 Box White Cake Mix (WHITE not yellow)
  • Food Coloring
  • Blue and Red Crystal Sugar Sprinkles
  • 1-2 Cartons Strawberries (enough to have 24 strawberries, try to go for smaller strawberries, they sit atop the cupcake much easier)
  • 6 oz. White Chocolate
  • 1 can Vanilla Frosting (any white frosting will do)

DIRECTIONS

  1. Begin by melting your chocolate over a double boiler or in the microwave. If using a double boiler place chocolate in a glass bowl set atop a pot of simmering water, stirring until melted. For the microwave, place chocolate in a microwave safe dish, microwaving 30 seconds at a time, stirring after each interval until completely melted.
  2. Place your blue sugar sprinkles in a small container, then working one by one dip each strawberry in the white chocolate, allowing any excess chocolate to drip off before dipping in the sprinkles then place on a sheet pan or plate lined with parchment or wax paper. When you have finished, place the strawberries in the fridge for at least 15 minutes to allow the chocolate to really harden, I just left mine in there until I was done making the cupcakes.pat1
  3. Prepare your cake mix according to package directions, once the batter is prepared divide the batter equally among three separate bowls. One bowl will be left as is (that will be your white portion), into the second, squeeze a few drops of red food coloring and into the third a few drops of blue. The amount of coloring you add depends on how vibrant you want your color to be. NOTE: I am usually all about dollar store everything but I learned the hard way, there is a BIG difference between name brand and dollar store brand food coloring. The tie-dye cupcakes I made for Easter were sub-par in the color department lol. Go for the good stuff, it’s worth it. pat2
  4. Place your cupcake liners in your tin and beginning with your first color (doesn’t matter which) gently place a dollop of each color into your cupcake liner, aiming for off to the side (see pics). Work your portions so that you will have enough for 24 dollops, just eyeball it. Do the same with the second and third colors, the idea is to have each color showing on the top of the cupcake once they are baked. pat3 pat4

    yikes, I need to clean my oven lol

    yikes, I need to clean my oven lol

  5. Bake your cupcakes for the minimum suggested time, just until the toothpick comes out clean and they are springy. If you allow them to overcook your white will become tan or brown. Once baking has finished allow the cupcakes to cool. pat7 pat9
  6. Frost your cupcakes however you please, I use a large Wilton star tip and a plastic bag to pipe a small amount of icing onto the middle of each cupcake so that the red, white and blue will still  be seen on top. Dash some red and blue sprinkles on top then set a strawberry on top of each cupcake. Ta-da, you’re finished, God bless America … and easy cupcake recipes!!!

 pat11 pat10 pat12

Look who woke up just in time to watch the finishing touches!

Look who woke up just in time to watch the finishing touches!

Hard to believe I will be making this guy a smash cake in under 5 months!

Hard to believe I will be making this guy a smash cake in under 5 months!

So as I put it on Insta - If you've got the time and your squishy baby don't mind ... get yo patriotic cupcake on!!!

So as I put it on Insta – If you’ve got the time and your squishy baby don’t mind … get yo patriotic cupcake on!!!

Easy DIY Nautical Frame – Made For Under $1!!!

frame8

So with J gone for fleet week (*sigh* it has only been seven days and it feels like foreverrrr already), I have been keeping myself busy with baby P but also, of course, with TONS of crafts, haha. Earlier this week I found an adorable beachy frame on clearance at our local craft store and picked it up for J’s Mom (with all the running around for my niece’s b-day I wasn’t able to get my MIL a Mother’s Day gift, just a card), who loves beach themed decor so my plan was to put a picture of baby P from one of our recent beach trips in the frame. However, when I printed the picture I wanted to use, the store cropped it wrong and I ended up having to use another, but being the weirdo that I am, I couldn’t bring myself to throw out a picture of baby P even though it was basically useless (wow, I am a FREAK lol). In an ah-ha! moment I had the idea to use it in our guest bathroom, which is beach themed and a little gallery wall where baby P’s beach photo would fit perfectly (check out our guest bathroom update saga here). In my mind the project was going to involve rope, a picture frame and some of those baby clothes pins I had picked up for a party craft I am making in the near future, but to save myself the running around looking for rope (especially when I probably wouldn’t use it again, defeating the purpose of this craft being essentially free), I decided to just use twine I already had at home and instead of a frame I purchased a dowel for $0.59 to create my own “frame”. So, yesterday during P’s nap I whipped up this little picture frame in about 15 minutes, but the ease of this craft isn’t even the best part. The best part would be that when broken down, this craft costs about $0.75!!! Baby P looked on in delight as I hung it as part of our little bathroom gallery wall this morning and I just know our guests will love seeing it too :).

The original picture that prompted this idea, isn't my squishy baby sweet?

The original picture that prompted this idea, isn’t my squishy baby sweet?

YOU WILL NEED:

NOTE: If you find a cheap thrift store picture frame you could use that in place of the dowel, simply remove the glass and begin the instructions at step 3. Also, this does not need to be beach themed, you can wrap the frame in whatever material you would like and then embellish with something that suits your style!

frame1

  • A dowel (round or square, whatever your preference)
  • Hack Saw (or any saw, if you are desperate you can use scissors if you dowel is skinny enough)
  • Sand Paper (optional)
  • Rope or twine
  • Glue Gun
  • Mini Clothes pin (available at most craft stores, if you are making a larger version of the frame you could use a regular sized clothes pin)
  • Ribbon (optional, you could just use more rope or twine in it’s place if you’d like)
  • Sea Shells or Beach Glass (optional)

INSTRUCTIONS:

Step 1: Take your dowel and measure and mark the lengths of your frame size. I chose to do a 7″X7″ square frame since I only had a small amount of space available on my wall. Then use your hack saw to cut the four pieces and then sand off any remaining wood pieces or roughness on the edges (no need to make it perfect, you will be covering this anyway). NOTE: If you are desperate, just hack at your dowel using scissors until you weaken it enough to snap it with your hands, it will be uneven on the edges but you can sand them. Ghetto option I know, but I know some peeps don’t have saws and I like to be an equal opportunity crafter, lol!

Step 2: Arrange your four sides in a square as if they are lincoln logs (two on the bottom and two on the top overlapping). You can also do one under the other or glue the corners so that the frame will lay completely flat, it is up to you but personally I liked the way it looked using the lincoln log method. Use a dot of hot glue to attach each of your four corners.

frame2

Step 3: Now, beginning at a corner, use a dot of hot glue to attach the end of your rope or twine to the frame. Then apply a small line of glue to the frame and working a few inches at a time, begin wrapping the rope or twine tightly around the frame. Work quickly so the glue does not dry before you press the rope to it. Continue this process around the body of the frame until it is completely covered.

frame3 frame4 frame5

Step 4: Once you have finished the frame, decide where you want your picture to fall within it, then cut a piece of twine long enough to reach across the back width of the frame, securing it at either end with a dot of hot glue.

Step 5: Now, cut two pieces of ribbon, twine or rope of equal length (you will use these to hang the frame), the length depends on your personal preference. To attach each piece, place a dot of glue at each of the two top corners of the frame and secure an end of each piece. Tie them at the top in a bow or knot and it is ready to hang!

frame7

Step 6: The last step is optional, but if you wish you can embellish your frame. I used a single seashell attached with hot glue at one of the lower corners. Hang your frame, high-five yourself and if you’re a Mom decided what you’d like to do with the other 45 minutes of naptime! 🙂

frame6

Don’t forget to check out my post on our guest bathroom update, where you can view before and after pictures of our bathroom and all of our decor 🙂